Перейти к основному содержанию

RCA CC310 Onboard Speaker Replacement

Выберете то, что вам нужно

  1. RCA CC310 Onboard Speaker Replacement, Disassembling RCA CC310 Left Cover: шаг 1, изображение 1 из 2 RCA CC310 Onboard Speaker Replacement, Disassembling RCA CC310 Left Cover: шаг 1, изображение 2 из 2
    • Remove the six 7.9mm Phillips #0 screws on the back and bottom.

    • Remove the one 3.8mm Phillips #0 screw on the bottom.

    • Remove the two 7.5mm Phillips #0 screws on the back and bottom.

  2. RCA CC310 Onboard Speaker Replacement: шаг 2, изображение 1 из 2 RCA CC310 Onboard Speaker Replacement: шаг 2, изображение 2 из 2
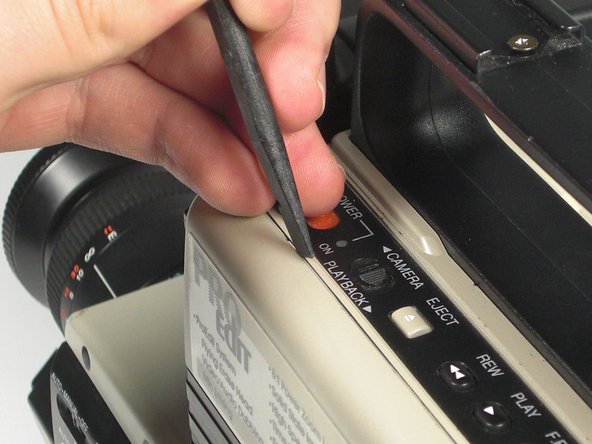
    • Remove 5.8mm Phillips #1 screw from the side button panel.

    • Slide the viewfinder all the way to the right and remove the 7.9mm Phillips #0 screw.

  3. RCA CC310 Onboard Speaker Replacement: шаг 3, изображение 1 из 2 RCA CC310 Onboard Speaker Replacement: шаг 3, изображение 2 из 2
    • Pry along the seam on the top side near the buttons with a spudger.

  4. RCA CC310 Onboard Speaker Replacement: шаг 4, изображение 1 из 2 RCA CC310 Onboard Speaker Replacement: шаг 4, изображение 2 из 2
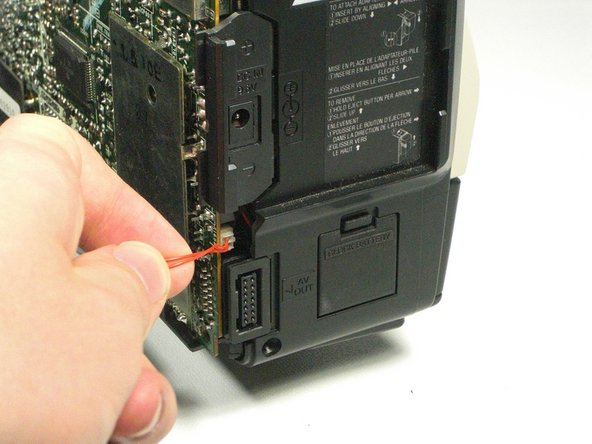
    • Pull the left panel away from the rest of the camcorder.

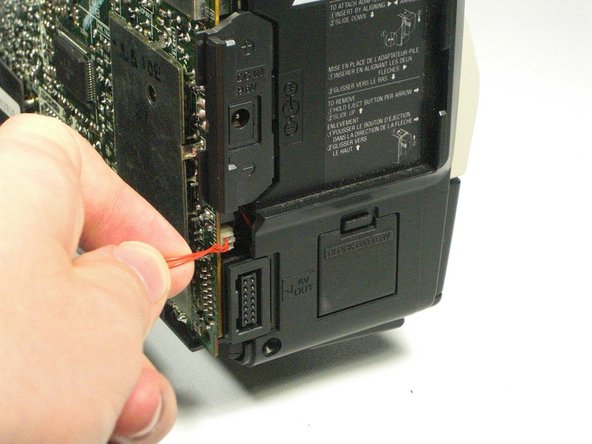
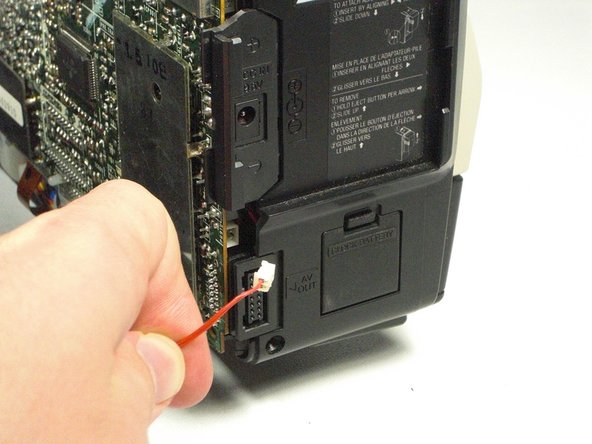
    • Unplug the red speaker cable located at the rear of the device.

    • Be careful to not pull too hard. The speaker cable is still connected to the panel and it can rip.

  5. RCA CC310 Onboard Speaker Replacement, Onboard Speaker: шаг 5, изображение 1 из 2 RCA CC310 Onboard Speaker Replacement, Onboard Speaker: шаг 5, изображение 2 из 2
    • Unplug the red cable connecting the speaker to the motherboard.

  6. RCA CC310 Onboard Speaker Replacement: шаг 6, изображение 1 из 2 RCA CC310 Onboard Speaker Replacement: шаг 6, изображение 2 из 2
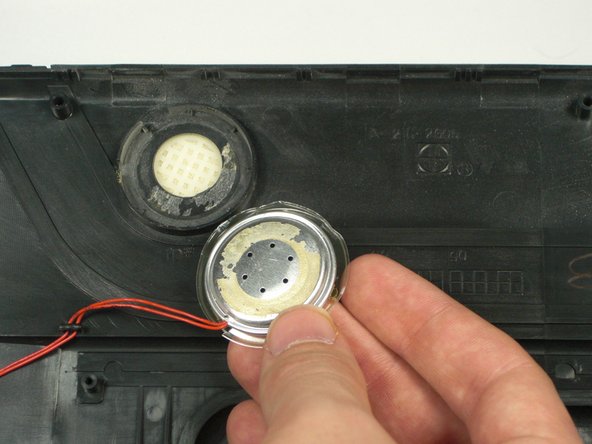
    • Locate the speaker on the removed panel. Find the groove on the top left side of the speaker.

    • Pry the plastic up with a spudger until the glue breaks and the speaker is detached.

  7. RCA CC310 Onboard Speaker Replacement: шаг 7, изображение 1 из 1
    • Break the plastic pieces holding the cable to the panel.

    • Glue the new cables, with a hot glue gun, back to the panel after replacing the speaker.

  8. RCA CC310 Onboard Speaker Replacement: шаг 8, изображение 1 из 3 RCA CC310 Onboard Speaker Replacement: шаг 8, изображение 2 из 3 RCA CC310 Onboard Speaker Replacement: шаг 8, изображение 3 из 3
    • Glue the new speaker to the panel.

    • Plug the cable back into the motherboard.

Заключение

To reassemble your device, follow these instructions in reverse order.

Oliver Adams

Участник с: 01/19/11

629 Репутация

Автор 6 руководств

Команда

Cal Poly, Team 5-20, Amido Winter 2011 Участник Cal Poly, Team 5-20, Amido Winter 2011

CPSU-AMIDO-W11S5G20

4 членов

Автор 7 руководств

0 Комментариев

Добавить комментарий

Просмотр статистики:

За последние 24часов: 0

За последние 7 дней: 1

За последние 30 дней: 4

За всё время: 995