Введение
Replacing the main motherboard and attached components involves loosening or disconnecting each component individually before replacing the whole unit.
Выберете то, что вам нужно
-
-
Remove the two 2.5mm Phillips head screws before attempting to remove the screen from the device.
-
-
-
Run an opening pick around the edge of the screen to loosen it and begin to pry upward.
-
When the screen comes up like it has in the photo, it should be able to simply be removed from its casing.
-
-
-
Remove the battery by first removing the electrical tape holding it down. Then begin gently prying underneath it and around the edges with your plastic opening tool, until the battery is loose.
-
-
-
-
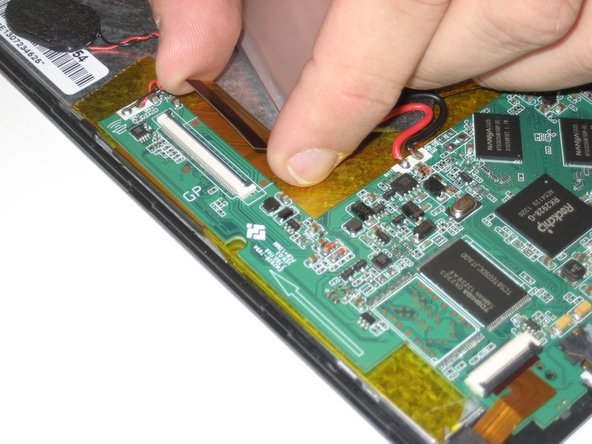
Unclip the ribbon cables from the motherboard by lifting up on their latches (the black portions that the cables feed into) and gently pulling the cables.
-
-
-
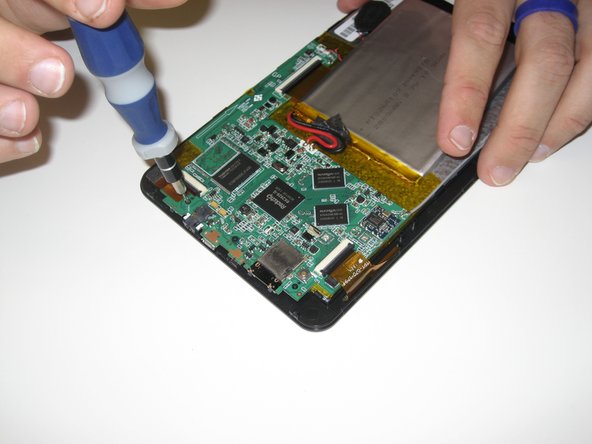
Remove the three 2.5mm Phillips screws from the motherboard.
-
After removing the screws, use a plastic opening tool to gently pull the motherboard off of the double-sided tape holding it down.
-
-
-
Replace the removed unit with a suitable replacement, with all of the pictured parts.
-


To reassemble your device, follow these instructions in reverse order - replacing all tapes and adhesives as you proceed.
To reassemble your device, follow these instructions in reverse order - replacing all tapes and adhesives as you proceed.
Отменить: Я не выполнил это руководство.
7 участников успешно повторили данное руководство.

Команда

Pasco Hernando, Team 1-2, Prince Winter 2015 Участник Pasco Hernando, Team 1-2, Prince Winter 2015
PHSC-PRINCE-W15S1G2
6 членов
Автор 8 руководств
2 Комментариев
We did a reset. When our tablet boots up we get a message "google account manager has stopped running". We can not access the settings. How do we fix this error message?
how about a screen that has lines