Введение
Taking apart the RCA Voyager II is pretty straightforward. Here is a short Guide.
Note that the tablet pictured has been disassembled and reassembled before.
Выберете то, что вам нужно
-
-
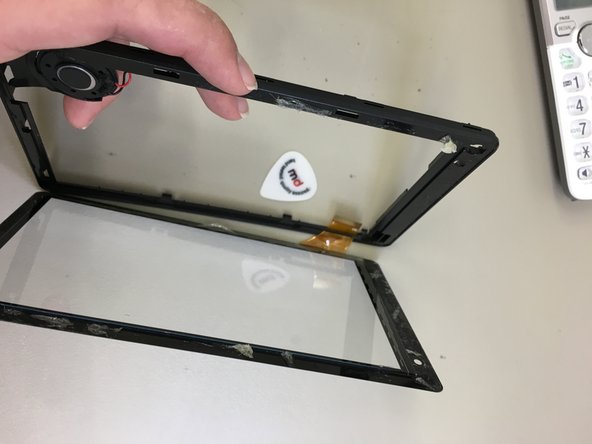
Starting from the top, place pick or plastic tool between the power button and screen edge and push apart slightly.
-
-
-
Run pick across the top to the right and then down the right side and around the rest of the tablet.
-
-
-
lift section out of the black casing from the bottom, lift and remove by pulling away from tablet.
-
-
-
Battery connection (on older models, may be soldered to board)
-
Front Camera
-
Digitizer
-
LCD
-
Speaker
-
-
-
-
Remove battery Connection First
What the name to this part that cover the flex cable I lost the clamp.
-
-
-
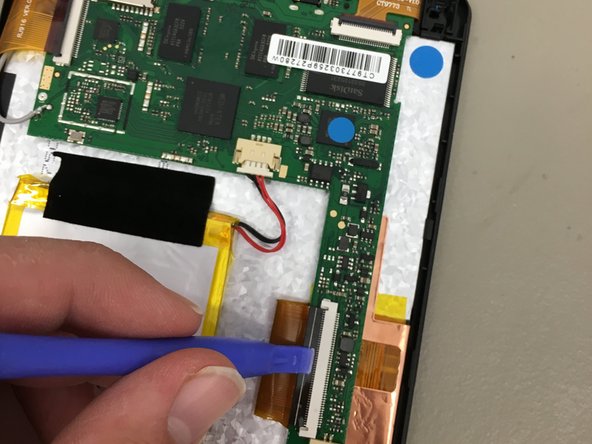
Lift the black cover over all three flex cables (Camera, LCD, Digitizer) with a plastic tool.
-
gently disconnect all three cables with your fingers by pulling slightly
-
-
-
lift the board out gently
-
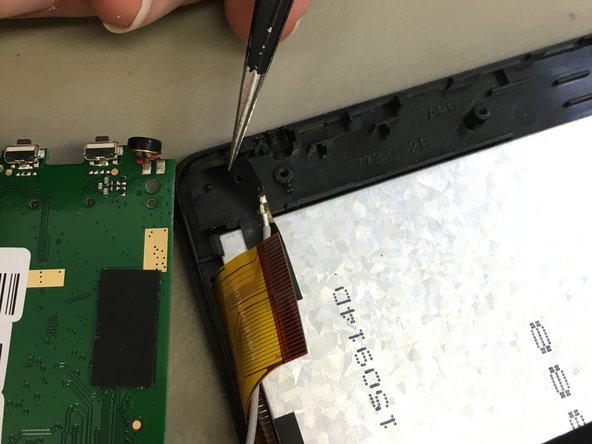
Fold board over the left side of the tablet and gently remove tape securing antenna to the case. Use a small amount of heat if necessary.
-
-
-
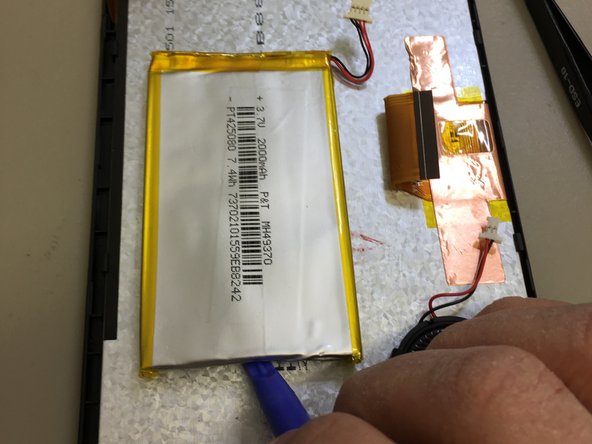
remove tape from top and bottom of the battery.
-
with a plastic piece, lift battery from adhesive securing it in place.
-
-
-
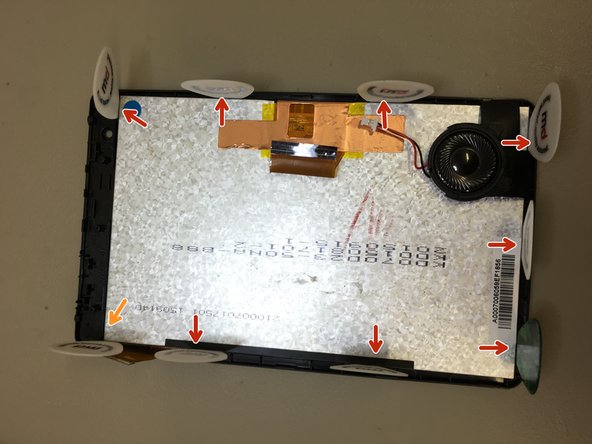
Place picks between the lcd and the plastic clips holding it in place.
-
The pick placement to the top left side (near the power button) is smaller and on a corner. I recommend inserting this pick last.
-
-
-
Gently push top right pick down to lift LCD from the clip. Run across the top and right side to further lift LCD.
-
Use picks as needed to separate LCD in other areas.
-
-
-
Once separated and loose, remove picks so you do not damage the LCD while removing it.
-
To remove, lift top of LCD and pull out of case away from the speaker, which is fixed to the digitizer frame.
-
-
-
to remove Digitizer/Glass from the frame and speaker, slide a pick under a corner between the glass and frame to loosen adhesive
-


To reassemble your device, follow these instructions in reverse order.
To reassemble your device, follow these instructions in reverse order.
Отменить: Я не выполнил это руководство.
35 участников успешно повторили данное руководство.

31 Комментариев
what is that flat part that has the little copper bar in the middle. What do you call that?
The LCD has a piece of copper tape on it, is that what you mean?
Bonne site merci pour tous je suis très heureux content que entrer dans ce site
Anyone know which company made this very fragile digitizer for RCA Voyager?
This is a tricky question, but I think it is RCA…
Om rabi -
Where can I find a screen for my voyager it has a crack inside
https://www.amazon.com/Atabletparts-Repl...
$9.99 Replacement Digitizer Touch Screen for RCA 7 Voyager II RCT6773W22B
Thank you, Thank you for this guide. This was the best step by step guide! I saw a few clips on YouTube but your guide was the best & easy to follow. It took me about an hour & 15 min to replace the screen on my granddaughter's tablet.
The biggest bear was separating the front & back. After that, it was pretty easy going. Your close-ups of the ribbons & connectors were great. THANK YOU AGAIN - I really appreciate it that you wrote this guide ! !
I appreciate your kind words. When I discovered no step by step for my own daughter's tablet I decided to make one myself. I'm glad I was able to help!
Chris -
awesome…. however my antenna became unsoldered…. any tips for reapplying?= thanks greatly
So heat is not required to remove the digitizer completely?
Update. Heat is not required but might make removing the screen a little easier. I did remove the old screen form my friends tablet with no heat and a little 99% IPA removed the little bit of adhesive that was left behind. The new screen went on perfectly and the tablet works PERFECTLY. Another Successful repair thanks to Ifixit and there repair guides and tear-down guides. I knew what i was in for when i started.
What does the grey wire need to be attached to? The one end of the wire has come loose and is attached with black tape, the other is attached to the circuit board? What am I to do to repair the wire? Surely it belongs somewhere.
The little black piece of tape it was soldered too is actually the antenna.
Somehow small ants got under the screen on my sons tablet is there anyway to get them out without taking it all apart? Thank you!!
That is odd! Try maybe some canned air in the ports see if you can blow them off the screen. Realistically, you can’t get them out without removing it.
Chris -
This is a phenomenal post!! One of my RCA voyager II 16 gb tablets needs a battery badly..thanks to this post I dont have to toss the tablet!
Thank you, I really appreciate that.
Chris -
My screen is crack in the inside do I need a LCD for it
Most likely.
Chris -
Good, Clean Job
Why will my unit just keep flashing the battery charging sign at intervals and not boot up to a full screen?
Is it possible to just remove the old battery and plug in a new one at the battery step? And is my battery no longer chargeable when it shows fully charged but only works for 15 min if that long? Thank you so much for your detailed video - it gives me hope that I can still revive my tablet.
my tablet has not been turning on and i have charged it and everything
This is an amazing guide. Thank you so much. My daughter keeps breaking her screens. She will be so happy her tablet could be fixed, and for free too!!
Why does my tablet keep restarting and is there anything I can do to fix the problem? Sometimes it will run for a while and restart at random different times, and other times it won't even get to the lockscreen and will just keep restarting over and over. I already tried a factory reset I don't know what else to do any kind of feedback would be greatly appreciated. Thank You
Where can i get the Lcd for the exact model ( rct6773w22… LCD only
I live in the USA, state (Missouri). Where can I get a battery for my RCA Voyager 2 tablet?