Перейти к основному содержанию

Rain-X Chipped Windshield Repair

Выберете то, что вам нужно

  1. Rain-X Chipped Windshield Repair, Rain-X Chipped Windshield Repair: шаг 1, изображение 1 из 3 Rain-X Chipped Windshield Repair, Rain-X Chipped Windshield Repair: шаг 1, изображение 2 из 3 Rain-X Chipped Windshield Repair, Rain-X Chipped Windshield Repair: шаг 1, изображение 3 из 3
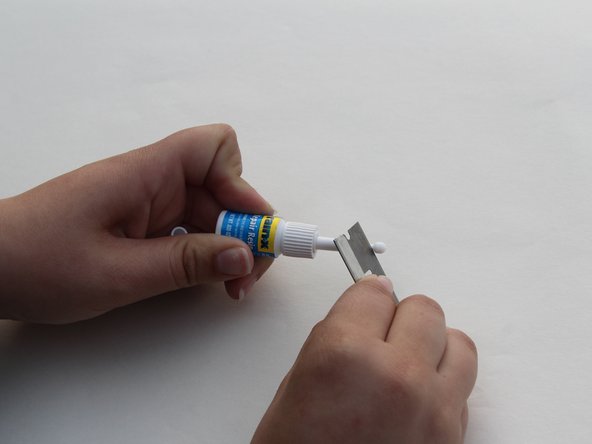
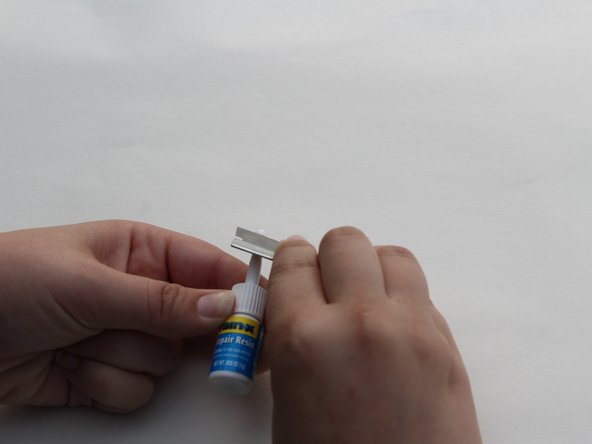
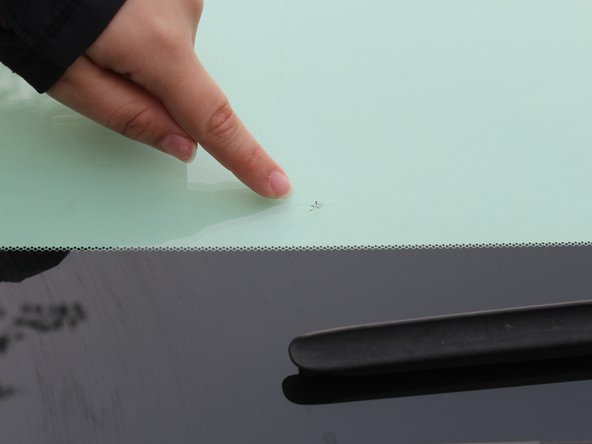
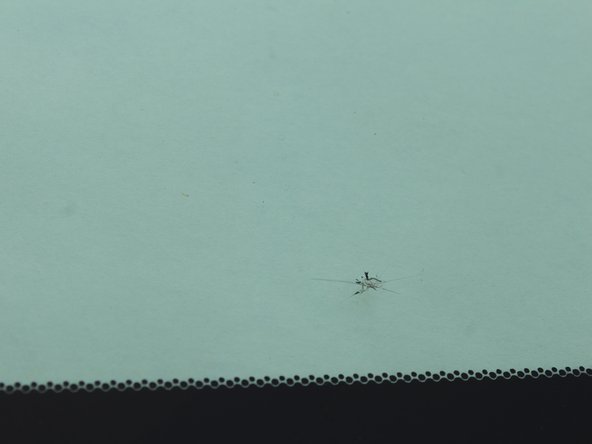
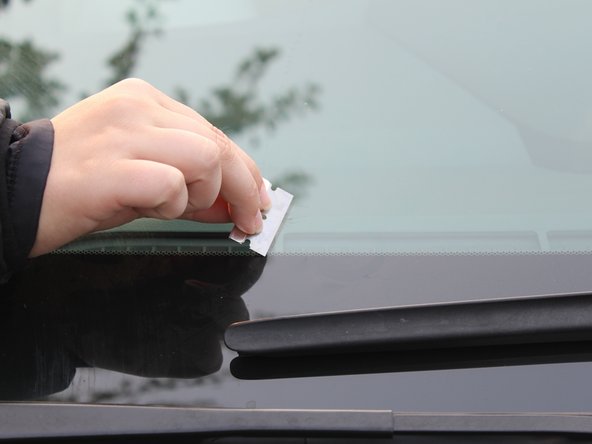
    • To remove excess glass, scrape over the surface of the chip with the included razor blade.

  2. Rain-X Chipped Windshield Repair: шаг 2, изображение 1 из 2 Rain-X Chipped Windshield Repair: шаг 2, изображение 2 из 2
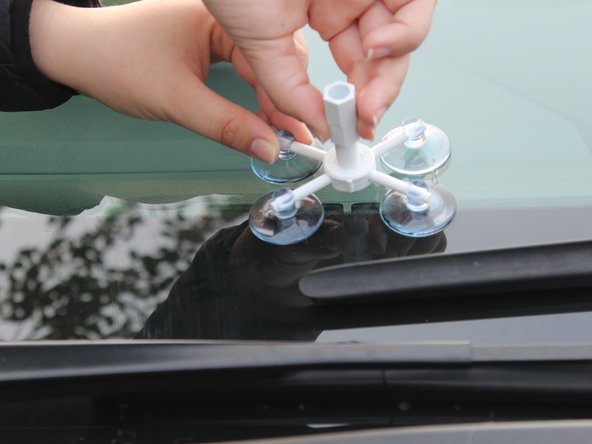
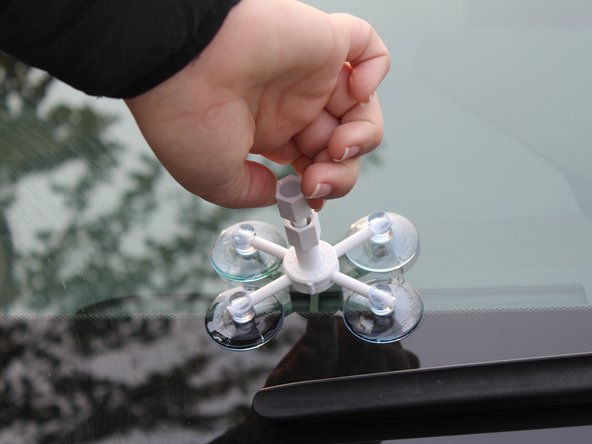
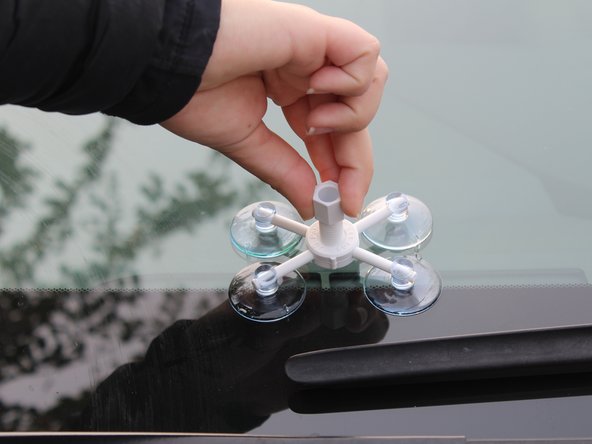
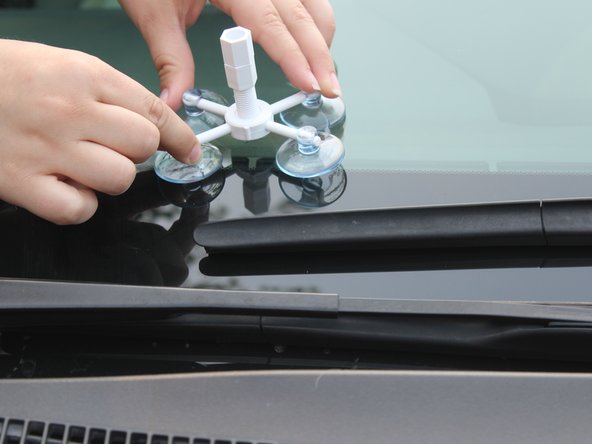
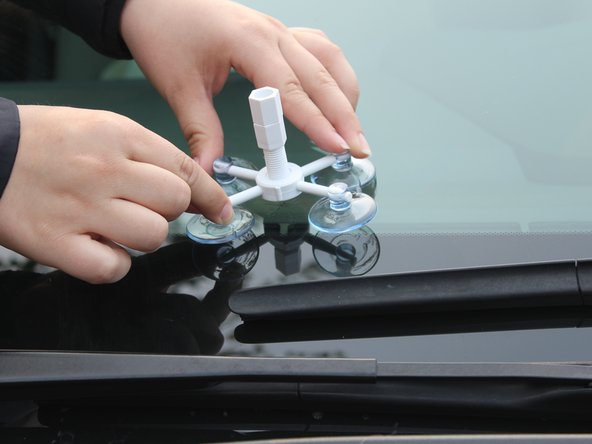
    • Attach the Rain-X applicator base to the windshield, with the center of the base directly above the chip.

  3. Rain-X Chipped Windshield Repair: шаг 3, изображение 1 из 2 Rain-X Chipped Windshield Repair: шаг 3, изображение 2 из 2
    • Cut the tip of the repair resin bottle using the razor blade.

  4. Rain-X Chipped Windshield Repair: шаг 4, изображение 1 из 3 Rain-X Chipped Windshield Repair: шаг 4, изображение 2 из 3 Rain-X Chipped Windshield Repair: шаг 4, изображение 3 из 3
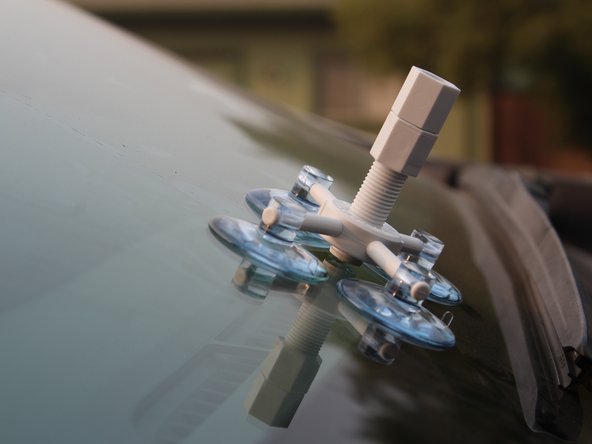
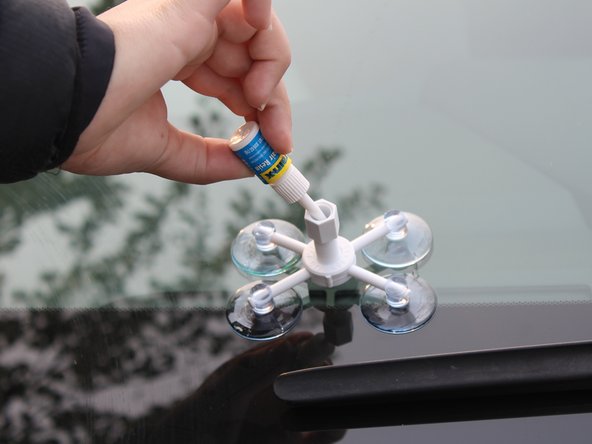
    • To attach resin chamber, screw the chamber into the center ring of the applicator base.

  5. Rain-X Chipped Windshield Repair: шаг 5, изображение 1 из 1
    • Screw the resin chamber clockwise until it is in contact with the windshield.

  6. Rain-X Chipped Windshield Repair: шаг 6, изображение 1 из 3 Rain-X Chipped Windshield Repair: шаг 6, изображение 2 из 3 Rain-X Chipped Windshield Repair: шаг 6, изображение 3 из 3
    • Apply 3-6 drops of resin from the resin repair bottle into the resin chamber.

  7. Rain-X Chipped Windshield Repair: шаг 7, изображение 1 из 3 Rain-X Chipped Windshield Repair: шаг 7, изображение 2 из 3 Rain-X Chipped Windshield Repair: шаг 7, изображение 3 из 3
    • To add the pressure driver, screw the driver clockwise into the resin chamber.

    • Make sure to tighten almost all the way.

    • Make sure the pressure driver is in contact with the windshield.

  8. Rain-X Chipped Windshield Repair: шаг 8, изображение 1 из 1
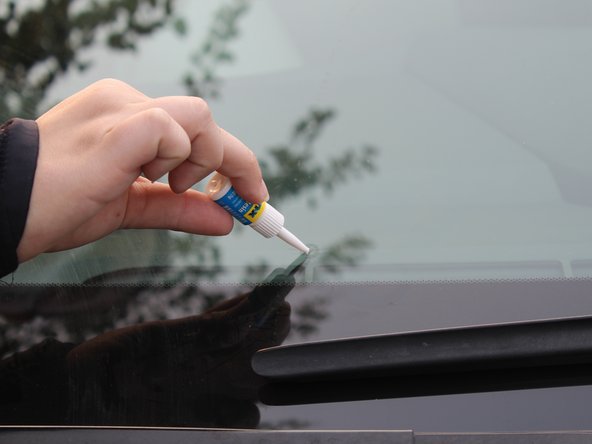
    • Set timer for 4-6 minutes - Let the adhesive absorb into the chip for 4-6 minutes.

    • To determine if the repair resin has absorbed properly, look at the glass from a 45 degree angle.

    • After the 4-6 minutes end, unscrew the pressure driver, turning it counter clockwise. Remove it to release any trapped air.

  9. Rain-X Chipped Windshield Repair: шаг 9, изображение 1 из 2 Rain-X Chipped Windshield Repair: шаг 9, изображение 2 из 2
    • Reinsert pressure driver by twisting clockwise.

    • This will discard any air remaining in the chip.

  10. Rain-X Chipped Windshield Repair: шаг 10, изображение 1 из 1
    • To check for remaining damage, look for a dark color to appear.

  11. Rain-X Chipped Windshield Repair: шаг 11, изображение 1 из 1
    • Leave to cure for 5-10 minutes.

  12. Rain-X Chipped Windshield Repair: шаг 12, изображение 1 из 2 Rain-X Chipped Windshield Repair: шаг 12, изображение 2 из 2
    • Once finished curing, remove the resin chamber and the pressure driver by screwing counter clockwise.

  13. Rain-X Chipped Windshield Repair: шаг 13, изображение 1 из 2 Rain-X Chipped Windshield Repair: шаг 13, изображение 2 из 2
    • Remove the applicator by using the tabs on the suction cups.

  14. Rain-X Chipped Windshield Repair: шаг 14, изображение 1 из 2 Rain-X Chipped Windshield Repair: шаг 14, изображение 2 из 2
    • Clean off any excess adhesive from the windshield.

  15. Rain-X Chipped Windshield Repair: шаг 15, изображение 1 из 2 Rain-X Chipped Windshield Repair: шаг 15, изображение 2 из 2
    • Cover the chip gently with a curing strip.

  16. Rain-X Chipped Windshield Repair: шаг 16, изображение 1 из 1
    • Move the car into direct sunlight and leave for 4-6 hours.

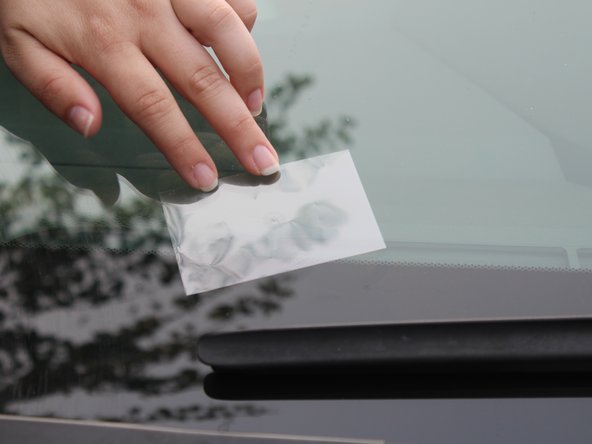
    • Remove the curing strip and enjoy.

Заключение

To reassemble your device, follow these instructions in reverse order.

2 участников успешно повторили данное руководство.

Jeffrey Ritchie

Участник с: 10/26/18

286 Репутация

1 руководство автора

Команда

UC Davis, Team S1-G8, Bender Fall 2018 Участник UC Davis, Team S1-G8, Bender Fall 2018

UCD-BENDER-F18S1G8

3 членов

Автор 1 руководств

Один комментарий

If you do not have a sunny day, what is the best UV wavelength in nm, watts, and length of time to fully cure the resin.

Thanks much!

AZRic - Ответить

Добавить комментарий

Просмотр статистики:

За последние 24часов: 1

За последние 7 дней: 1

За последние 30 дней: 50

За всё время: 4,626