Введение
This simple guide will show you how to change the cable in a Rapoo N1600 mouse. This guide does require disassembling, so try not to lose any parts! One thing to note in Step 2 is that the screw may be difficult to remove, so there's a chance you might have to pry it open. Don't worry; you won't need to screw it back since the mouse runs smoothly without the screw.
Выберете то, что вам нужно
-
-
-
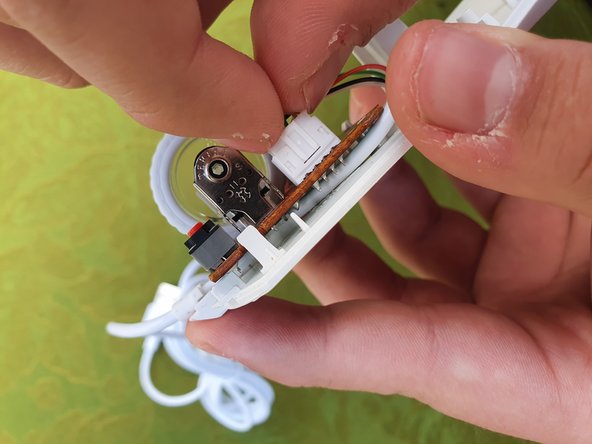
Use the iFixit opening tool to lift the cable connector plug slowly.
-
Using two fingers, slowly wiggle the connector plug out.
-
-
-
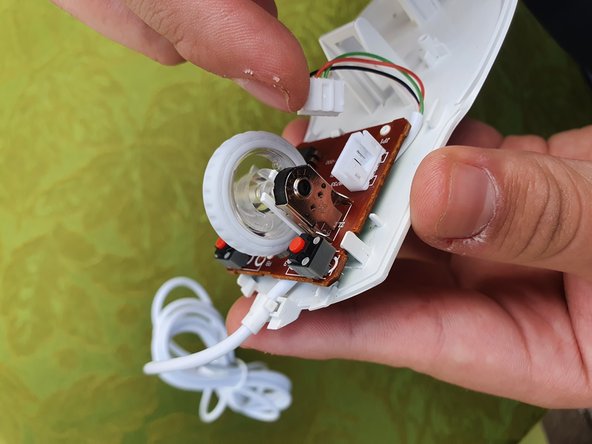
Place your index finger under the motherboard and lift your index finger so the motherboard pops up.
-
-
-
Remove the old mouse cable.
-
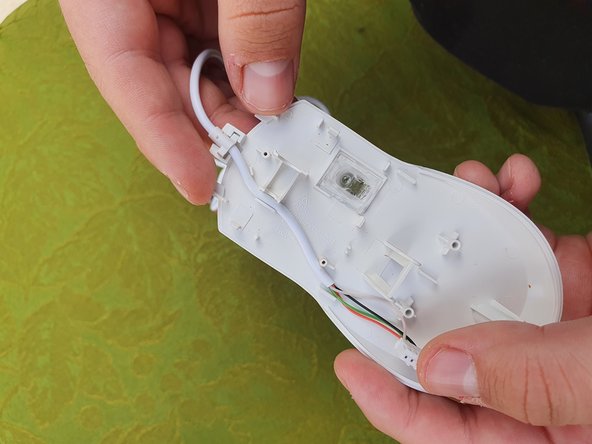
Place the matching cross from the new mouse cable on the cross outline.
-
Keep the cable away from the scroll wheel area. Make sure the cable stays to the side.
-
Make sure the mouse sensor stays in place. If it falls out, set it back in place.
-
-
-
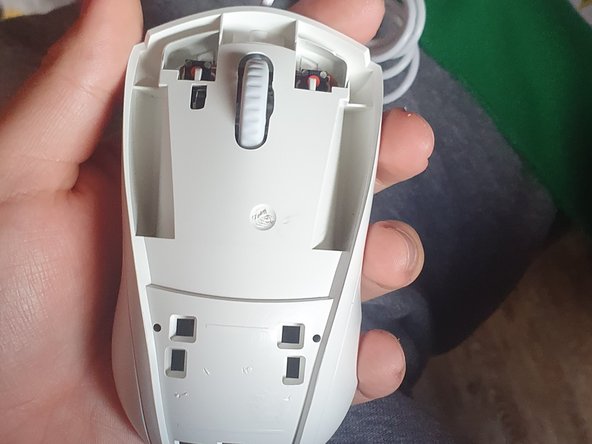
To replace the motherboard, match the circle from the motherboard and mouse and press down.
-
Add the mouse cable plug to the socket. Press down so it connects.
-
-
-
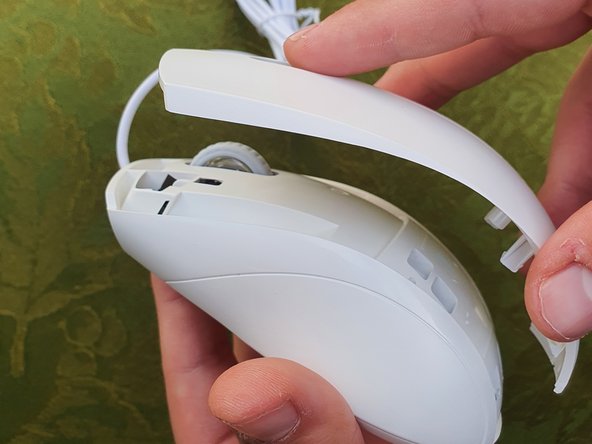
Slide an iFixit opening pick between the top shell and middle slowly until the end. Do this for the other side as well.
-
-
-
Match the middle part of the mouse with the bottom and slide it from top to bottom.
-
Once the middle part is attached, add the top shell of the mouse. Follow the pattern of the holes as they will help you.
-


Отменить: Я не выполнил это руководство.
Еще один человек закончил это руководство.

Команду

CSU Los Angeles, Team 2-25, Briggs Fall 2022 Участник CSU Los Angeles, Team 2-25, Briggs Fall 2022
CSULA-BRIGGS-F22S2G25
1 член
Автор 2 руководств