Введение
Make sure you look at the Samsung P241 Troubleshooting Guide first to see if you can solve your problem without taking the DVD player apart.
If the disc tray does not come out when you press the “Eject Disc” button, listen for the sound of the motor. If it sounds like a motor is trying to open the drive but something is preventing it, the disc drive is probably jammed and you can refer to this guide to open it up and remove the jam.
If the disc drive does not open when the machine is ON and it makes no noise whatsoever, then the electronics on motherboard or in the disc drive are probably damaged. In order to fix this problem, you will have to replace the disc drive and/or motherboard. Refer to the laser repair guide to remove the disc drive, and refer to the main board repair guide to replace the motherboard.
Выберете то, что вам нужно
-
-
With the back of the DVD player facing you, remove the three 1 cm black screws on the right, left, and top sides using a Phillips #1 screwdriver.
-
-
-
After the top cover has been removed, locate the disc drive on the right hand side of the DVD player.
-
-
-
-
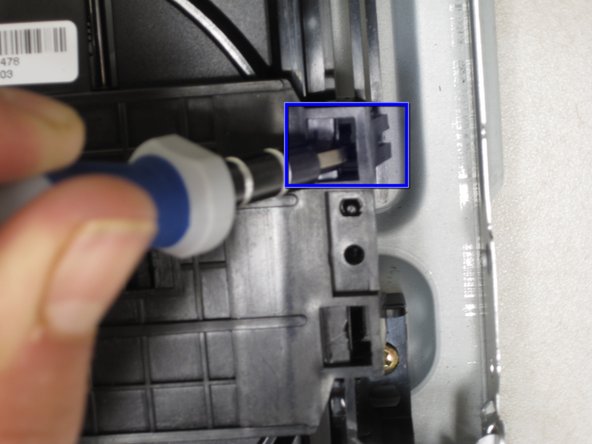
You will now pry off the black plastic cover from the disc tray. Insert a flathead screwdriver into the slot indicated and press down while at the same time pulling the screwdriver towards the middle of the device. This will pop the plastic catch out to the side.
-
-
-
Without removing the first screwdriver, insert a second one into the hole indicated and do the same motion.
-
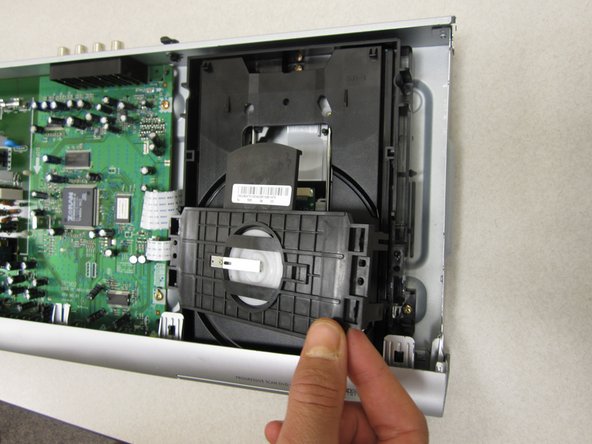
You can now lift up the right side of the cover. Don't pull up too far or you could break the clasps on the left side.
-
-
-
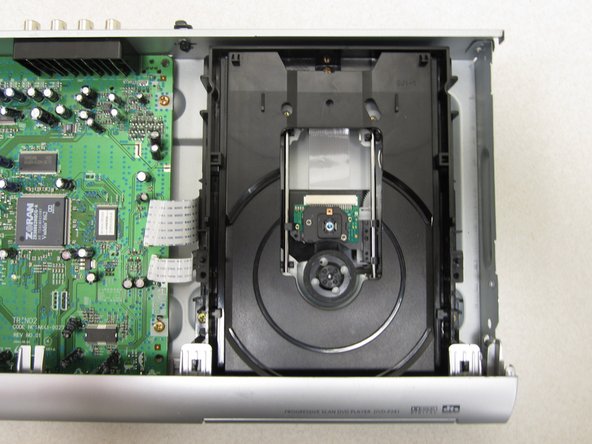
You can now pop of the black plastic cover and see the exposed disc drive. If there is anything stuck inside that is jamming the drive, you can remove it.
-


To reassemble your device, follow these instructions in reverse order.
To reassemble your device, follow these instructions in reverse order.
Отменить: Я не выполнил это руководство.
Еще один человек закончил это руководство.

Команда

Cal Poly, Team 14-7, Forte Winter 2011 Участник Cal Poly, Team 14-7, Forte Winter 2011
CPSU-FORTE-W11S14G7
5 членов
Автор 7 руководств