Перейти к основному содержанию

Removing Audio Technica ATH-AD500 Foam Disks

Выберете то, что вам нужно

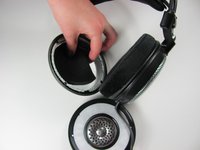
  1. Removing Audio Technica ATH-AD500 Foam Disks, Speaker Assembly: шаг 1, изображение 1 из 1
    • Remove the ear pads by peeling them away from the grill.

  2. Removing Audio Technica ATH-AD500 Foam Disks: шаг 2, изображение 1 из 1
    • Remove all four 1cm screws on the inside of the headphone using a #1 Phillips head.

  3. Removing Audio Technica ATH-AD500 Foam Disks: шаг 3, изображение 1 из 1
    • Remove the speaker from the grill by pulling it out.

    • Remove the speaker carefully so you do not rip the wires out.

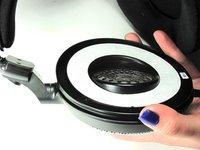
  4. Removing Audio Technica ATH-AD500 Foam Disks, Foam Disks: шаг 4, изображение 1 из 2 Removing Audio Technica ATH-AD500 Foam Disks, Foam Disks: шаг 4, изображение 2 из 2
    • Remove the foam disk from the grill by peeling it away from the grill.

    • During reassembly, make sure that the speaker is angled into your ear canal.

Заключение

To reassemble your device, follow these instructions in reverse order.

2 участников успешно повторили данное руководство.

Melanie Reis

Участник с: 01/11/13

227 Репутация

Автор 5 руководств

Команда

Cal Poly, Team 17-19, Forte Winter 2013 Участник Cal Poly, Team 17-19, Forte Winter 2013

CPSU-FORTE-W13S17G19

6 членов

Автор 17 руководств

0 Комментариев

Добавить комментарий

Просмотр статистики:

За последние 24часов: 0

За последние 7 дней: 5

За последние 30 дней: 22

За всё время: 2,074