Эта версия возможно содержит некорректные исправления. Переключить на последнюю проверенную версию.
Выберете то, что вам нужно
-
Этот шаг не переведен. Помогите перевести
-
Eject the disk tray from the DVD player before removing power supply.
-
-
Этот шаг не переведен. Помогите перевести
-
Evenly lift upward on the disk tray front cover (not slanted, as pictured). This will allow for easier disassembly of the player.
-
-
Этот шаг не переведен. Помогите перевести
-
Remove the three screws running along the back edge of case cover.
-
Remove the two screws from each side of the case cover.
-
-
-
Этот шаг не переведен. Помогите перевести
-
Grab edges of the cover with your hands. Pull outward slightly, then straight up.
-
-
Этот шаг не переведен. Помогите перевести
-
Lift up the five tabs securing the front panel to the chassis. There are three on the bottom, and two on the inside edges of the panel. Panel should then lift off the player.
-
-
Этот шаг не переведен. Помогите перевести
-
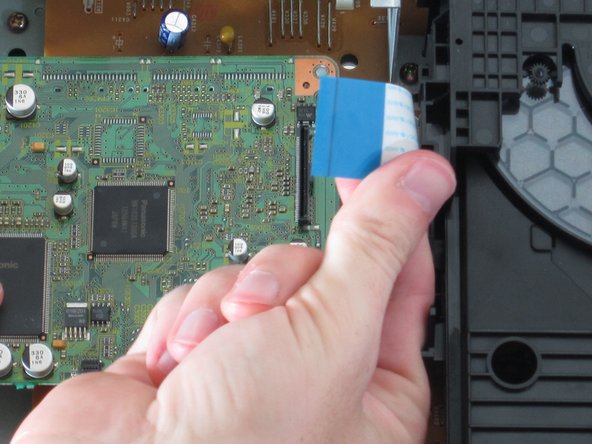
Remove the blue ribbon wire from its connector. When doing this, be cautious to not damage the connector.
-
Place forefinger under cable loop as shown, gripping with thumb.
-
Pull straight up. It should disconnect with little force.
-
-
Этот шаг не переведен. Помогите перевести
-
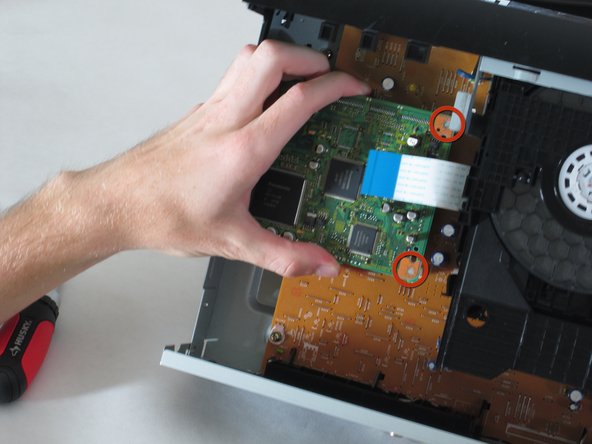
Using tweezers or pliers, squeeze the tabs of the plastic fasteners together. While doing this, gently lift up on the motherboard until the fasteners are released.
-
-
Этот шаг не переведен. Помогите перевести
-
Remove the two screws securing the motherboard using a philips screw driver.
-
-
Этот шаг не переведен. Помогите перевести
-
Lift the board from the side closest to the front panel (top of photo).
-
Gently apply force until bottom connector releases from power board below.
-
Отменить: Я не выполнил это руководство.
Еще один человек закончил это руководство.


