Эта версия возможно содержит некорректные исправления. Переключить на последнюю проверенную версию.
Выберете то, что вам нужно
-
Этот шаг не переведен. Помогите перевести
-
Pop the center cover open on the bottom cover.
-
Remove the center screw with a #00 Phillips screwdriver.
-
Use a T5 Torx screwdriver for the remaining screws around the edge of the bottom cover.
-
-
Этот шаг не переведен. Помогите перевести
-
Carefully remove back panel after all screws have been removed.
-
-
Этот шаг не переведен. Помогите перевести
-
After the back panel has been removed, disconnect the battery to prevent electrical shock
-
-
Этот шаг не переведен. Помогите перевести
-
Use a Phillips #00 screwdriver to remove the 8 screws that secure the battery.
-
-
Этот шаг не переведен. Помогите перевести
-
Once all the screws have been removed the battery is now safe to extract
-
-
Этот шаг не переведен. Помогите перевести
-
Close the laptop, flip the laptop over, and pop off the back small panel with a flathead screwdriver. The panel will be hanging by the hinges once open.
-
-
Этот шаг не переведен. Помогите перевести
-
Use a T5 Torx screwdriver to remove the screws along the edge of the bottom cover.
-
Open the center cover and use a Phillips #00 screwdriver to remove single screw.
-
-
-
Этот шаг не переведен. Помогите перевести
-
Disconnect yellow-colored ribbon cable from its port which sits at the bottom left of the fan housing.
-
-
Этот шаг не переведен. Помогите перевести
-
Use a Phillips #00 screwdriver to loosen the screws that secure the heat sink's heat spreader.
-
-
Этот шаг не переведен. Помогите перевести
-
Grip the heat sink from the sides and carefully lift it up to remove it.
-
-
Этот шаг не переведен. Помогите перевести
-
Use a Phillips screwdriver to remove the two cooling fan screws.
-
-
Этот шаг не переведен. Помогите перевести
-
The cooling fan can now be removed and a new one can be installed.
-
-
Этот шаг не переведен. Помогите перевести
-
Use a Phillips screwdriver to remove the 4 trackpad screws.
-
-
Этот шаг не переведен. Помогите перевести
-
Déconnecter les deux fils de la carte WiFi. Vous pouvez le faire à l'aide d'une pince ou de votre ongle.
-
Retirer la vis à l'aide d'un tournevis cruciforme #00.
-
Retirer à présent votre carte WiFi pour en faire le remplacement.
-
-
Этот шаг не переведен. Помогите перевести
-
Retirer la vis à l'aide d'un tournevis cruciforme #00.
-
Retirer le disque dur de son emplacement.
-
-
Этот шаг не переведен. Помогите перевести
-
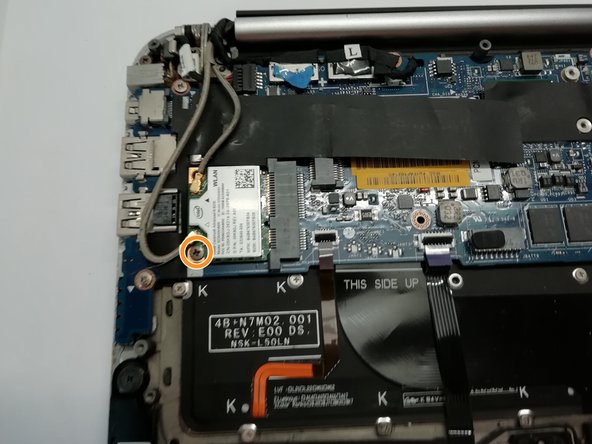
Retirer la connectique avec l'aide d'une pince ou de votre ongle.
-
Retirer les vis à l'aide d'un tournevis cruciforme #00.
-
Retirer la carte par la suite.
-
-
Этот шаг не переведен. Помогите перевести
-
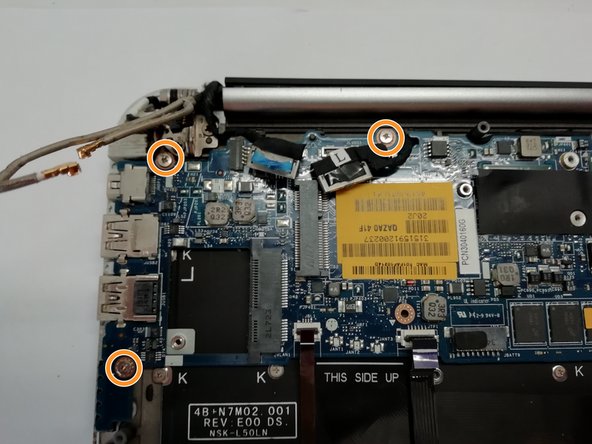
Déconnecter les différentes connectiques de la carte-mère.
-
Retirer les vis à l'aide d'un tournevis cruciforme #00.
-
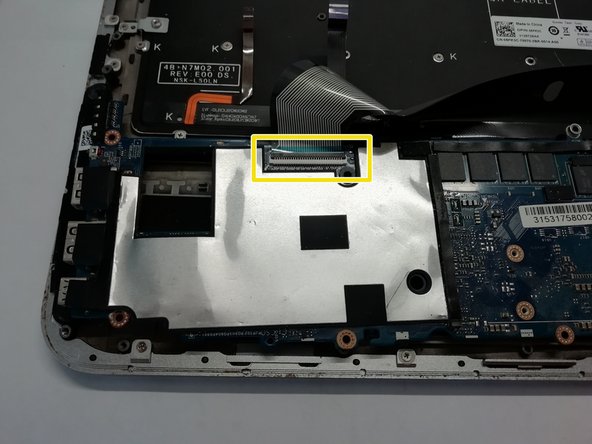
Retourner délicatement la carte-mère afin de déconnecter la nappe du clavier.
-
Vous pouvez à présent faire le remplacement de la carte-mère.
-
-
Этот шаг не переведен. Помогите перевести
-
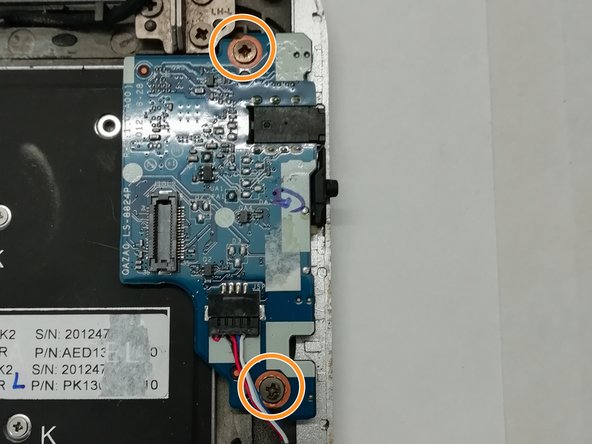
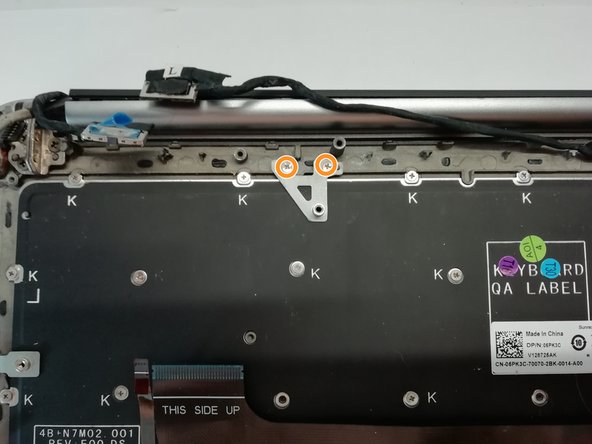
Retirer la vis à l'aide d'un tournevis cruciforme #00, puis le support.
-
Retirer la vis à l'aide d'un tournevis cruciforme #00, puis le support.
-
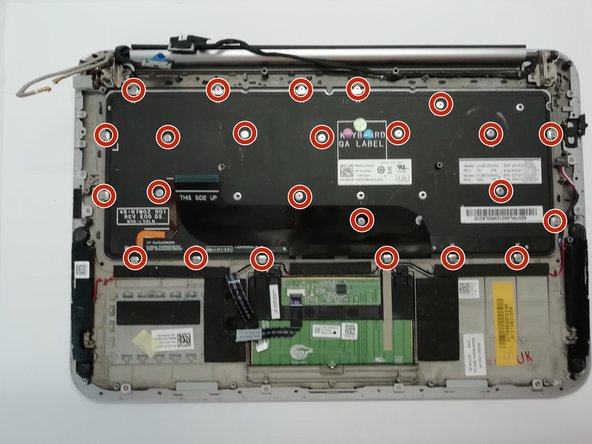
Soyez patient et dévisser les 24 vis du clavier.
-
-
Этот шаг не переведен. Помогите перевести
-
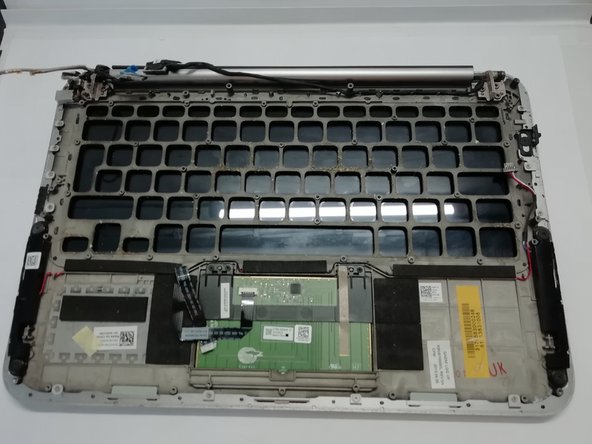
Vous pouvez maintenant retirer le clavier. Et également faire un nettoyage si nécessaire, comme sur la seconde photo.
-


Отменить: Я не выполнил это руководство.
Еще один человек закончил это руководство.

Команда
