Перейти к основному содержанию

Repairing HTC Droid Incredible LCD

Архивированное руководство
Это руководство сохранено для исторических целей. Используйте его обновлённую версию, чтобы выполнить ремонт.

Выберете то, что вам нужно

  1. Repairing HTC Droid Incredible LCD, Battery: шаг 1, изображение 1 из 3 Repairing HTC Droid Incredible LCD, Battery: шаг 1, изображение 2 из 3 Repairing HTC Droid Incredible LCD, Battery: шаг 1, изображение 3 из 3
    • Pry off back plastic, starting at the gap provided at the bottom of the phone. A spudger can be used to make this easier.

  2. Repairing HTC Droid Incredible LCD: шаг 2, изображение 1 из 2 Repairing HTC Droid Incredible LCD: шаг 2, изображение 2 из 2
    • Remove battery, prying from the provided gap at the upper-right corner of the battery

  3. Repairing HTC Droid Incredible LCD, Back Panel: шаг 3, изображение 1 из 2 Repairing HTC Droid Incredible LCD, Back Panel: шаг 3, изображение 2 из 2
    • Depress MicroSD to eject it from the side of the case.

  4. Repairing HTC Droid Incredible LCD: шаг 4, изображение 1 из 3 Repairing HTC Droid Incredible LCD: шаг 4, изображение 2 из 3 Repairing HTC Droid Incredible LCD: шаг 4, изображение 3 из 3
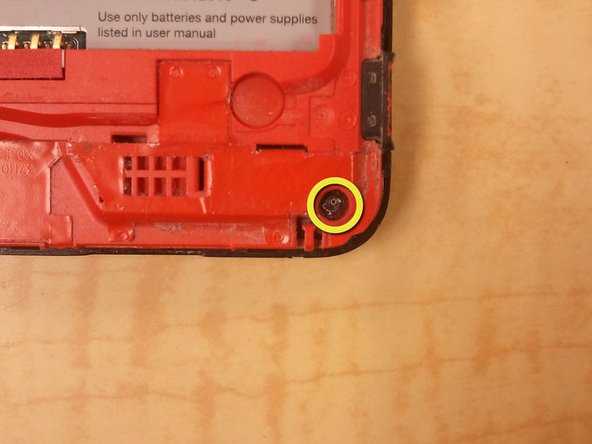
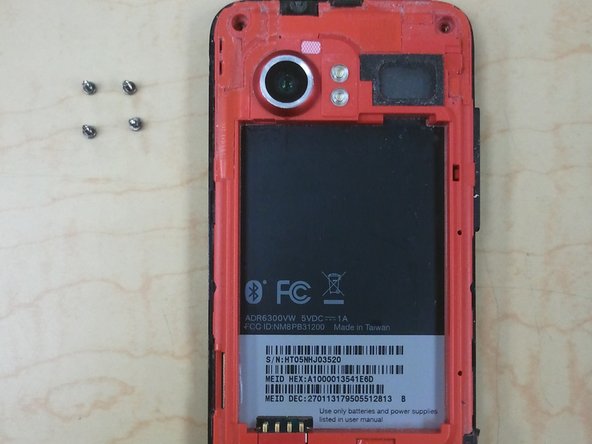
    • Remove 4 corner screws, you may have to remove a "VOID" sticker from one of the screw heads.

  5. Repairing HTC Droid Incredible LCD: шаг 5, изображение 1 из 3 Repairing HTC Droid Incredible LCD: шаг 5, изображение 2 из 3 Repairing HTC Droid Incredible LCD: шаг 5, изображение 3 из 3
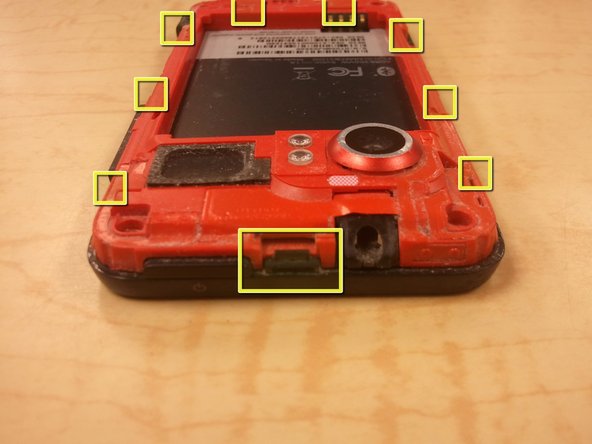
    • Using a spudger, unclip the nine clips holding the back panel to the front panel, highlighted in included pictures.

    • Start at the top, and work clockwise, being careful not to break the clips.

    • There are, 1, 3, 2, and 3 clips on each side, respectively.

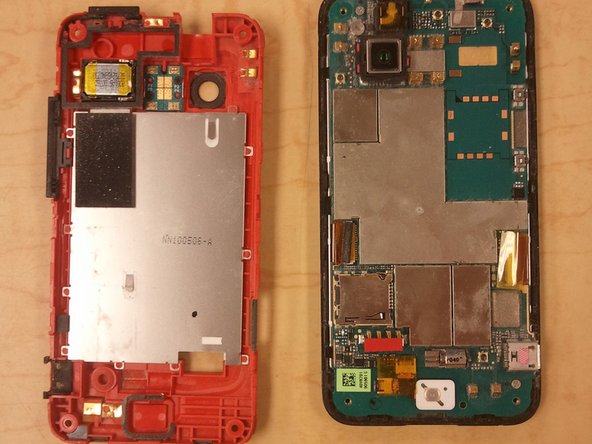
    • After the clips are disengaged, there are no cables holding the back panel in place.

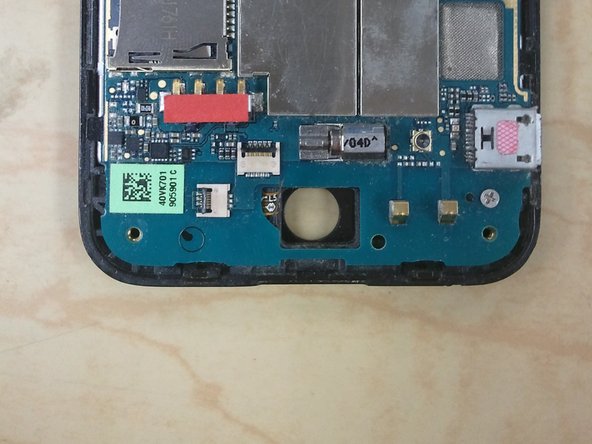
  6. Repairing HTC Droid Incredible LCD, Optical Track Pad: шаг 6, изображение 1 из 3 Repairing HTC Droid Incredible LCD, Optical Track Pad: шаг 6, изображение 2 из 3 Repairing HTC Droid Incredible LCD, Optical Track Pad: шаг 6, изображение 3 из 3
    • Use your spudger to release the jaw clip holding the Optical Track Pad cable to the logic board.

    • Remove Optical Track Pad from logic board.

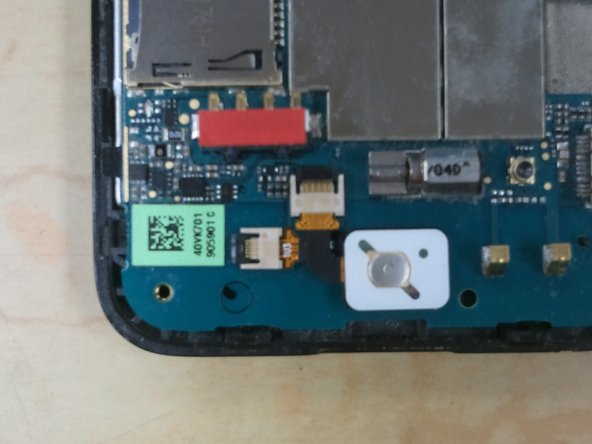
  7. Repairing HTC Droid Incredible LCD, Logic Board: шаг 7, изображение 1 из 1
    • Use your spudger to release the remaining clips, disconnecting the ribbon cables from the logic board.

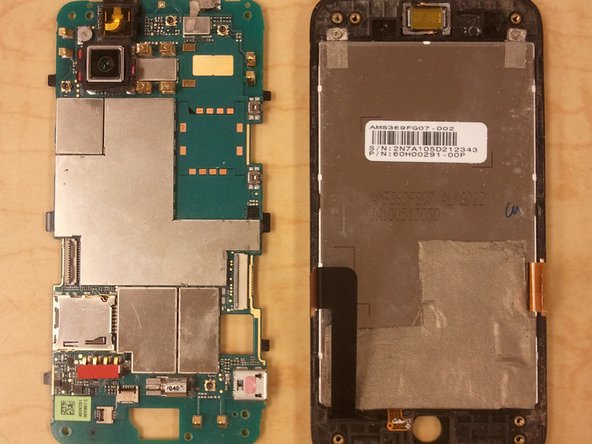
  8. Repairing HTC Droid Incredible LCD: шаг 8, изображение 1 из 2 Repairing HTC Droid Incredible LCD: шаг 8, изображение 2 из 2
    • Remove 2 Phillips Screws holding the logic board to the front panel.

    • Gently lift the logic board off the front panel.

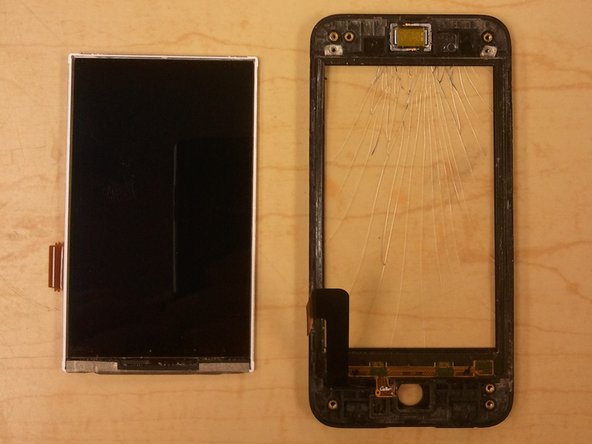
  9. Repairing HTC Droid Incredible LCD, LCD: шаг 9, изображение 1 из 2 Repairing HTC Droid Incredible LCD, LCD: шаг 9, изображение 2 из 2
    • Remove the two phillips screws from the top of the LCD frame.

    • Use your spudger to pry the LCD out of the frame.

Заключение

To reassemble your device, follow these instructions in reverse order.

4 участников успешно повторили данное руководство.

Mobile Rapid Response Unit

Участник с: 05/07/12

1 941 Репутация

Автор 6 руководств

0 Комментариев

Добавить комментарий

Просмотр статистики:

За последние 24часов: 0

За последние 7 дней: 0

За последние 30 дней: 0

За всё время: 3,692