Перейти к основному содержанию

Repairing Pioneer R1 Speaker Cables

Выберете то, что вам нужно

  1. Repairing Pioneer R1 Speaker Cables, Repairing Pioneer R1 Speaker Cables: шаг 1, изображение 1 из 1
    • Insert your plastic spudger into the opening near the HDMI port.

    • Gently pry the back cover of the R1 from the the front by using the spudger along the edges.

    • Do not pull the back cover straight off the R1. You may further damage the cables connecting the speakers to the motherboard.

  2. Repairing Pioneer R1 Speaker Cables: шаг 2, изображение 1 из 1
    • Lay the R1 flat like an open book.

    • This will prevent further damage to the cables connecting the speakers to the motherboard.

  3. Repairing Pioneer R1 Speaker Cables: шаг 3, изображение 1 из 2 Repairing Pioneer R1 Speaker Cables: шаг 3, изображение 2 из 2
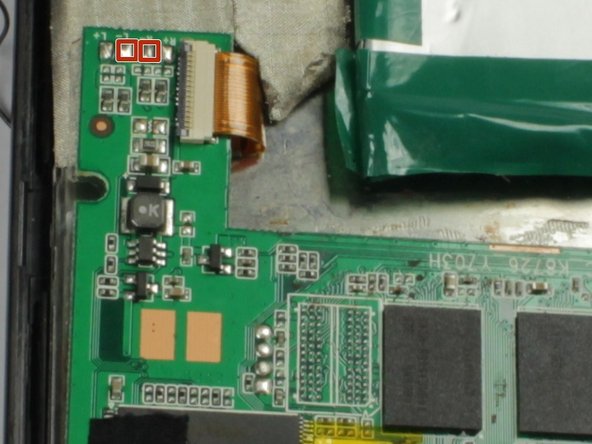
    • Solder the black cable of the left speaker to the nodule marked L+ on the motherboard.

    • Do not allow solder from one nodule to touch another nodule. This will cause the speakers to malfunction.

    • Solder the black cable of the Right speaker to the nodule marked R+ on the motherboard.

    • Solder the red cable of the left speaker to the nodule marked L- on the motherboard.

    • Solder the red cable of the right speaker to the nodule marked R- on the motherboard.

Заключение

To reassemble your device, follow these instructions in reverse order.

Еще один человек закончил это руководство.

Christopher Rosario

Участник с: 02/17/15

411 Репутация

Автор 4 руководств

Команда

San Diego State, Team 1-1, Sheppard Winter 2015 Участник San Diego State, Team 1-1, Sheppard Winter 2015

SDSU-SHEPPARD-W15S1G1

3 членов

Автор 7 руководств

0 Комментариев

Добавить комментарий

Просмотр статистики:

За последние 24часов: 0

За последние 7 дней: 0

За последние 30 дней: 0

За всё время: 140