Эта версия возможно содержит некорректные исправления. Переключить на последнюю проверенную версию.
Выберете то, что вам нужно
-
Этот шаг не переведен. Помогите перевести
-
Look for liquid or residue between the touchscreen and LCD. This phone shows water build-up between the touchscreen and LCD, and most likely contains more liquid inside.
-
In this case, there is no obvious damage or corrosion in the external dock connector.
-
There is no obvious damage or corrosion in the headphone jack.
-
-
Этот шаг не переведен. Помогите перевести
-
Lifting the front panel of this phone, the flex for the dock connector has stuck to the back of the midframe.
-
-
Этот шаг не переведен. Помогите перевести
-
The water damage sticker is now pink, indicating that the inside of this phone was flooded with liquid.
-
Residue and corrosion discoloration can clearly be seen on the connectors for the LCD, Digitizer, and proximity sensor, as well as the camera and SIM card slot.
-
-
Этот шаг не переведен. Помогите перевести
-
The dock connector water sensor sticker has turned pink too, indicating liquid flooding of this end of the phone.
-
The top of this dock connector looks fairly clean, with only a few green corrosive changes near connector 4.
-
-
-
Этот шаг не переведен. Помогите перевести
-
The rear of the display assembly shows more green corrosion and debris on the LCD and digitizer connectors.
-
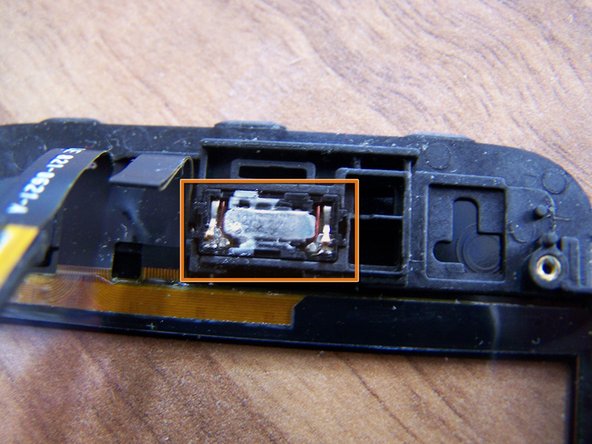
Removing the LCD and the back cover of the ear speaker and proximity sensor assembly reveals liquid damage to the speaker.
-
The proximity sensor is only lightly damaged.
-
-
Этот шаг не переведен. Помогите перевести
-
Closer inspection of proximity sensor/earpiece flex reveals more corrosion damage.
-
-
Этот шаг не переведен. Помогите перевести
-
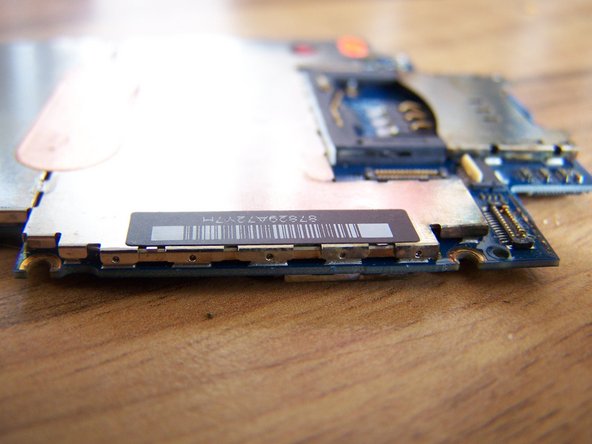
After removing the logic board, more liquid damage is visible.
-
The vibration motor has some rust.
-
The battery pins have corroded.
-
-
Этот шаг не переведен. Помогите перевести
-
Headphone jack connector 5, the vibration motor, and the volume switch show some light corrosion.
-
-
Этот шаг не переведен. Помогите перевести
-
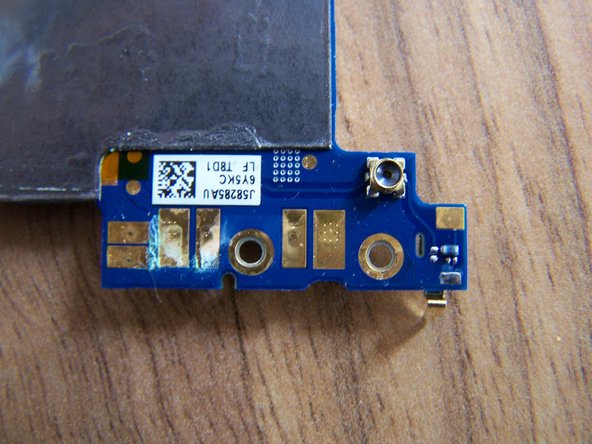
Rear of motherboard showing some signs of corrosion to battery contacts.
-
-
Этот шаг не переведен. Помогите перевести
-
Look for the dimpled tabs on the shield that reach down over the tabs attached to the mother board.
-
Using your plastic tool, catch the edge of a dimpled tab near a corner of the shield, and pry it up away from the logic board.
-
Being careful of all the tiny surface mounted components, work your way around the available edges until the shield comes free.
-
-
Этот шаг не переведен. Помогите перевести
-
Submerge the logic board in isopropyl alcohol, and allow it to soak long enough to loosen hardened residue, and to displace any remaining water or other liquid. Use a soft brush to remove visible corrosion and residue.
-
Residue from motherboard left in isopropyl alcohol container.
-
Clean all flex ends, battery contacts, connectors, chips, and fuses on motherboard with a soft brush.
-
Repeat cleaning if necessary, or if traces of residue are still visible.
-
Allow the logic board or other parts to dry completely before reassembly.
-
-
Этот шаг не переведен. Помогите перевести
-
Wipe LCD with cloth moistened with isopropyl alcohol. Immersion isn't advised, as liquid may leave a mark behind the LCD.
-
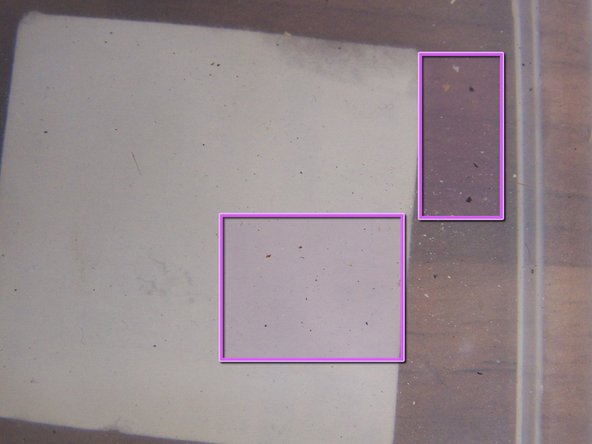
This is the screen after cleaning. Water mark is no longer visible.
-


Отменить: Я не выполнил это руководство.
188 участников успешно повторили данное руководство.

Команда

56 Комментариев
Thanks!
I fixed my iPhone 3GS that got lots of water in!!!
thanks for a great guide!
you're welcome shai, hope all the other repairs go so well
Hi, I have a quick question. Is 70% Isopropyl alcohol good enough to clean the logic board or does it HAVE to be either 90% or 99%? Thank you so much for your help.