Перейти к основному содержанию

Ridgid GEN5X R8611506 Foward / Reverse Selector Switch Replacement

Выберете то, что вам нужно

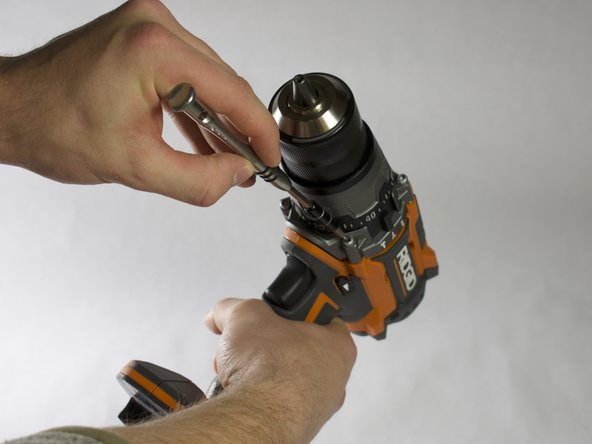
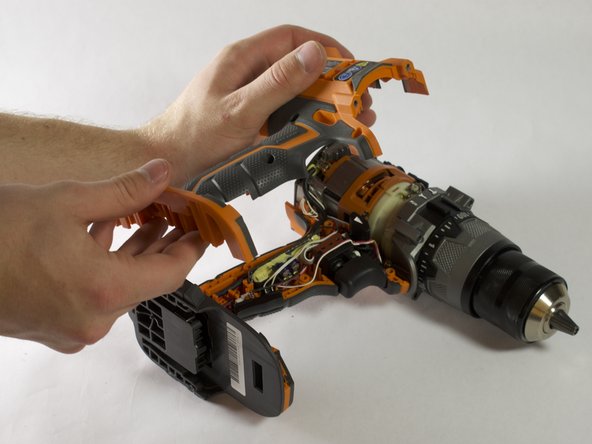
  1. Ridgid GEN5X R8611506 Foward / Reverse Selector Switch Replacement, Outer Case: шаг 1, изображение 1 из 2 Ridgid GEN5X R8611506 Foward / Reverse Selector Switch Replacement, Outer Case: шаг 1, изображение 2 из 2
    • Orient the drill to have the side with the screws facing up.

    • Using the Torx T10 screwdriver, remove the eight 4.0mm screws from the face of the drill.

  2. Ridgid GEN5X R8611506 Foward / Reverse Selector Switch Replacement: шаг 2, изображение 1 из 3 Ridgid GEN5X R8611506 Foward / Reverse Selector Switch Replacement: шаг 2, изображение 2 из 3 Ridgid GEN5X R8611506 Foward / Reverse Selector Switch Replacement: шаг 2, изображение 3 из 3
    • Orient the drill to where the back is facing up.

    • Using a Torx T10 screwdriver, remove the four 6.0mm screws that attach the back piece to the drill.

    • Remove the back piece of the drill using the iFixit opening tool.

  3. Ridgid GEN5X R8611506 Foward / Reverse Selector Switch Replacement: шаг 3, изображение 1 из 2 Ridgid GEN5X R8611506 Foward / Reverse Selector Switch Replacement: шаг 3, изображение 2 из 2
    • Orient the drill to where the chuck is facing up.

    • Using the Torx T15 screwdriver, remove the four 8.0mm screws from the front of the drill.

  4. Ridgid GEN5X R8611506 Foward / Reverse Selector Switch Replacement: шаг 4, изображение 1 из 2 Ridgid GEN5X R8611506 Foward / Reverse Selector Switch Replacement: шаг 4, изображение 2 из 2
    • Orient the drill so the side with the screw holes is facing up.

    • Use a plastic opening tool to gently pry the face off of the drill.

    • Remove the face completely from the drill.

  5. Ridgid GEN5X R8611506 Foward / Reverse Selector Switch Replacement, Forward / Reverse Selector Switch: шаг 5, изображение 1 из 2 Ridgid GEN5X R8611506 Foward / Reverse Selector Switch Replacement, Forward / Reverse Selector Switch: шаг 5, изображение 2 из 2
    • Gently lift the trigger up.

    • Unhook the selector switch from the trigger.

    • Remove the selector switch.

Заключение

To reassemble your device, follow these instructions in reverse order.

Harrison Essary

Участник с: 02/05/19

611 Репутация

Автор 6 руководств

Команда

Appalachian State University, Team S2-G4, Menagarishvili Spring 2019 Участник Appalachian State University, Team S2-G4, Menagarishvili Spring 2019

APSU-MENAGARISHVILI-S19S2G4

3 членов

Автор 12 руководств

0 Комментариев

Добавить комментарий

Просмотр статистики:

За последние 24часов: 0

За последние 7 дней: 1

За последние 30 дней: 11

За всё время: 872