Перейти к основному содержанию

Ridgid GEN5X R8642 Gear Assembly Replacement

Выберете то, что вам нужно

  1. Ridgid GEN5X R8642 Gear Assembly Replacement, Gear Assembly: шаг 1, изображение 1 из 1
    • Remove the plastic tab holding the handle cover in place by prying upward with the spudger until the tab pops off.

  2. Ridgid GEN5X R8642 Gear Assembly Replacement: шаг 2, изображение 1 из 1
    • Remove the handle cover by pulling it towards the front of the saw.

    • The grip can sometimes become stuck and may require a decent amount of force to remove.

  3. Ridgid GEN5X R8642 Gear Assembly Replacement: шаг 3, изображение 1 из 2 Ridgid GEN5X R8642 Gear Assembly Replacement: шаг 3, изображение 2 из 2
    • Use a T20 Torx screwdriver to remove the nine M4 X 16mm screws from the plastic housing.

  4. Ridgid GEN5X R8642 Gear Assembly Replacement: шаг 4, изображение 1 из 1
    • Use a JIS #1 screwdriver to remove the two M4 x 25mm screws on both sides of the metal housing.

  5. Ridgid GEN5X R8642 Gear Assembly Replacement: шаг 5, изображение 1 из 1
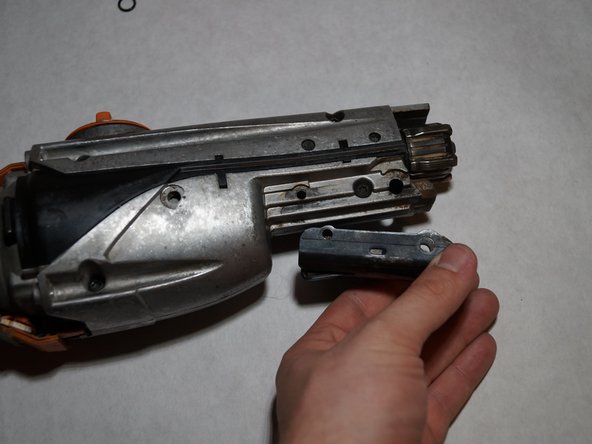
    • Remove one half of the plastic housing using a spudger so that the internal system is exposed.

  6. Ridgid GEN5X R8642 Gear Assembly Replacement: шаг 6, изображение 1 из 2 Ridgid GEN5X R8642 Gear Assembly Replacement: шаг 6, изображение 2 из 2
    • Remove the one 16mm T20 screw that holds the grip support onto the saw.

  7. Ridgid GEN5X R8642 Gear Assembly Replacement: шаг 7, изображение 1 из 3 Ridgid GEN5X R8642 Gear Assembly Replacement: шаг 7, изображение 2 из 3 Ridgid GEN5X R8642 Gear Assembly Replacement: шаг 7, изображение 3 из 3
    • Remove the five T20 Torx screws from the gear assembly cover and pull the cover off.

  8. Ridgid GEN5X R8642 Gear Assembly Replacement: шаг 8, изображение 1 из 2 Ridgid GEN5X R8642 Gear Assembly Replacement: шаг 8, изображение 2 из 2
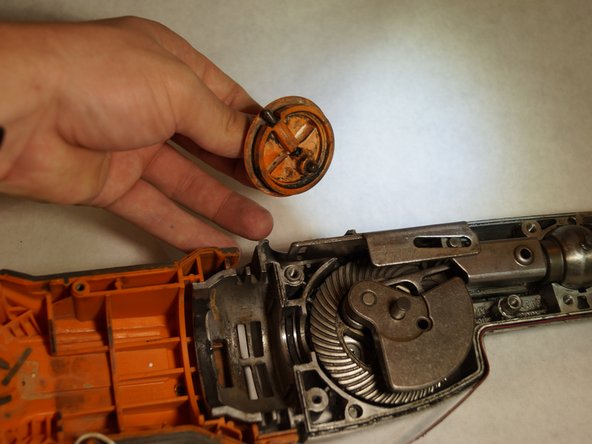
    • Carefully remove the motor making sure not to harm any of the wires that are attached. Place motor gently out of the way.

  9. Ridgid GEN5X R8642 Gear Assembly Replacement: шаг 9, изображение 1 из 3 Ridgid GEN5X R8642 Gear Assembly Replacement: шаг 9, изображение 2 из 3 Ridgid GEN5X R8642 Gear Assembly Replacement: шаг 9, изображение 3 из 3
    • Remove the orbital switch by pulling straight up on it.

    • Be careful to not lose the spring and pin that is inside of the switch.

  10. Ridgid GEN5X R8642 Gear Assembly Replacement: шаг 10, изображение 1 из 3 Ridgid GEN5X R8642 Gear Assembly Replacement: шаг 10, изображение 2 из 3 Ridgid GEN5X R8642 Gear Assembly Replacement: шаг 10, изображение 3 из 3
    • Remove the gear assembly by pulling it straight up.

  11. Ridgid GEN5X R8642 Gear Assembly Replacement: шаг 11, изображение 1 из 3 Ridgid GEN5X R8642 Gear Assembly Replacement: шаг 11, изображение 2 из 3 Ridgid GEN5X R8642 Gear Assembly Replacement: шаг 11, изображение 3 из 3
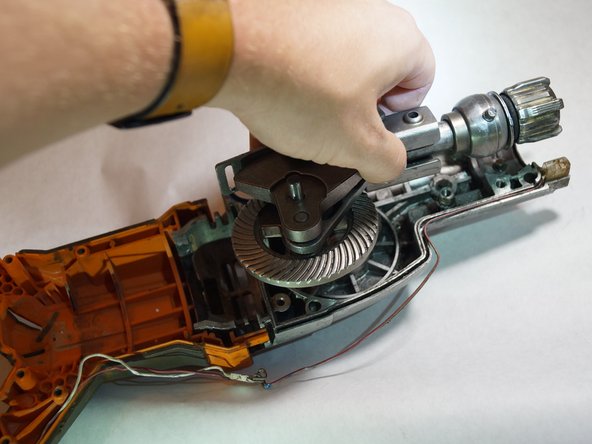
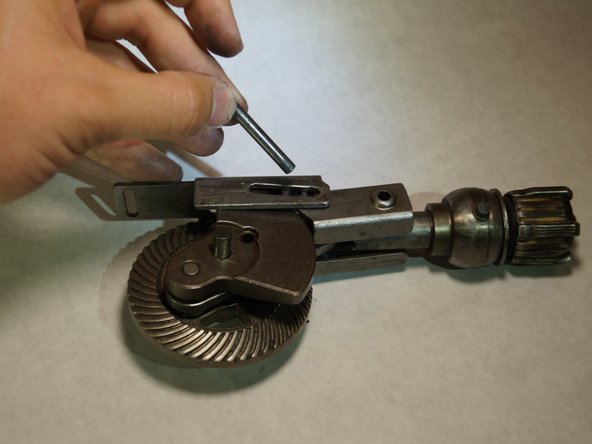
    • Pull the pin holding the metal guide housing in place.

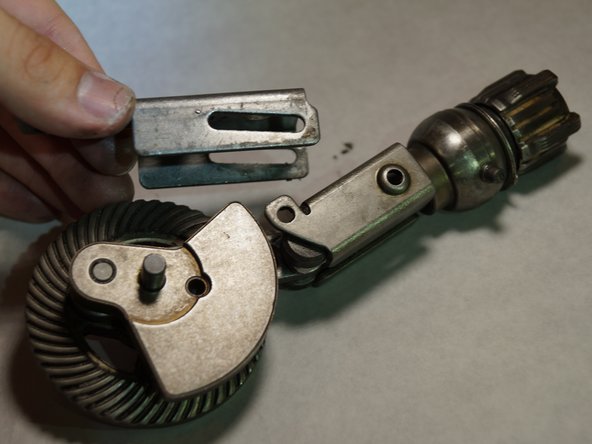
    • Slide the metal guide housing back off the gear assembly.

  12. Ridgid GEN5X R8642 Gear Assembly Replacement: шаг 12, изображение 1 из 2 Ridgid GEN5X R8642 Gear Assembly Replacement: шаг 12, изображение 2 из 2
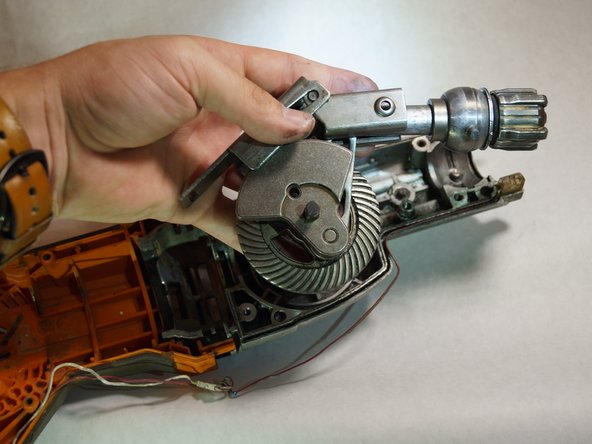
    • Remove the guide bushing by pulling up on it.

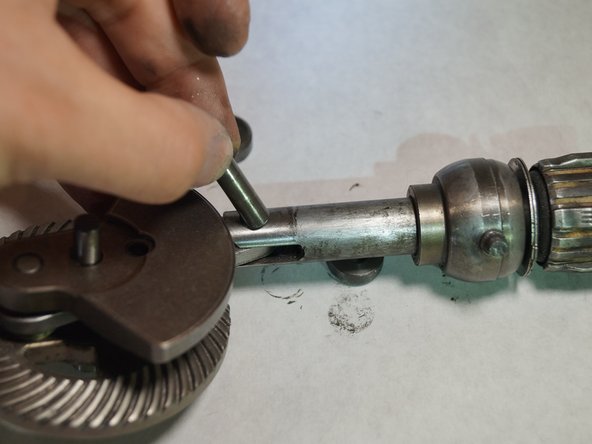
    • Then slide the pin out that holds the gear assembly and blade clamp assembly.

  13. Ridgid GEN5X R8642 Gear Assembly Replacement: шаг 13, изображение 1 из 1
    • Slide the blade clamp assembly off the gear assembly.

Заключение

To reassemble your device, follow these instructions in reverse order.

3 участников успешно повторили данное руководство.

Josh Wagoner

Участник с: 02/12/19

217 Репутация

1 руководство автора

Команда

Western Carolina University, Team S1-G3, Virtue Spring 2019 Участник Western Carolina University, Team S1-G3, Virtue Spring 2019

WCU-VIRTUE-S19S1G3

4 членов

Автор 5 руководств

Один комментарий

When reassembling with new gear, does gear needs to be greased?

Syoma Zv - Ответить

Добавить комментарий

Просмотр статистики:

За последние 24часов: 2

За последние 7 дней: 6

За последние 30 дней: 31

За всё время: 1,993