Введение
A damaged housing assembly will impede the users ability to properly insert the battery and undermines the drills durability in harsh working environments. Switching out the drill’s housing assembly requires a Hex 2.0 Screwdriver to remove the seven M3 X 14mm screws.
Выберете то, что вам нужно
-
-
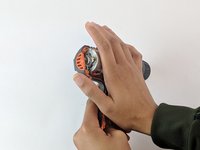
Eject the battery from the drill.
-
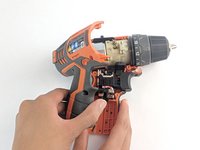
Unscrew the seven M3x15.3mm screws, with the 2mm hex screwdriver bit, that secures the Housing Assembly.
-
-
-
Push the metallic Housing Connecting clip out with flat side of the plastic opening tool.
-
-
-
-
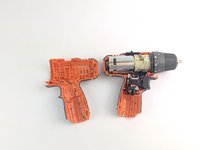
Grasp carefully the top and bottom of drill components.
-
Lift and transfer, as a whole, the drill components from the old housing assembly to the new housing.
-


To reassemble your device, follow these instructions in reverse order. Also reinsert the battery to make sure the drill has power.
To reassemble your device, follow these instructions in reverse order. Also reinsert the battery to make sure the drill has power.
Отменить: Я не выполнил это руководство.
2 человек успешно провели ремонт по этому руководству.
Команду

USF Tampa, Team S1-G2, Leahy Spring 2019 Участник USF Tampa, Team S1-G2, Leahy Spring 2019
USFT-LEAHY-S19S1G2
4 членов
Автор 10 руководств