Введение
In this guide, you will learn how to take apart the Ring Video Doorbell Pro.
Выберете то, что вам нужно
-
-
Start by using the star-shaped end of the included Ring screwdriver to take out the 5 mm screw on the bottom of the device.
-
-
-
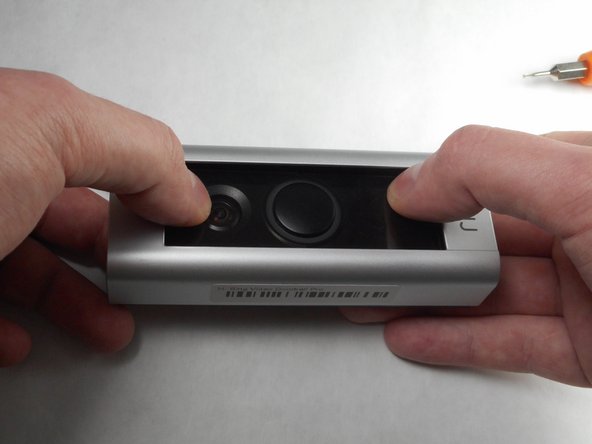
Use your thumbs to apply downward pressure on the glass part of the device while pulling the faceplate up and off of the device.
-
-
-
-
Using a PH-000 screwdriver, unscrew and set aside all four of these 5.25 mm screws.
-
-
-
Using a plastic pry tool, go along the edge of the device prying the device apart. While doing this, focus on the four clips, two of which are on either side of the device.
-


To reassemble your device, attach the new housing and follow these instructions in reverse order.
To reassemble your device, attach the new housing and follow these instructions in reverse order.
Отменить: Я не выполнил это руководство.
4 участников успешно повторили данное руководство.
Команда

IUPUI, Team S7-G4, Baechle Fall 2017 Участник IUPUI, Team S7-G4, Baechle Fall 2017
IUPUI-BAECHLE-F17S7G4
3 членов
Автор 5 руководств