Введение
This guide will show you how to disassemble a Rival Crock Pot model 3120. None of the components in the device are extremely fragile, but you should still be careful while performing the steps in this guide. Make sure before starting that your device is not plugged in, and that if it was turned on ensure it has had time to cool down fully. The only tools required are a 10mm and 16mm wrench, but an adjustable wrench or pliers could be used instead. This guide may be helpful for accessing the rotary switch of it is faulty or for replacing the heating element(s) if it burns out. The crock pot has a very simple design and very few components, so repairs should be straightforward.
Выберете то, что вам нужно
Рекомендуемый документ
-
-
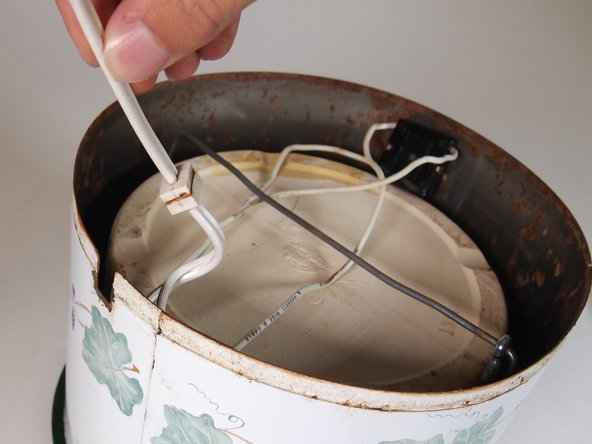
Remove the lid from the crockpot and turn the device over, so that the bottom faces up.
-
-
-
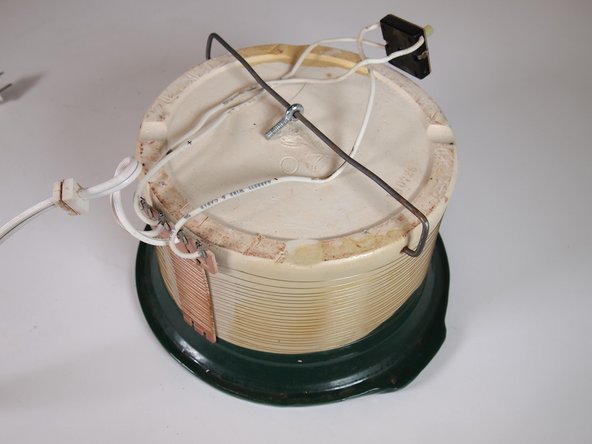
Use your fingers to remove the rubber end cap from the bolt on the bottom of the device.
-
-
-
-
You have now successfully disassembled your device. From here you can troubleshoot or replace any specific parts.
-


To reassemble your device, follow these instructions in reverse order.
To reassemble your device, follow these instructions in reverse order.
Прикрепленные документы

Команда

Tufts University School of Engineering, Team 1-6, Bell Fall 2022 Участник Tufts University School of Engineering, Team 1-6, Bell Fall 2022
TUFTS-BELL-F22S1G6
2 членов
Автор 1 руководств
4 Комментариев
Bolt is way too short to reassemble this thing and I'm not strong enough to bend the wire bail no matter how I try to do it. Never should have taken the thing apart.
It has been quite a long time since I went through this process but I seem to remember wrapping the threaded part of the bot in dental floss to use as a guide and threaded it through the hole with the crockpot propped up, upright so gravity would aid in assembly (some tire chocks on their sides would work, I think). It took some patience or perhaps stubbornness? But that's how I got it reassembled. I had a really hard time getting the bolt centered and the wire bail part vertical, which made the bolt seem impossibly short, before I tried this approach.
The bolt is definitely too short. I was taking it apart to clean it up- had I known, I wouldn't have bothered. I did bend the wire and tied some thread to the bolt- I was determined to not let it get the best of me.
Those heating wires that wrap around the pot are so thin, I was worried about breaking one. When I got it out back together I put some water in it and turn it on low- it was still working.