Введение
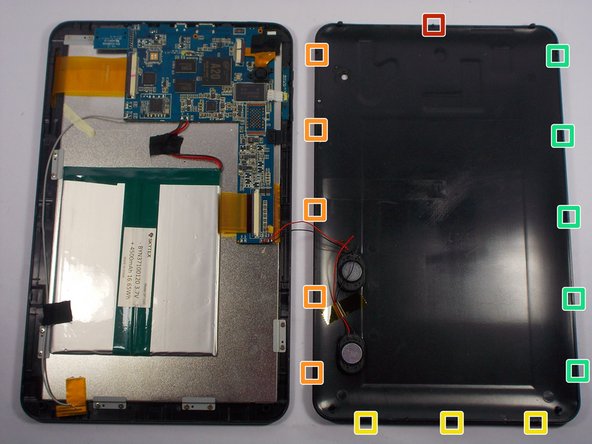
By the end of the guide the back panel will be separated from your device.
Выберете то, что вам нужно
-
-
Prior to any repairs make sure that you are familiar with the device as well as the location of its buttons and ports.
-
-
-
Insert the plastic opening tool between the bottom seam of the back panel and the micro SD port. The tool's edge should point toward the rear panel to prevent any scratching or damage.
-
Follow up with the plastic opening tool, releasing the clips as you go all the way around the device.
-
-
-
-
The clips will be released in the order specified as the spudger tool is moved along the seam around the device.
-
-
-
Use a plastic opening tool to pry the speakers out of the rear case.
-
The rear case will now be free from the rest of the device.
-


To reassemble your device, follow these instructions in reverse order.
To reassemble your device, follow these instructions in reverse order.
Отменить: Я не выполнил это руководство.
Еще один человек закончил это руководство.
Команда

UMass Dartmouth, Team 1-6, Miles Spring 2015 Участник UMass Dartmouth, Team 1-6, Miles Spring 2015
UMASSD-MILES-S15S1G6
4 членов
Автор 8 руководств