Введение
This is a guide for replacing the CR2032 battery inside an SN Programmable controller (model SV-336).
The SN Programmable was an arcade-style controller for the SNES with the ability to learn combinations of moves, and replay them using special action buttons. The controller remembers these combos with the use of a CR2032 battery backup for the onboard memory, and the official instructions say to mail the entire unit back to the manufacturer to get the battery replaced - this is obviously no longer an option. This guide walks you through replacing that battery to get your SN Programmable back to 100%.
Just looking for the original user manual, so you can program new codes into your controller? You can find that here: https://archive.org/details/sn-programma...
Выберете то, что вам нужно
-
-
For this procedure you will need:
-
An SN Programmable
-
A #1 Phillips screwdriver - the screws are actually #2, but some #2 screwdrivers may be too thick to reach into the screw holes.
-
A small flat-head screwdriver to lift the battery out of its holder.
-
A flat blade to pop/crumble the rubber feet off the bottom of the controller.
-
A new CR2032 coin cell battery.
-
Disregard the ominous black circle over the joystick handle in all the photos - it's difficult to take photos of extremely shiny things without showing off the entirety of your untidy workspace.
-
-
-
There are five screws to undo - one in the bottom centre (just above the two smaller holes), and four underneath the rubber feet. You will need to peel the feet off the case to access these - mine were so aged and stiffened they crumbled apart when I tried. You can optionally replace these later with new rubber feet up to 14mm in diameter.
-
Push down hard when starting to loosen each a screw. They have been set in hard, cheap plastic for possibly decades, and may take some force to start moving.
-
-
-
-
Once you've removed all five screws from the bottom, turn the controller upright again and remove the top plastic cover - it should lift off easily. The side buttons are likely to pop out - make sure you keep both the grey plastic button and the spring. Take care to ease the cable out from the top of the case as it may be firmly fitted into it.
-
-
-
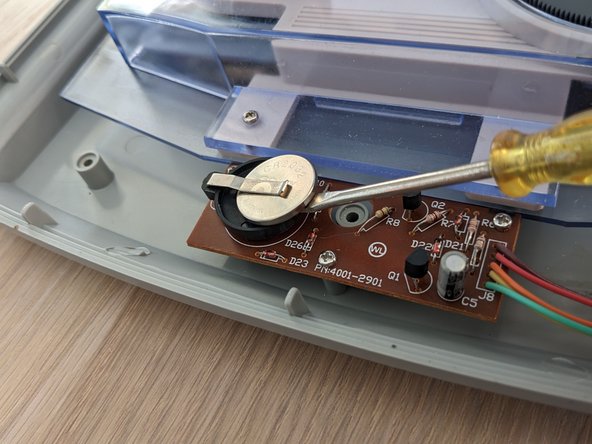
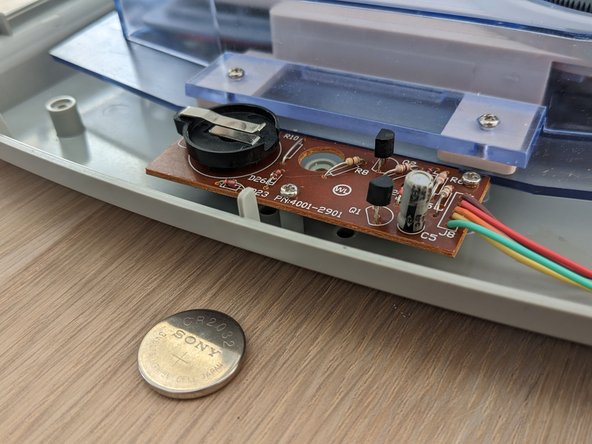
The CR2032 battery is in a holder in a separate circuit board at the front edge of the controller. Use a small flat-head screwdriver to lever it upwards, then slide it out of its holder to the right.
-
Slide the replacement battery in.
-
-
-
Re-install the top cover of the controller, taking care to line up the cable and the "slow", "set", "mode" and "start" buttons with their respective holes.
-
Leave the side buttons out, for now.
-
Flip the controller over and re-install all five screws (and replacement rubber feet, if need be).
-
-
-
Now's the time to pop the side buttons back in. Pop the spring back over the button's shaft, and firmly press the button back into place. It will take some force to do, but it will snap back in.
-


You're all done! Time to plug your controller in and double-check all the buttons work correctly. The SN Programmable's screen will show a little box to represent each button when it's pushed. Use this to make sure pressing each button produces an input of some kind.
