Введение
This guide shows you how to replace the camera on your phone.
Выберете то, что вам нужно
-
-
Use your fingernail or the plastic opening tool under the slit to pull the back cover off.
-
-
-
Making sure your hands are dry, insert your fingernail beneath the battery and remove it.
-
-
-
-
Use a Phillips #00 Precision Screwdriver to remove the six screws in the back of the phone.
-
Place the screws on a magnetic mat to prevent losing them.
-
-
-
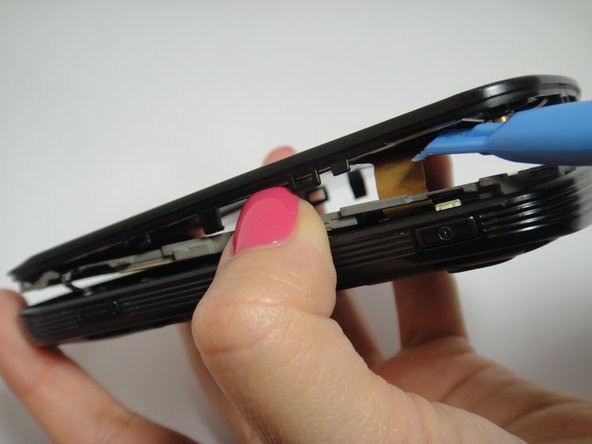
Place the Plastic Opening tool on the outside rim of the back cover.
-
Carefully circle around the rim to open the inside back cover completely.
-
Disconnect the ribbon cables and remove the back cover.
-
-
-
Carefully disconnect the volume button, the microphone connector, and the screen connector from the motherboard.
-
Pull back the side clips and lift the motherboard slowly.
-
-
-
Use the plastic opening tool to disconnect the camera from the phone.
-
Connect the new camera into the motherboard.
-


To reassemble your device, follow these instructions in reverse order.
To reassemble your device, follow these instructions in reverse order.
Отменить: Я не выполнил это руководство.
11 участников успешно повторили данное руководство.
Команда

USF Tampa, Team 7-5, Remmell Winter 2015 Участник USF Tampa, Team 7-5, Remmell Winter 2015
USFT-REMMELL-W15S7G5
4 членов
Автор 4 руководств