Перейти к основному содержанию

Samsung BlackJack II Audio Receiver Replacement

Выберете то, что вам нужно

  1. Samsung BlackJack II Audio Receiver Replacement, Battery: шаг 1, изображение 1 из 3 Samsung BlackJack II Audio Receiver Replacement, Battery: шаг 1, изображение 2 из 3 Samsung BlackJack II Audio Receiver Replacement, Battery: шаг 1, изображение 3 из 3
    • Apply downward pressure to the top of the battery panel while pulling down to slide it off the phone.

  2. Samsung BlackJack II Audio Receiver Replacement: шаг 2, изображение 1 из 3 Samsung BlackJack II Audio Receiver Replacement: шаг 2, изображение 2 из 3 Samsung BlackJack II Audio Receiver Replacement: шаг 2, изображение 3 из 3
    • Locate the grooves on the sides of the battery near the bottom of the phone. Use your fingers to pull the battery up and out of the phone.

  3. Samsung BlackJack II Audio Receiver Replacement, Back Casing: шаг 3, изображение 1 из 2 Samsung BlackJack II Audio Receiver Replacement, Back Casing: шаг 3, изображение 2 из 2
    • Use the spudger to pry the two plastic caps out of the top corners of the phone casing.

    • To get a better grip, you may use the tweezers to finish pulling the plastic caps from the phone.

  4. Samsung BlackJack II Audio Receiver Replacement: шаг 4, изображение 1 из 1
    • Remove the six 4.0 mm screws using the Phillips 00 screwdriver.

  5. Samsung BlackJack II Audio Receiver Replacement: шаг 5, изображение 1 из 3 Samsung BlackJack II Audio Receiver Replacement: шаг 5, изображение 2 из 3 Samsung BlackJack II Audio Receiver Replacement: шаг 5, изображение 3 из 3
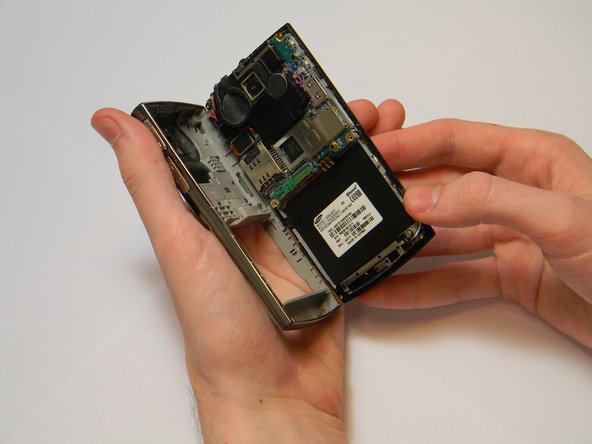
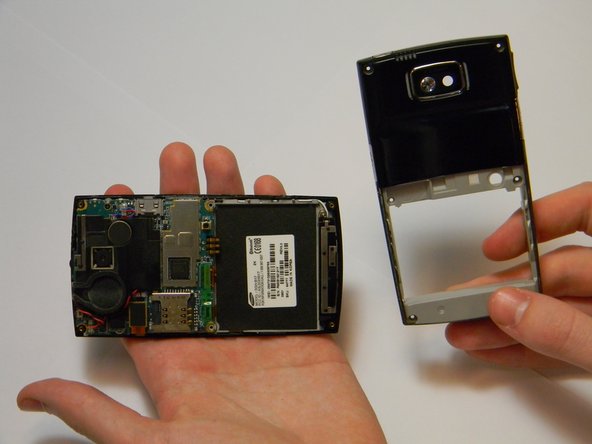
    • Insert the plastic opening tool in the gap between the back panel and rest of the body.

    • Slide the tool along the edges until the two pieces come apart.

    • The circuit board is attached to the front casing. Both casings should separate without having to sever electrical connections.

  6. Samsung BlackJack II Audio Receiver Replacement, Front Casing: шаг 6, изображение 1 из 2 Samsung BlackJack II Audio Receiver Replacement, Front Casing: шаг 6, изображение 2 из 2
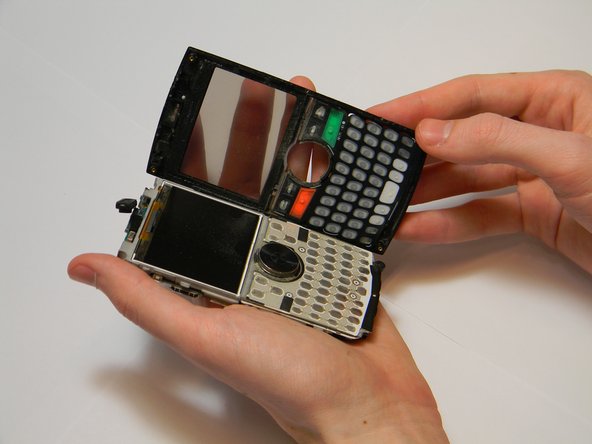
    • Pry apart the plastic tabs along the edges of the phone.

    • Separate the front panel from the main body of the phone using your fingers.

  7. Samsung BlackJack II Audio Receiver Replacement, Audio Receiver: шаг 7, изображение 1 из 1
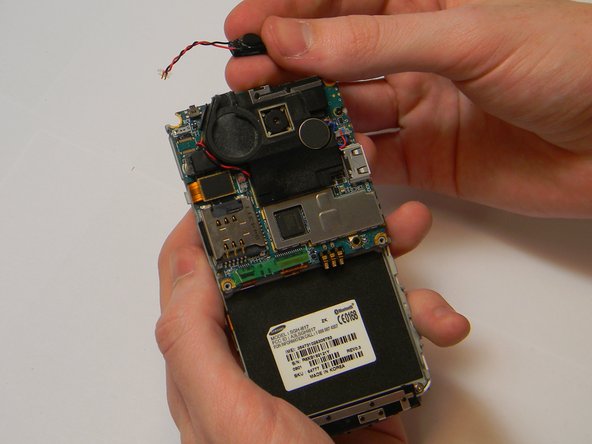
    • The audio receiver is a small rectangular piece connected via wire to the circuit board.

    • Carefully free the audio receiver so it is only connected by a small, clear plug on the circuit board.

  8. Samsung BlackJack II Audio Receiver Replacement: шаг 8, изображение 1 из 2 Samsung BlackJack II Audio Receiver Replacement: шаг 8, изображение 2 из 2
    • Use the spudger to separate the clear plug from its connector on the circuit board.

    • Use light force to avoid damaging any fragile components.

Заключение

To reassemble your device, follow these instructions in reverse order.

Ryan Rumsey

Участник с: 01/30/13

8 Репутация

Автор 6 руководств

Команда

Cal Poly, Team 20-1, Maness Winter 2013 Участник Cal Poly, Team 20-1, Maness Winter 2013

CPSU-MANESS-W13S20G1

4 членов

Автор 12 руководств

0 Комментариев

Добавить комментарий

Просмотр статистики:

За последние 24часов: 0

За последние 7 дней: 1

За последние 30 дней: 2

За всё время: 392