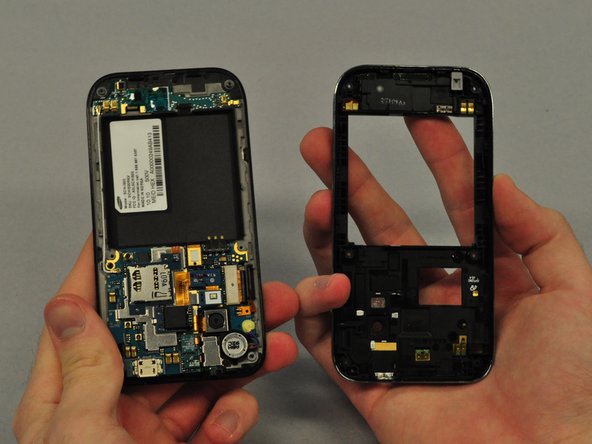
Перейти к основному содержанию

Samsung Fascinate Motherboard Replacement

Выберете то, что вам нужно

  1. Samsung Fascinate Motherboard Replacement, Back Case: шаг 1, изображение 1 из 3 Samsung Fascinate Motherboard Replacement, Back Case: шаг 1, изображение 2 из 3 Samsung Fascinate Motherboard Replacement, Back Case: шаг 1, изображение 3 из 3
    • To remove the back case of the Samsung Galaxy S, you may need a spudger.

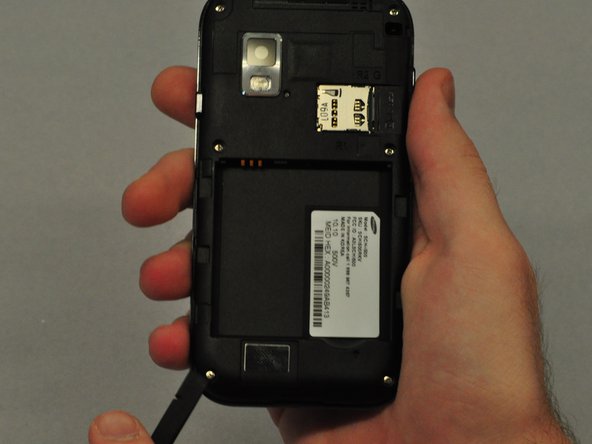
    • Identify the slit which is at the bottom edge of the phone.

  2. Samsung Fascinate Motherboard Replacement: шаг 2, изображение 1 из 2 Samsung Fascinate Motherboard Replacement: шаг 2, изображение 2 из 2
    • Insert the edge of the spudger into the slit and use it to pry the back case off of the phone.

  3. Samsung Fascinate Motherboard Replacement, Battery: шаг 3, изображение 1 из 2 Samsung Fascinate Motherboard Replacement, Battery: шаг 3, изображение 2 из 2
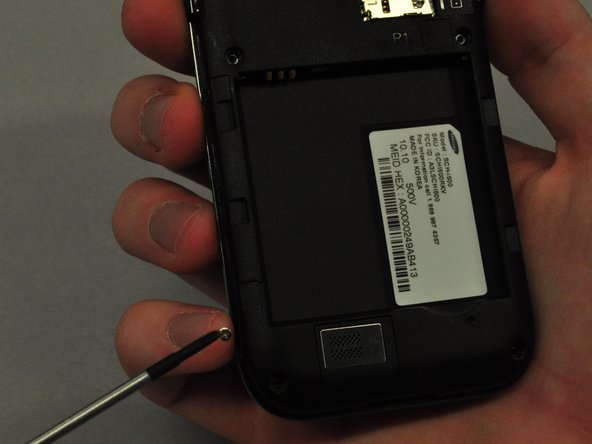
    • Insert the spudger into the space between the battery and the phone and pry the battery out as you slide it along the underside the battery.

  4. Samsung Fascinate Motherboard Replacement, Speaker: шаг 4, изображение 1 из 3 Samsung Fascinate Motherboard Replacement, Speaker: шаг 4, изображение 2 из 3 Samsung Fascinate Motherboard Replacement, Speaker: шаг 4, изображение 3 из 3
    • Use the screwdriver to unscrew each of the 6 silver screws holding the main case to the LCD touchscreen.

    • If the screws are stuck, use the spudger to pry them out.

  5. Samsung Fascinate Motherboard Replacement: шаг 5, изображение 1 из 3 Samsung Fascinate Motherboard Replacement: шаг 5, изображение 2 из 3 Samsung Fascinate Motherboard Replacement: шаг 5, изображение 3 из 3
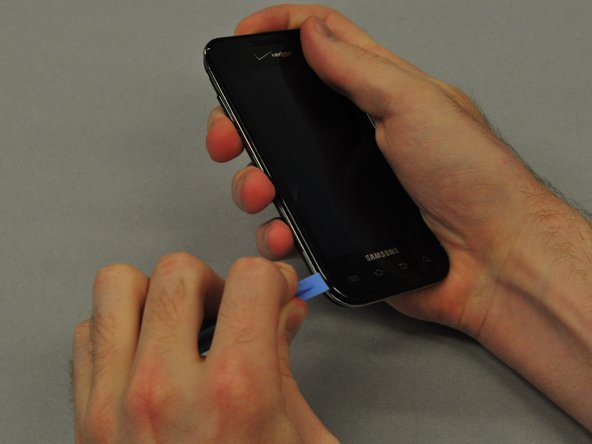
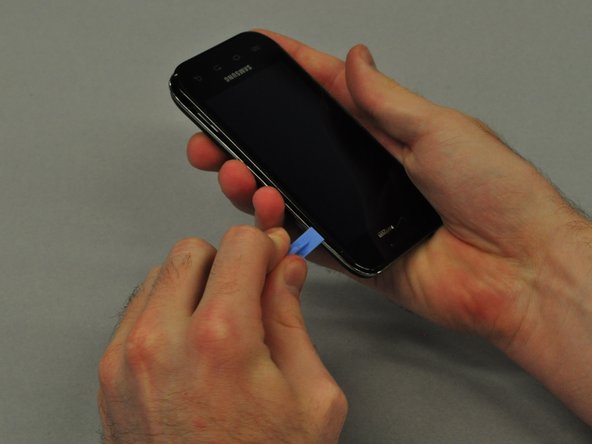
    • Use the plastic opening tool to pry the main case from the LCD touchscreen.

    • Insert the thin edge of the plastic opening tool into the groove between the silver edge and black edge.

    • Run the tool all the way around the edge of the phone until you hear each of the clips detach.

  6. Samsung Fascinate Motherboard Replacement: шаг 6, изображение 1 из 3 Samsung Fascinate Motherboard Replacement: шаг 6, изображение 2 из 3 Samsung Fascinate Motherboard Replacement: шаг 6, изображение 3 из 3
    • Once the clips are detached, separate the main case from the LCD touchscreen.

  7. Samsung Fascinate Motherboard Replacement: шаг 7, изображение 1 из 3 Samsung Fascinate Motherboard Replacement: шаг 7, изображение 2 из 3 Samsung Fascinate Motherboard Replacement: шаг 7, изображение 3 из 3
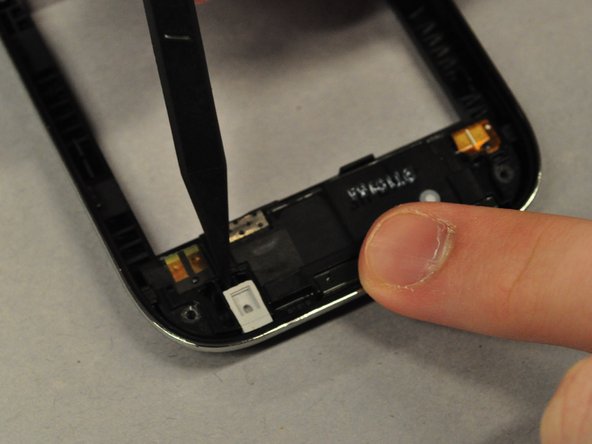
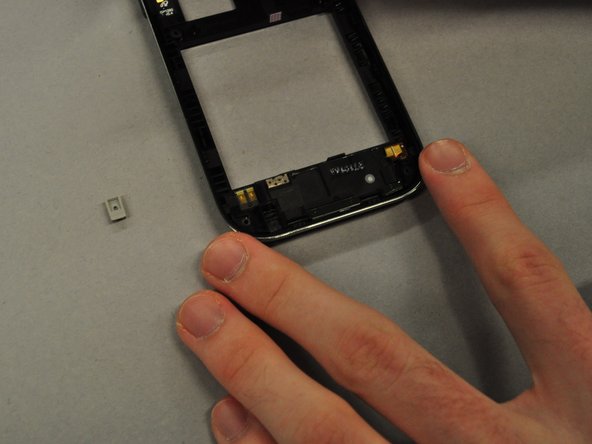
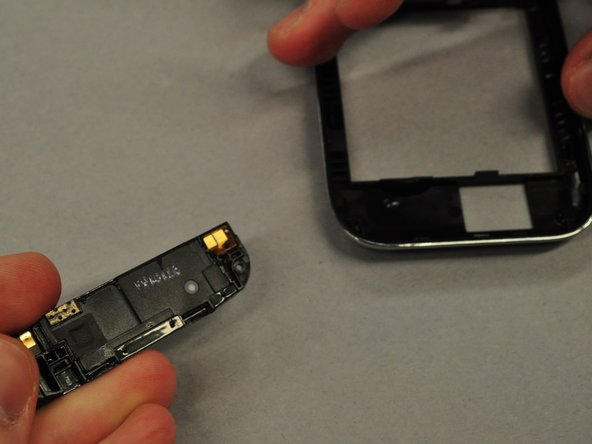
    • Use the spudger to pry out the grey rubber rectangular component from the main case.

  8. Samsung Fascinate Motherboard Replacement: шаг 8, изображение 1 из 3 Samsung Fascinate Motherboard Replacement: шаг 8, изображение 2 из 3 Samsung Fascinate Motherboard Replacement: шаг 8, изображение 3 из 3
    • Use the spudger to pry along the groove between the speaker and the main case.

    • Once the speaker is unclipped it should pop out easily.

  9. Samsung Fascinate Motherboard Replacement, Camera: шаг 9, изображение 1 из 3 Samsung Fascinate Motherboard Replacement, Camera: шаг 9, изображение 2 из 3 Samsung Fascinate Motherboard Replacement, Camera: шаг 9, изображение 3 из 3
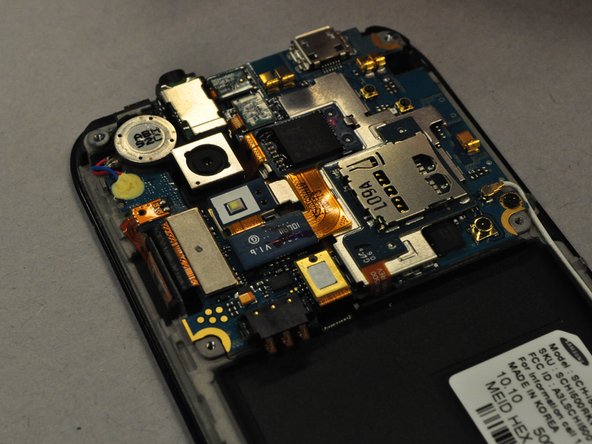
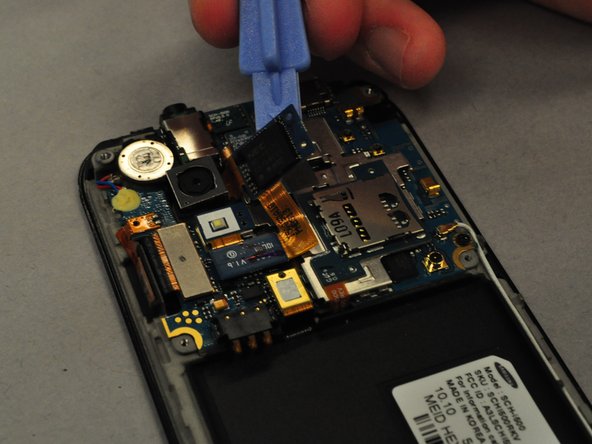
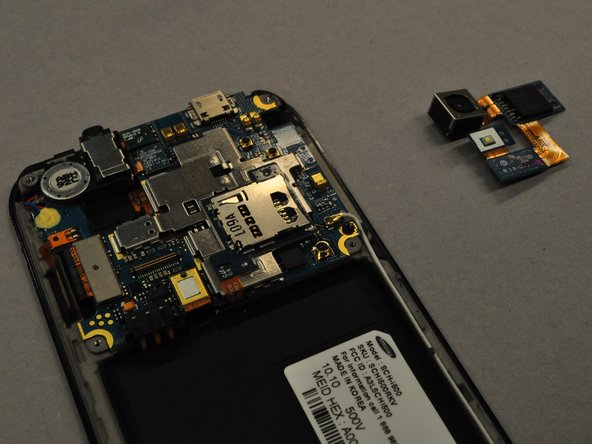
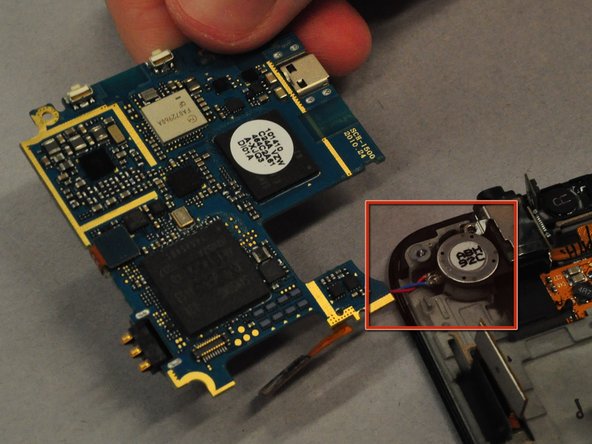
    • Using the plastic opening tool, you will need to detach the black square component which is boxed in blue.

    • Pry camera unit attached to it off the motherboard.

  10. Samsung Fascinate Motherboard Replacement, Motherboard: шаг 10, изображение 1 из 3 Samsung Fascinate Motherboard Replacement, Motherboard: шаг 10, изображение 2 из 3 Samsung Fascinate Motherboard Replacement, Motherboard: шаг 10, изображение 3 из 3
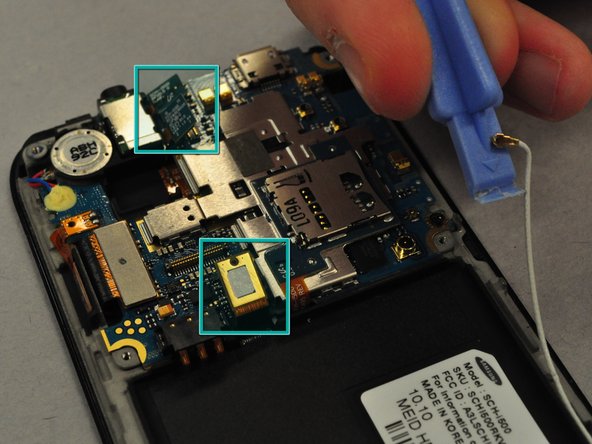
    • Use the plastic opening tool to disconnect the white wire boxed in red.

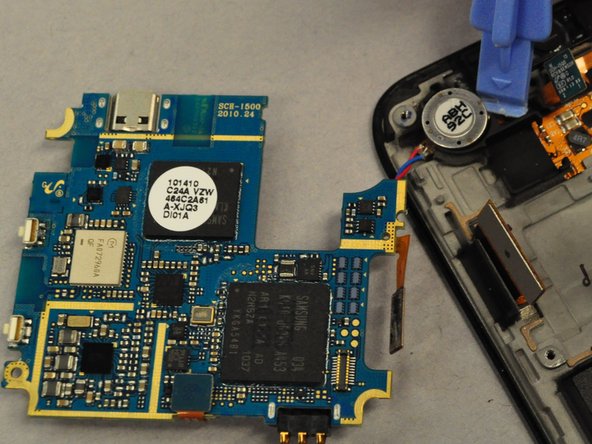
    • Carefully disconnect the green and golden boxed components from the motherboard.

    • The boxed components do not completely detached from the motherboard.

  11. Samsung Fascinate Motherboard Replacement: шаг 11, изображение 1 из 3 Samsung Fascinate Motherboard Replacement: шаг 11, изображение 2 из 3 Samsung Fascinate Motherboard Replacement: шаг 11, изображение 3 из 3
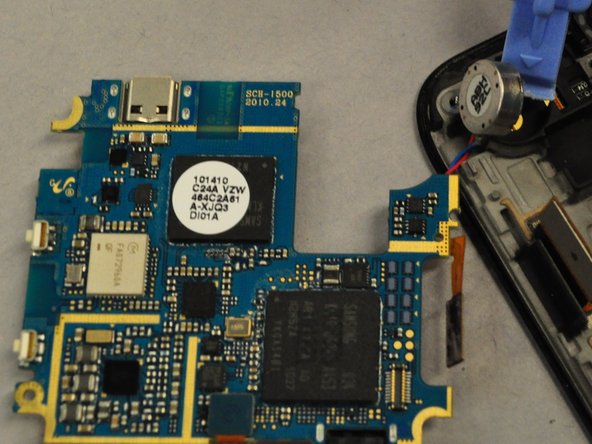
    • Use the screwdriver to remove the black screw circled in blue.

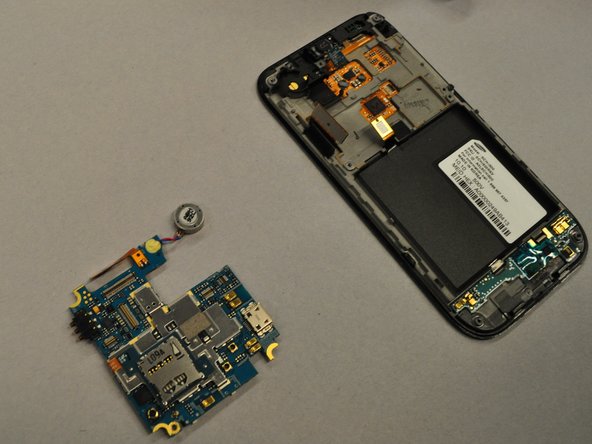
    • Lift the motherboard off of the touchscreen.

    • The motherboard is still attached to the phone by wires. Do not pull on the wires.

  12. Samsung Fascinate Motherboard Replacement: шаг 12, изображение 1 из 3 Samsung Fascinate Motherboard Replacement: шаг 12, изображение 2 из 3 Samsung Fascinate Motherboard Replacement: шаг 12, изображение 3 из 3
    • Using the plastic opening tool, gently pry the silver cylinder out of its housing.

    • The cylinder is held in place by a weak adhesive and shouldn't be too difficult to remove.

Заключение

To reassemble your device, follow these instructions in reverse order.

2 участников успешно повторили данное руководство.

Kevin Carlson

Участник с: 04/22/11

236 Репутация

Автор 6 руководств

Команда

Cal Poly, Team 25-25, Garner Spring 2011 Участник Cal Poly, Team 25-25, Garner Spring 2011

CPSU-GARNER-S11S25G25

4 членов

Автор 6 руководств

0 Комментариев

Добавить комментарий

Просмотр статистики:

За последние 24часов: 0

За последние 7 дней: 0

За последние 30 дней: 3

За всё время: 7,485