Введение
Use this guide to replace the back cover of your Samsung Galaxy A50.
You’ll need replacement adhesive to reattach the back cover when reassembling the device.
Выберете то, что вам нужно
-
-
Start by switching off your phone.
-
Heat an iOpener and apply it to the back cover to soften the adhesive.
-
-
-
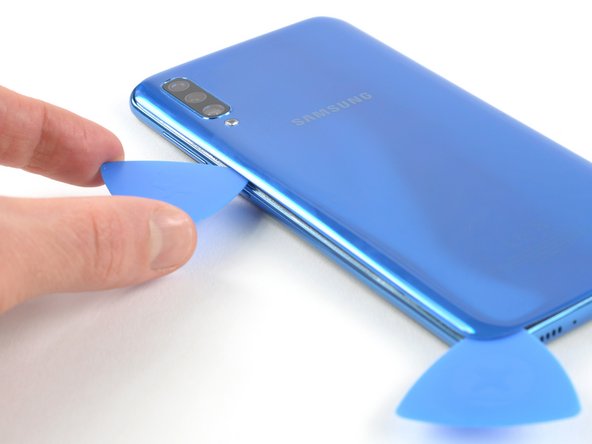
Insert an opening pick at the bottom of your phone near the USB-C port.
-
Slide the opening pick to the bottom left corner.
It would be much better to attempt the opening from the top of the phone as there is a delicate flex PCB antenna at the bottom just where you stick the pick in that can get damaged.
-
-
-
-
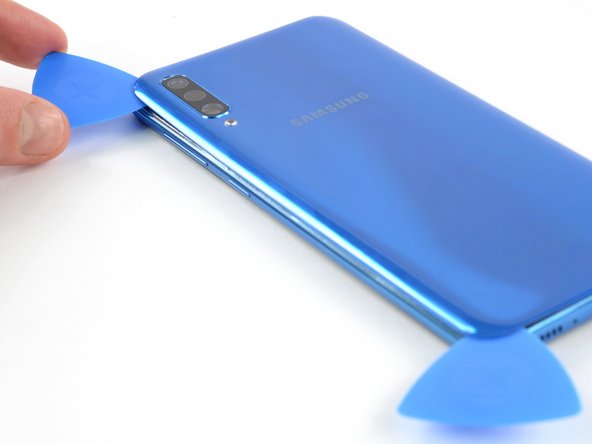
Insert a second opening pick and slide it from the bottom to the top left corner to cut the adhesive.
-
Leave the opening picks in place to prevent the adhesive from resealing.
-
-
-
Insert a third opening pick under the top left corner of the back cover.
-
Slide the opening pick along the top edge of the phone.
-
Leave the opening pick in the top right corner to prevent the adhesive from resealing.
-
-
-
Insert a fourth opening pick under the top right corner of the back cover.
-
Slide the tip of the opening pick along the side of the phone to the bottom right corner to cut the adhesive.
-
Leave the opening pick in the bottom right corner to prevent the adhesive from resealing.
-
-
-
Remove the back cover.
Very straight forward and simple replacement to do with the right tools, I used my hot air gun work station so this might have been alot easier for me then someone without one? Hair dryers work too, just in case a hot airgun station is not available to you dont worry you can do this repair without, but some form of heat will make life alot simpler :)
-


To reassemble your device, follow these instructions in reverse order.
Apply new adhesive where necessary after cleaning the relevant areas with isopropyl alcohol (>90%). Secure the new back cover with pre-cut adhesive or double-sided adhesive tape.
To reassemble your device, follow these instructions in reverse order.
Apply new adhesive where necessary after cleaning the relevant areas with isopropyl alcohol (>90%). Secure the new back cover with pre-cut adhesive or double-sided adhesive tape.
Отменить: Я не выполнил это руководство.
15 участников успешно повторили данное руководство.


Один комментарий
Thank you for this write up, I wanted to insure there were no connections and overall it's just something I practice to make sure to double check rather a back cover has any hidden surprises, Trust me I've learned from experience not to Assume anything, lol. Take care, and thanks
Nur ein kleiner Tippfehler-Hinweis: (Überhitze das Gerät nicht)
Jonas Hahn - Ответить
OK, korrigiert. Das kann übrigens jeder machen, iFixit ist ein Wiki.
VauWeh -
how long should the heat pack be used for?
David Hall - Ответить
The heat pack is in the wrong position in photo - the glue that you are heating is actually all around the edge of the phone!
David Hall - Ответить