Перейти к основному содержанию

Samsung Galaxy Fame S6812i Vibration Unit Replacement

Выберете то, что вам нужно

  1. Samsung Galaxy Fame S6812i Vibration Unit Replacement, Remove the Backplate: шаг 1, изображение 1 из 2 Samsung Galaxy Fame S6812i Vibration Unit Replacement, Remove the Backplate: шаг 1, изображение 2 из 2
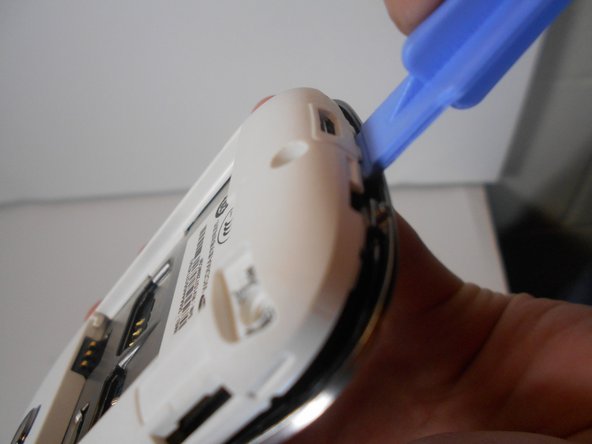
    • Locate the small indent in the top of the device and use your nails or a spudger to separate the backplate from the mid-frame.

  2. Samsung Galaxy Fame S6812i Vibration Unit Replacement, Remove the Battery: шаг 2, изображение 1 из 2 Samsung Galaxy Fame S6812i Vibration Unit Replacement, Remove the Battery: шаг 2, изображение 2 из 2
    • Locate the indent on the bottom left corner of the battery compartment. Use your fingers or the plastic opening tool to lift the battery from the device.

  3. Samsung Galaxy Fame S6812i Vibration Unit Replacement, Remove the Mid-Frame: шаг 3, изображение 1 из 3 Samsung Galaxy Fame S6812i Vibration Unit Replacement, Remove the Mid-Frame: шаг 3, изображение 2 из 3 Samsung Galaxy Fame S6812i Vibration Unit Replacement, Remove the Mid-Frame: шаг 3, изображение 3 из 3
    • Remove the five 3mm screws along the top and bottom edges of the device with the Philips #00 screwdriver.

    • One of these will be hidden under a piece of reflective foil. Breaking this will void the warranty.

    • Use the plastic removal tool to work pry the mid-frame from the device.

    • This may take some effort, so try working around the edges slowly as to not break anything.

  4. Samsung Galaxy Fame S6812i Vibration Unit Replacement, Remove Damaged Vibration Unit: шаг 4, изображение 1 из 2 Samsung Galaxy Fame S6812i Vibration Unit Replacement, Remove Damaged Vibration Unit: шаг 4, изображение 2 из 2
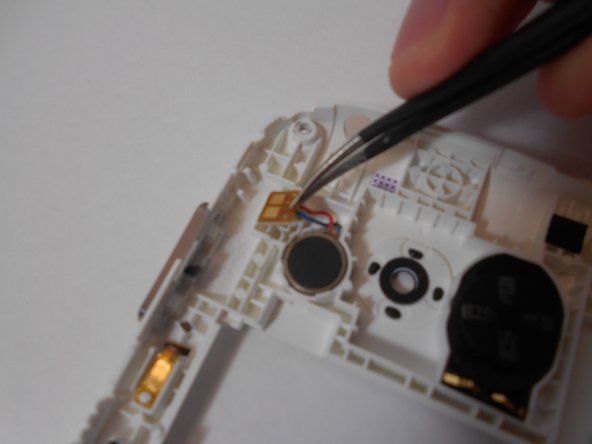
    • The vibration unit can be found on the internal side of the mid-frame, in the upper left corner.

    • Using the tweezers, remove the small plastic slip to the left of the unit. The optimal place to grab this is on the small flap on the slip's right.

    • Place the head of the tweezers in the small crevice on the bottom left of the device's housing and push up from under it. This will pop out the vibration unit.

    • These parts are held in via a weak adhesive; some amount of force may be required.

Заключение

To reassemble your device, follow these instructions in reverse order.

Еще один человек закончил это руководство.

Taylor

Участник с: 01/30/15

1 165 Репутация

Автор 5 руководств

Команда

USF Tampa, Team 16-6, Watkins Winter 2015 Участник USF Tampa, Team 16-6, Watkins Winter 2015

USFT-WATKINS-W15S16G6

2 членов

Автор 5 руководств

0 Комментариев

Добавить комментарий

Просмотр статистики:

За последние 24часов: 0

За последние 7 дней: 0

За последние 30 дней: 1

За всё время: 302