Перейти к основному содержанию

Samsung Galaxy Note 10.1 Speaker Replacement

Выберете то, что вам нужно

  1. Samsung Galaxy Note 10.1 Speaker Replacement, Removing the Top Piece: шаг 1, изображение 1 из 3 Samsung Galaxy Note 10.1 Speaker Replacement, Removing the Top Piece: шаг 1, изображение 2 из 3 Samsung Galaxy Note 10.1 Speaker Replacement, Removing the Top Piece: шаг 1, изображение 3 из 3
    • This is the back of the device and where you willl begin to take it apart

    • It is necessary to remove the silver piece covering the camera first before removing the bigger back piece.

    • Use the plastic opening tools to pry along the indicated box.

    • Lift up the silver piece to reveal the rest of the back cover.

  2. Samsung Galaxy Note 10.1 Speaker Replacement, Removing the Back Cover: шаг 2, изображение 1 из 3 Samsung Galaxy Note 10.1 Speaker Replacement, Removing the Back Cover: шаг 2, изображение 2 из 3 Samsung Galaxy Note 10.1 Speaker Replacement, Removing the Back Cover: шаг 2, изображение 3 из 3
    • Unscrew the three 5 mm screws indicated by the red circles with the Philips #00 screwdriver.

    • Using the plastic opening tools pry along the bottom of the device, moving to the sides of the cover to the top.

    • Remove the back cover.

    • At this point use anti-static gloves or do NOT take it apart on carpet.

  3. Samsung Galaxy Note 10.1 Speaker Replacement, Removing Ribbons Covering the Battery: шаг 3, изображение 1 из 3 Samsung Galaxy Note 10.1 Speaker Replacement, Removing Ribbons Covering the Battery: шаг 3, изображение 2 из 3 Samsung Galaxy Note 10.1 Speaker Replacement, Removing Ribbons Covering the Battery: шаг 3, изображение 3 из 3
    • Carefully remove all of the ribbons that connect over the battery from the locations indicated by the yellow circles.

  4. Samsung Galaxy Note 10.1 Speaker Replacement, Removing the Battery: шаг 4, изображение 1 из 3 Samsung Galaxy Note 10.1 Speaker Replacement, Removing the Battery: шаг 4, изображение 2 из 3 Samsung Galaxy Note 10.1 Speaker Replacement, Removing the Battery: шаг 4, изображение 3 из 3
    • Remove all of the 3 mm screws indicated by a red circle with the #00 Philips screwdriver.

    • Disconnect the battery from the location indicated by a yellow circle

    • Now you may remove the battery.

  5. Samsung Galaxy Note 10.1 Speaker Replacement, Removing the Components Around the Motherboard: шаг 5, изображение 1 из 3 Samsung Galaxy Note 10.1 Speaker Replacement, Removing the Components Around the Motherboard: шаг 5, изображение 2 из 3 Samsung Galaxy Note 10.1 Speaker Replacement, Removing the Components Around the Motherboard: шаг 5, изображение 3 из 3
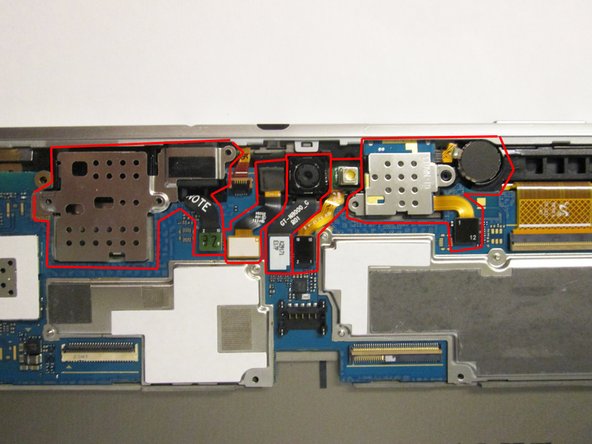
    • From the first photo:

    • Remove all the components marked by yellow circles

    • Unscrew all the 2 and 3 mm screws marked by the red circles with the #00 Philips screwdriver.

    • From the second photo:

    • Starting with the motherboard connectors, remove all the components marked in red.

    • Please place all components removed after this point in a static-free area or in anti-static bags.

    • Please note that you can only remove the ribbon attached to the headphone jack and the metal covering it on the far left. Do not attempt to remove the whole piece at this time.

  6. Samsung Galaxy Note 10.1 Speaker Replacement, Removing the Motherboard: шаг 6, изображение 1 из 3 Samsung Galaxy Note 10.1 Speaker Replacement, Removing the Motherboard: шаг 6, изображение 2 из 3 Samsung Galaxy Note 10.1 Speaker Replacement, Removing the Motherboard: шаг 6, изображение 3 из 3
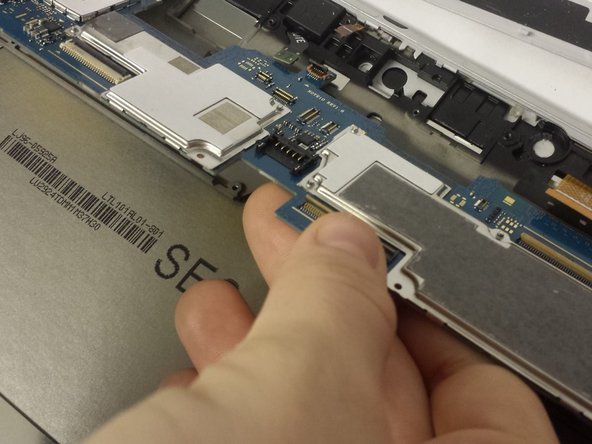
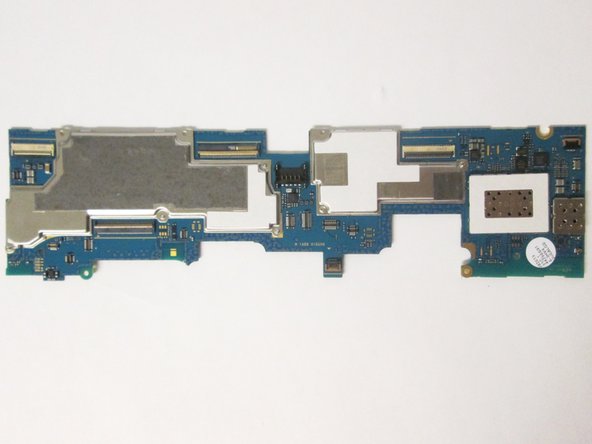
    • Once you have removed all the components connected to the motherboard, gently lift up on the area surrounding the green box and remove your motherboard.

    • Please place the motherboard in a static-free area or in anti-static bags.

  7. Samsung Galaxy Note 10.1 Speaker Replacement, Remove the loudspeaker modules: шаг 7, изображение 1 из 3 Samsung Galaxy Note 10.1 Speaker Replacement, Remove the loudspeaker modules: шаг 7, изображение 2 из 3 Samsung Galaxy Note 10.1 Speaker Replacement, Remove the loudspeaker modules: шаг 7, изображение 3 из 3
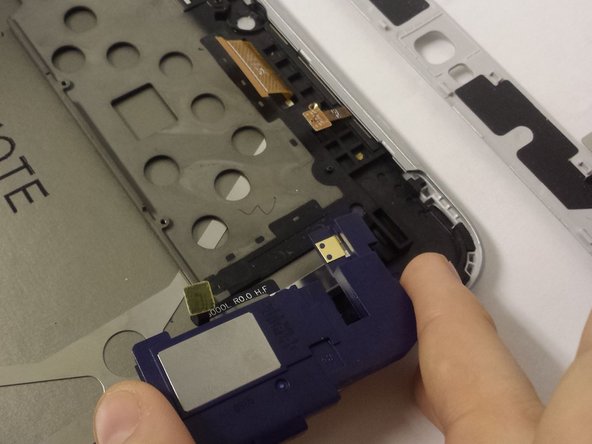
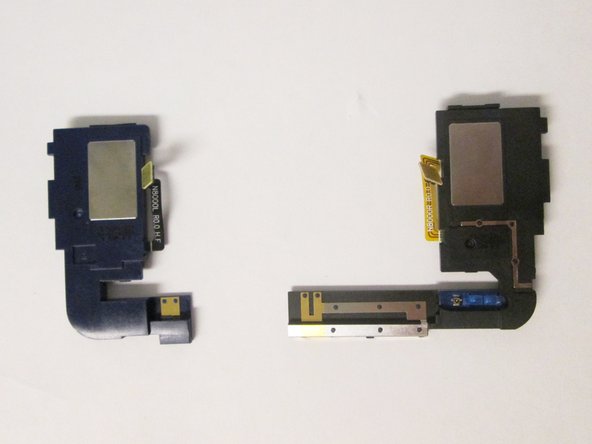
    • Apply pressure to the locations boxed in red to remove the loudspeaker modules.

    • These are your loudspeaker modules, replace with the new parts

Заключение

To reassemble your device, follow these instructions in reverse order.

7 участников успешно повторили данное руководство.

Bryan Fernandez

Участник с: 09/22/14

241 Репутация

Автор 2 руководств

Команда

USF Tampa, Team 3-7, Brown Fall 2014 Участник USF Tampa, Team 3-7, Brown Fall 2014

USFT-BROWN-F14S3G7

3 членов

Автор 9 руководств

2 Комментариев

I wouldn't say that a guide "hopes" to do anything.

Dan Brown - Ответить

In Step 7, mention that you should use the plastic tools to pop the speakers out of the device.

John Peterson - Ответить

Добавить комментарий

Просмотр статистики:

За последние 24часов: 0

За последние 7 дней: 0

За последние 30 дней: 3

За всё время: 3,490