Введение
Use this guide to replace the USB board in a Samsung Galaxy Note II.
Выберете то, что вам нужно
-
-
Pry with a plastic opening tool, or your fingernail, in the divot to the left of the rear-facing camera, near the power button.
-
-
-
Lift the rear case by the corner nearest the divot and remove it from the phone.
-
-
-
If you have an SD card inserted, use the flat end of a spudger, or your fingernail, to press the microSD card slightly deeper into its slot until you hear a click.
-
After the click, release the card and it will pop out of its slot.
-
Remove the microSD card.
-
-
-
Insert a plastic opening tool, or your finger, into the notch of the battery compartment and lift the battery upward.
-
-
-
Remove the eleven 4.0 mm Phillips #00 screws securing the midframe to the display assembly.
In my phone some of the screws are litterally not ot turn - I screwed up one of the heads - be careful!
I have 2 note 2 phones model #: SGH-I317M. I have a broken screen that does not display in my note 2 but my brother's note 2 is working perfectly. Can I either transfer the motherboard in MY note 2 to my brothers note 2 or swap the broken screen with the new screen in my brother's note 2 ? Thanks. Reach me at anmac1789@gmail.com
-
-
-
-
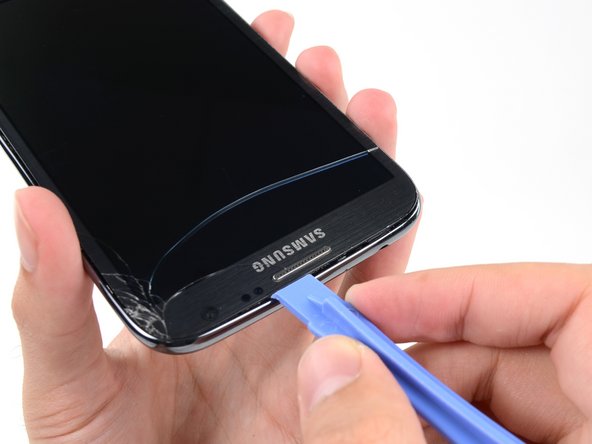
Insert your plastic opening tool between the midframe and front panel assembly on the side of the phone.
-
Slide the plastic opening tool down the seam.
I didn't have an opening tool, so I used a stiff guitar pick. Worked like a charm.
for best result without any scratches or breaking frame, open the frame on table (solid), don't open on hand.
-
-
-
Carefully pry around the corner with a plastic opening tool.
-
-
-
Push the plastic opening tool down to free the corner of the midframe from the display assembly.
-
-
-
Free the clips along the power button side of the phone.
-
Lastly, free the two clips along the top and bottom edge of battery compartment.
Start with the top clip. You can see it located next to the three battery connectors. Insert the spludge from the side gently to push, the clip should go off.
Once this clip is off, the bottom battery clip can be unclipped simply by gently moving the two pieces apart.
Gan kalok bluetooth hp saya sama wifi nya nggak bisa nelusurin jaringan apa nya yg rusak apa gara gara udah di root
If you're primarily following the pictures, as I was, you might be frustrated that your display assembly isn't popping off. Unfortunately, a vital step was listed in the instructions but not photographed:
"Lastly, there are two clips along the top and bottom edge of battery compartment that also hold the display assembly in place."
-
-
-
Lift the display assembly out of the midframe.
-
-
-
Remove the 3 mm Phillips #00 screw from the speaker enclosure.
-
-
-
Using the flat end of a spudger, disconnect the USB board cable connector.
-
Use the tip of a spudger to disconnect the antenna cable connector from the USB board.
-
-
-
Push the flat end of a spudger under the USB board to separate it from the display assembly.
-
-
-
Remove the USB board from the display assembly.
-
To reassemble your device, follow these instructions in reverse order.
To reassemble your device, follow these instructions in reverse order.
Отменить: Я не выполнил это руководство.
67 участников успешно повторили данное руководство.
10 Комментариев
Very good tutorial of the process needed to do this repair. Sadly the one that I was trying to repair had been dropped and the circuit board right where the charge pcb attaches was physically cracked. Did not find that problem until actually removing the original part and throughly inspecting the connect area. Thank You again for an excellent tutorial and dialogue.
Excellent tutorial regarding the disassembly of the Note II and replacement if the charge circuit board. Sadly the device i have had been dropped and the main circuit board where the charge PCB plugs into it was fractured. After removal of the original charge board through inspection noted the original problem was the cracked main PCB. :( Now I have a Note II with a good case and display but damaged main circuit board.
I replaced my USB board and success. However my speakers are not working now. Someone please guide me .
did you try another charge port? the small gold piece with a small hole to the right of the charge port is the speaker. step 19
Oscar C -
Put in new usb board and now no charge recognition upon male micro usb plug insertion rechecked connections all are ok
do I need to have phone recognize new board ?
New usb port no charging recognition upon plug intertion? Any help needed much appreciated
My cellphone doesn't boot correctly after switching the usb port. I only see the start screen, after that it just turns off. Anyone with the same problem?
Where can I buy a USB Port for my note2


