Эта версия возможно содержит некорректные исправления. Переключить на последнюю проверенную версию.
Выберете то, что вам нужно
-
Этот шаг не переведен. Помогите перевести
-
Prepare an iOpener and apply it to the left edge of the back panel for one minute.
-
-
Этот шаг не переведен. Помогите перевести
-
Apply a suction cup to the heated edge of the back panel, as close to the edge as possible.
-
Pull up on the suction cup with strong, steady force to create a gap between the back panel and the frame.
-
Insert the point of an opening pick into the gap.
-
-
Этот шаг не переведен. Помогите перевести
-
Slide the opening pick along the left edge towards the bottom left corner to slice the adhesive.
-
Leave the pick inserted in the bottom left corner to prevent the adhesive from re-sealing.
-
-
Этот шаг не переведен. Помогите перевести
-
Insert a second opening pick and slide it across the left side towards the top left corner to slice the adhesive.
-
Leave the pick inserted in the top left corner to prevent the adhesive from re-sealing.
-
-
Этот шаг не переведен. Помогите перевести
-
Prepare an iOpener and apply it to the top edge of the phone for one minute.
-
-
Этот шаг не переведен. Помогите перевести
-
Insert a third opening pick into the gap on the top edge of the phone.
-
Slide the opening pick to the top right corner, slicing the adhesive.
-
Leave the pick inserted in the top right corner to prevent the adhesive from re-sealing.
-
-
Этот шаг не переведен. Помогите перевести
-
Prepare an iOpener and apply it to the right edge of the phone for one minute.
-
-
Этот шаг не переведен. Помогите перевести
-
Insert a fourth and final opening pick into the gap on the right side of the phone, sliding it down towards the bottom right corner of the phone to slice the adhesive.
-
Slide an opening pick back and forth around the entire perimeter of the phone to release any missed adhesive, reheating if you find any extra-stubborn adhesive.
-
-
Этот шаг не переведен. Помогите перевести
-
Use a Phillips screwdriver to remove the five 4 mm screws securing the wireless charging coil.
-
-
-
Этот шаг не переведен. Помогите перевести
-
Use a pair of tweezers to lift up and flip back the metal shield covering the battery connector.
-
-
Этот шаг не переведен. Помогите перевести
-
While holding the metal shield up and out of the way, use the pointed end of a spudger to pry up the battery connector to disconnect it.
-
-
Этот шаг не переведен. Помогите перевести
-
Use the pointed end of a spudger to disconnect the wireless charging coil connector from the motherboard.
-
-
Этот шаг не переведен. Помогите перевести
-
Tilt the metal shielding up so you can grip it with your fingers.
-
Peel the wireless charging coil up and away from the device.
-
Remove the wireless charging coil.
-
-
Этот шаг не переведен. Помогите перевести
-
Use a Phillips screwdriver to remove the four 4 mm screws securing the top plastic cover.
-
-
Этот шаг не переведен. Помогите перевести
-
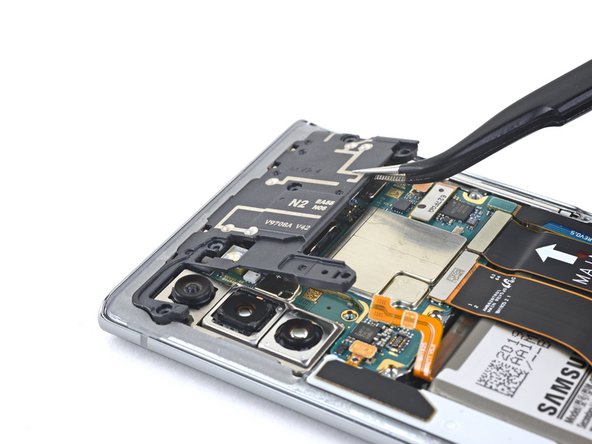
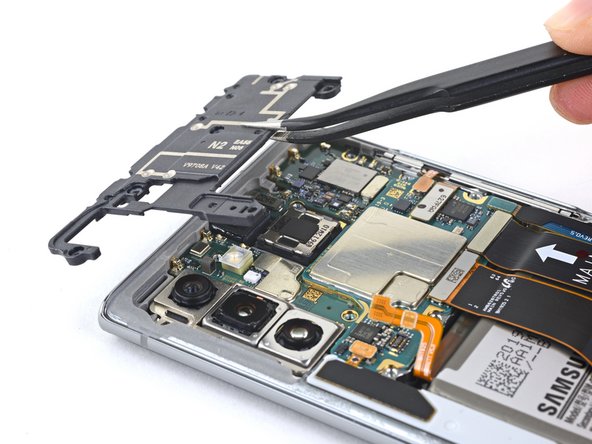
Use a pair of tweezers to pivot the top plastic cover up and off of the phone.
-
-
Этот шаг не переведен. Помогите перевести
-
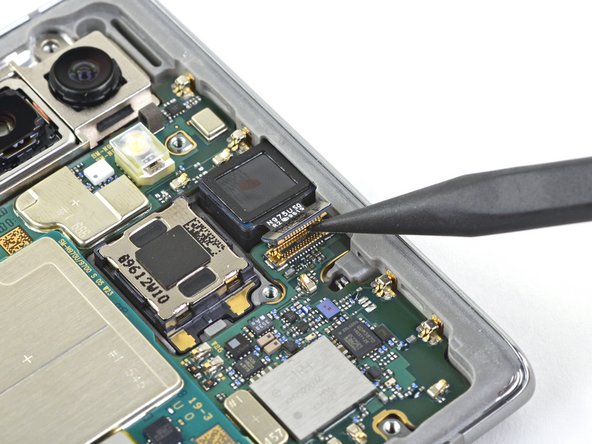
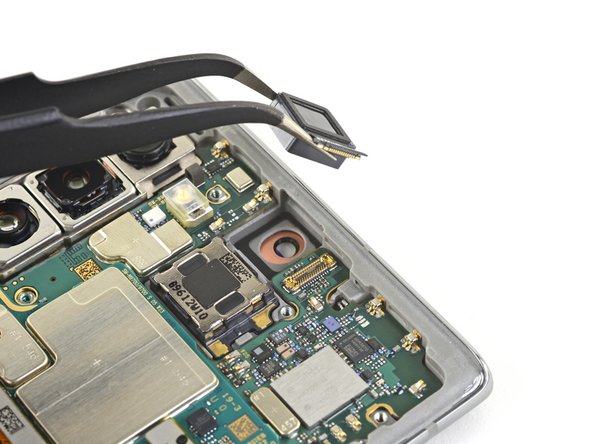
Use the pointed end of a spudger to pry the front-facing camera connector straight up from the motherboard.
-
-
Этот шаг не переведен. Помогите перевести
-
Use a Phillips screwdriver to remove the five 4 mm screws securing the loudspeaker.
-
-
Этот шаг не переведен. Помогите перевести
-
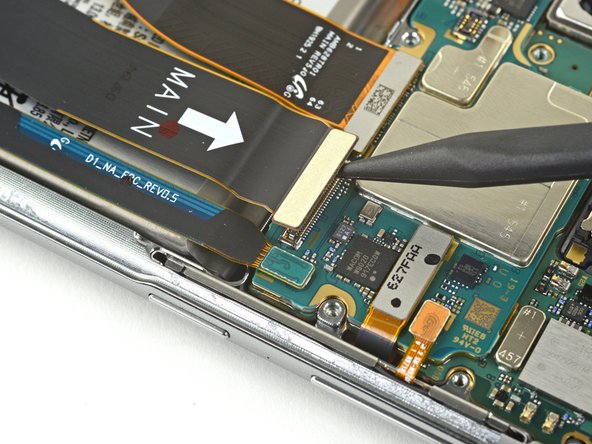
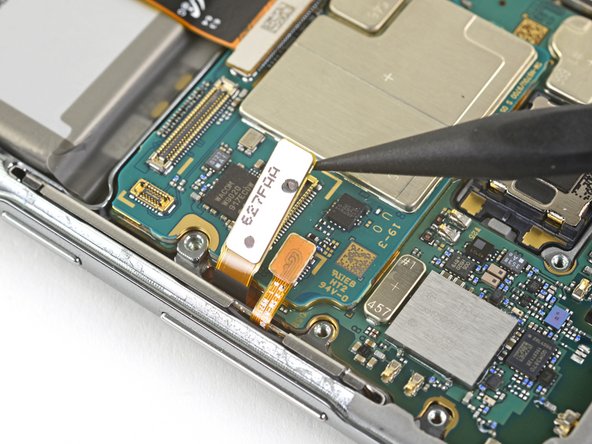
Use the pointed end of a spudger to disconnect the main interconnect cable from the motherboard.
-
Disconnect the secondary interconnect cable from the motherboard.
-
-
Этот шаг не переведен. Помогите перевести
-
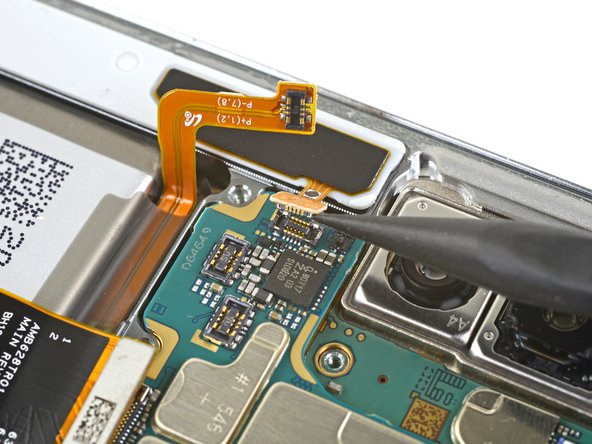
Use the pointed end of a spudger to disconnect the main interconnect cable from the daughterboard.
-
Disconnect the secondary interconnect cable from the daughterboard.
-
-
Этот шаг не переведен. Помогите перевести
-
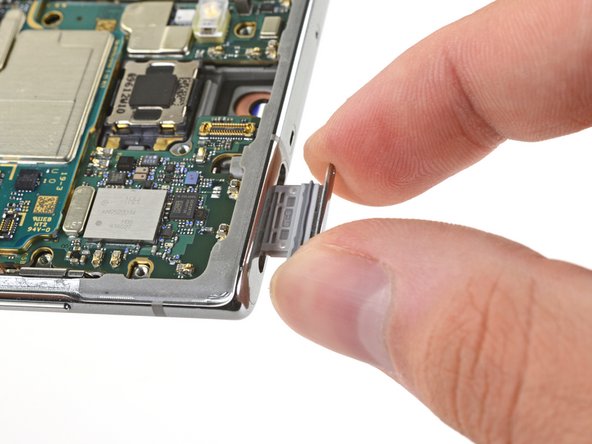
Insert a SIM eject tool, bit, or a straightened paper clip into the small hole on the SIM card tray on the top edge of the phone.
-
Press firmly to eject the tray.
-
Remove the SIM card tray.
-
-
Этот шаг не переведен. Помогите перевести
-
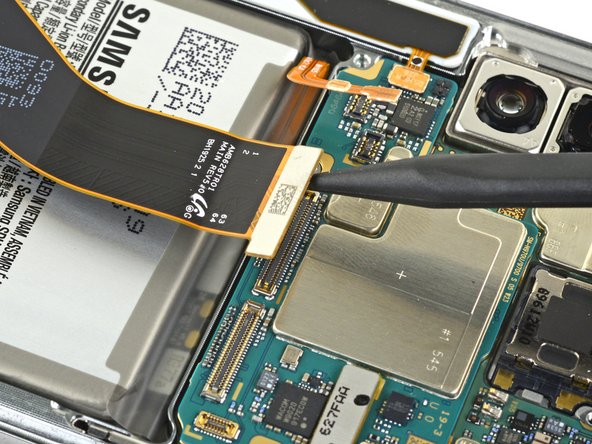
Use the pointed end of a spudger to disconnect the display cable from the motherboard.
-
-
Этот шаг не переведен. Помогите перевести
-
Use the pointed end of a spudger to disconnect the side button connector from the motherboard.
-
Disconnect the touch layer connector from the motherboard.
-
-
Этот шаг не переведен. Помогите перевести
-
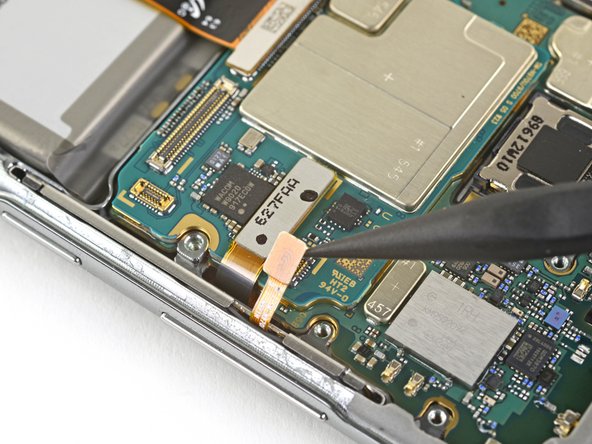
Use the pointed end of a spudger to disconnect the S-Pen charging coil connector from the motherboard.
-
-
Этот шаг не переведен. Помогите перевести
-
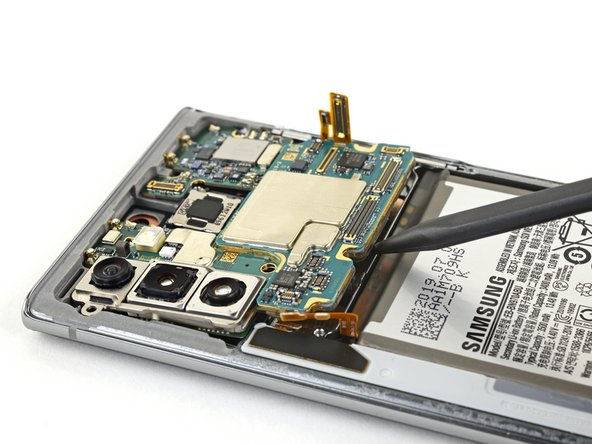
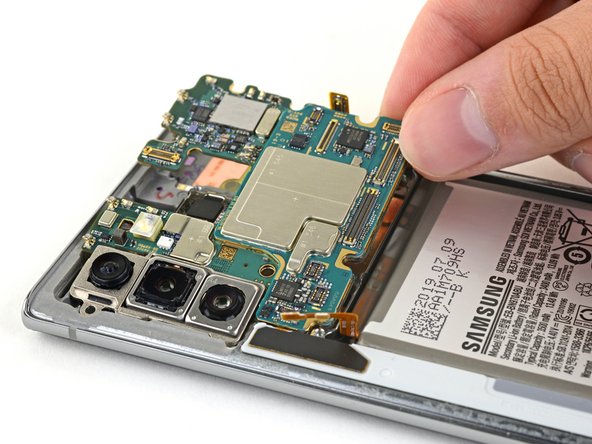
Use the pointed end of a spudger to pry up the motherboard enough to grip it with your fingers.
-
Remove the motherboard.
-


Отменить: Я не выполнил это руководство.
4 участников успешно повторили данное руководство.

