Введение
This replacement guide will walk you through how to replace the motherboard on your Samsung Galaxy Tab 3 Lite. Before doing this, you will need to remove the back case of your tablet first. The guide for how to do that is also included here.
Выберете то, что вам нужно
-
-
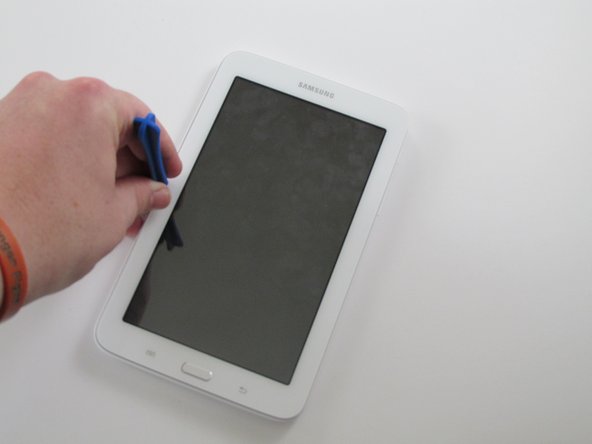
Using a plastic opening tool, wedge in the seam between the screen and the case.
-
Rock the tool by moving it towards and away from the middle of the screen, trying to separate the tape holding the screen and case together.
-
This is a long process, so don't try and rush it. Also, be careful about applying pressure.
-
-
-
After separating the tape holding the screen and case together, slowly start taking the screen off the case from the opposite side of the side with the buttons
-
-
-
Use a plastic opening tool to lift up the zero insertion force (ZIF) connector holding down the ribbon cable.
-
Use the precision tweezers to gently pull the ribbon cable out of the ZIF connector.
-
-
-
-
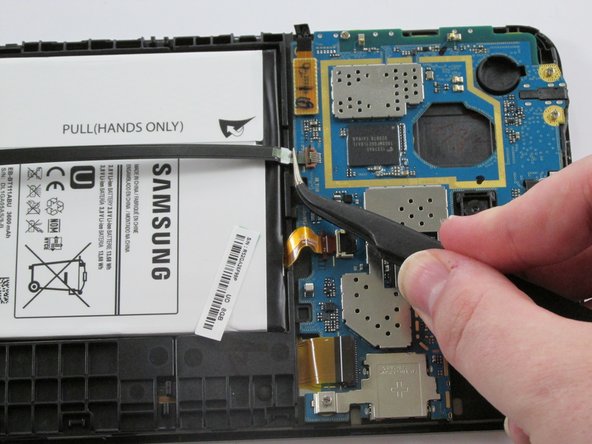
Use the plastic opening tool to lift up the zero insertion force (ZIF) connector holding down the battery ribbon cable.
-
Use the precision tweezers to remove the ribbon cable from the ZIF connector.
-
-
-
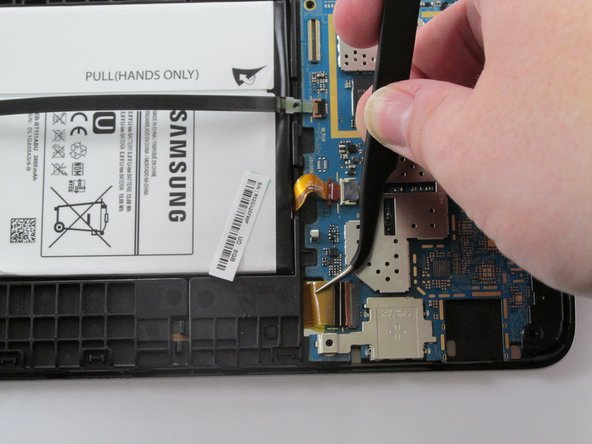
Use the plastic opening tool to lift up the zero insertion force (ZIF) connector holding down the battery ribbon cable.
-
Use the precision tweezers to remove the ribbon cable from the ZIF connector.
-
-
-
Use the plastic opening tool and gently pry up the tab holding the motherboard in place.
-
-
-
Use the precision tweezers to remove the black plastic corner on top of the motherboard.
-
Use the plastic opening tool to pull the motherboard off the case.
-


To reassemble your device, follow these instructions in reverse order.
To reassemble your device, follow these instructions in reverse order.
Отменить: Я не выполнил это руководство.
21 участников успешно повторили данное руководство.
Команда

USF Tampa, Team 11-1, Cheng Spring 2016 Участник USF Tampa, Team 11-1, Cheng Spring 2016
USFT-CHENG-S16S11G1
4 членов
Автор 12 руководств
3 Комментариев
Thank you friend!
Nice guide, Done very well.
Ótimo guia. Esses tutoriais facilitam demais nossa vida. Sou fã! Parabéns