Эта версия возможно содержит некорректные исправления. Переключить на последнюю проверенную версию.
Выберете то, что вам нужно
-
Этот шаг не переведен. Помогите перевести
-
Insert the wedge of the nylon spudger and slide it between the front and back panels until the back comes off.
-
-
Этот шаг не переведен. Помогите перевести
-
Peel off the green tape that covers the connectors for the three black strips.
-
Use the tip of a spudger or your fingernail to flip up the small retaining flaps.
-
-
Этот шаг не переведен. Помогите перевести
-
Use a Phillips #00 screwdriver to remove the four 3.2mm screws.
-
-
Этот шаг не переведен. Помогите перевести
-
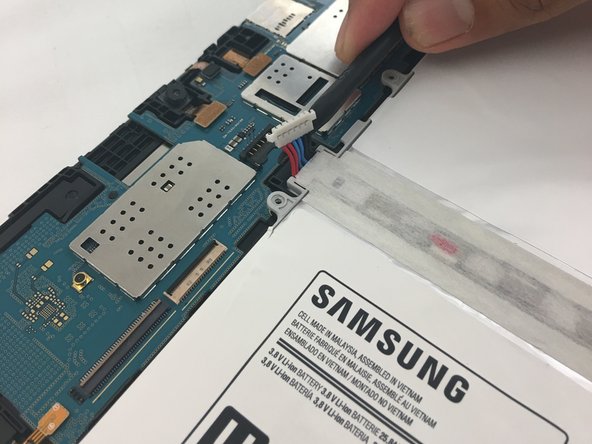
Detach the red, blue, and black cables by prying up on the white connector from the motherboard.
-
If using fingers instead, pull evenly on the full width of the cable so the wires are not overly strained.
-
-
-
Этот шаг не переведен. Помогите перевести
-
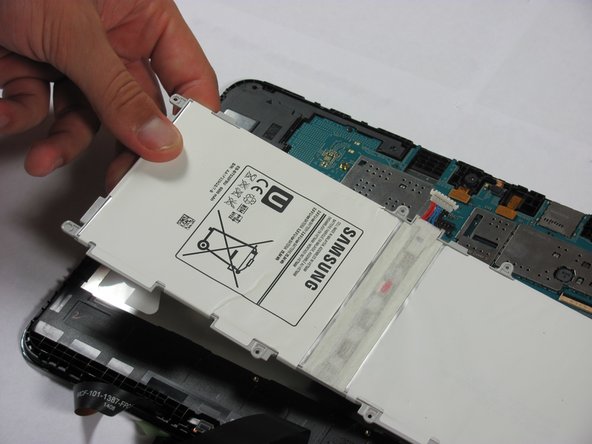
Use the nylon spudger to remove the battery by prying up on the edges.
-
-
Этот шаг не переведен. Помогите перевести
-
Remove the two 2.7mm Phillips #00 screws from the motherboard.
-
-
Этот шаг не переведен. Помогите перевести
-
Use the flat end of a spudger to pry up and disconnect the five press-fit connectors from the motherboard.
-
-
Этот шаг не переведен. Помогите перевести
-
Use a spudger to pry up the motherboard, and remove it from the device.
-
-
Этот шаг не переведен. Помогите перевести
-
Insert the pointed end of a spudger underneath the ribbon connector of the left loudspeaker.
-
Pry upwards to remove the loudspeaker.
-
-
Этот шаг не переведен. Помогите перевести
-
Insert the pointed end of a spudger underneath the headphone jack .
-
Pry upwards to remove the loudspeaker.
-