Введение
A camera installed in a phone is susceptible to damage if the phone is dropped and lands on the area where the camera is located. This guide highlights how to remove the back cover of the tablet in order to get to the camera as a means to replace it.
Выберете то, что вам нужно
-
-
At the top portion of the memory card slot, use the small metal spudger to create separation between the back cover and the rest of the device.
-
-
-
Use the intermediate metal spudger in place of the small metal spudger to remove the back cover. This is done by sliding the intermediate metal spudger around the perimeter of the device, beginning at the top portion of the memory card slot.
-
The second picture shows the internal portion of the device once the back cover is removed.
-
-
-
-
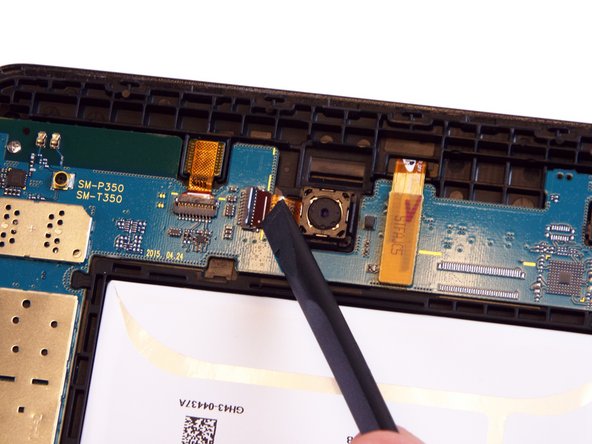
Use the spudger to disconnect the camera from the motherboard.
-
The first and second pictures show what the camera looks like when it is still connected to the motherboard and once it is disconnected, respectively.
-
-
-
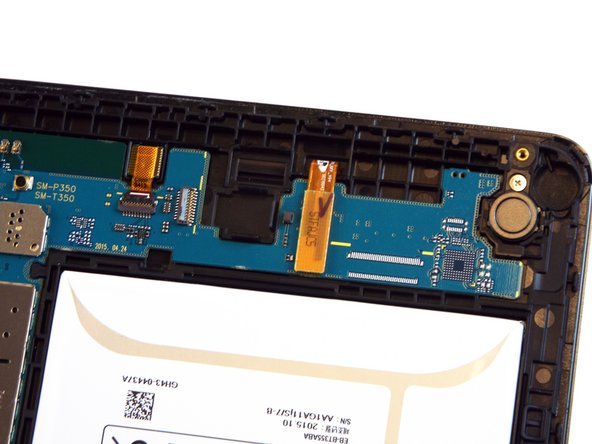
Use the spudger to remove the main body of the camera from the rest of the device. This should be done anywhere around the black-framed perimeter of the camera.
-
-
-
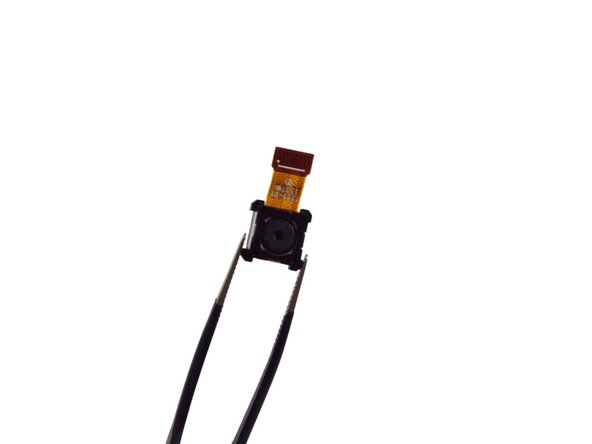
Use the tweezers to fully remove the camera from the rest of the device. The camera should be pulled out and away from where the device was connected to the motherboard in Step 3.
-
The second picture illustrates what the device should look like once the camera is removed.
-


To reassemble your device, follow these instructions in reverse order.
To reassemble your device, follow these instructions in reverse order.
Отменить: Я не выполнил это руководство.
2 участников успешно повторили данное руководство.
Команда

USF Tampa, Team 17-4, Blackwell Winter 2016 Участник USF Tampa, Team 17-4, Blackwell Winter 2016
USFT-BLACKWELL-W16S17G4
4 членов
Автор 11 руководств