Эта версия возможно содержит некорректные исправления. Переключить на последнюю проверенную версию.
Выберете то, что вам нужно
-
Этот шаг не переведен. Помогите перевести
-
Apply heat to all the seams of the device using an iFixit iOpener or heat gun in order to loosen the adhesive around the edges of the screen.
-
-
Этот шаг не переведен. Помогите перевести
-
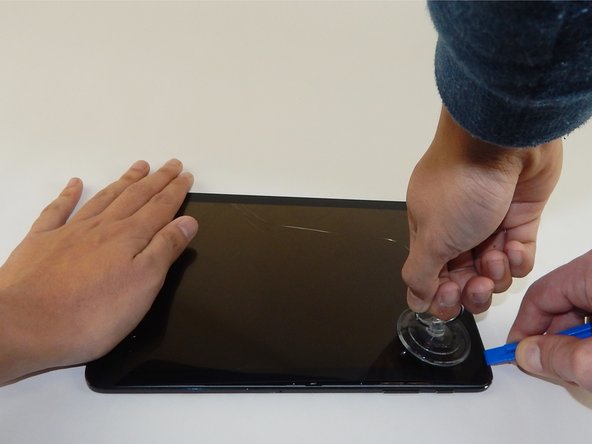
Insert the plastic opening tool into the gap on the side of the tablet, near a corner where you want to start removing the screen.
-
Place the small suction cup on the screen near the corner that the plastic opening tool is placed.
-
Lift the small suction cup up while pushing down with the plastic opening tool to remove screen (you may need to have someone else hold the device down for proper leverage).
-
-
-
Этот шаг не переведен. Помогите перевести
-
With the plastic opening tool gently lift to disconnect the gold ribbon cable that attaches the screen to the base tablet.
-
-
Этот шаг не переведен. Помогите перевести
-
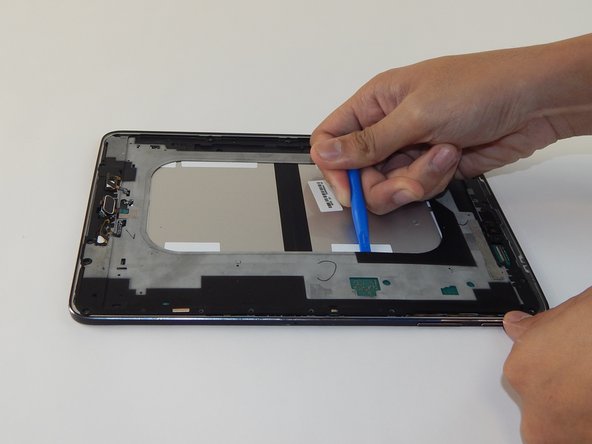
Pry open the next layer of the device using the plastic opening tool.
-
-
Этот шаг не переведен. Помогите перевести
-
Remove the four black 3 mm Phillips #1 screws that hold the battery in place.
-
-
Этот шаг не переведен. Помогите перевести
-
Use a plastic opening tool to lift the black flap on the ZIF connector located in the top left corner of the device.
-
Once the connector is unlocked, pull the ribbon cable out with tweezers.
-
-
Этот шаг не переведен. Помогите перевести
-
Using the plastic opening tool remove the cable that connects the battery to the device.
-
Now you can remove the battery with your hands.
-


Отменить: Я не выполнил это руководство.
38 участников успешно повторили данное руководство.
Команда

USF Tampa, Team 10-4, Remmell Spring 2016 Участник USF Tampa, Team 10-4, Remmell Spring 2016
USFT-REMMELL-S16S10G4
4 членов
Автор 18 руководств
17 Комментариев
Thanks for the guide. At least Apple has an out-of-warranty service for the battery replacement of $99. To replace this battery, with a dubious quality 3rd party battery as I don't think it's possible to buy a OEM Samsung battery, looks like a disaster waiting to happen, not worth the effort or time, I returned mine to Samsung after seeing this guide. I'm not suggesting Apple is a saint for the $99 replacement, but at least they will do it with an OEM battery.
Can you give a link to this apple offer for an ipad ?
after I did this, my display was dead. Nothing showed. Tablet was receiving email notifications and lights worked.. just a blank screen. What happened?
You crackedbthe oled panel
The Battery is accessible from the rear panel!
**It will damage two plastic mounts on the rear panel, however an appropriate adhesive (GO2 by loctite) or bonding tape, will fix this**
1: On the back, there is a clearly visible outline of a plastic cover.
2: Starting from the side opposite the “Little round button things” on the back, run a case opening tool slowly around the seam, popping the small plastic hooks. Do all three sides EXCEPT the side with the round button things.
3: When you get to this forth side, carefully and slowly work around the round buttons, working the case up. Then flex up the back plastic from the side you have already removed, and using a long case tool, insert it in all the way past the battery to the inside edge of the round button things and gently twist here. The tabs will pop and that side will release. Repeat for the other snap button.
4: Your back cover is now removed and you have access directly to the battery !
Do this If you are not confident lifting a $350 dollar screen…