Перейти к основному содержанию

Эта версия возможно содержит некорректные исправления. Переключить на последнюю проверенную версию.

Выберете то, что вам нужно

  1. Этот шаг не переведен. Помогите перевести

    : шаг 1, изображение 1 из 1
    • Working on your device while it is turned on may result in an electric shock. Be sure to shut down and unplug your device before you begin.

    • Removing the screen may be difficult due to strong adhesives.

    • Apply heat to all the seams of the device using an iFixit iOpener or heat gun in order to loosen the adhesive around the edges of the screen.

  2. Этот шаг не переведен. Помогите перевести

    : шаг 2, изображение 1 из 2 : шаг 2, изображение 2 из 2
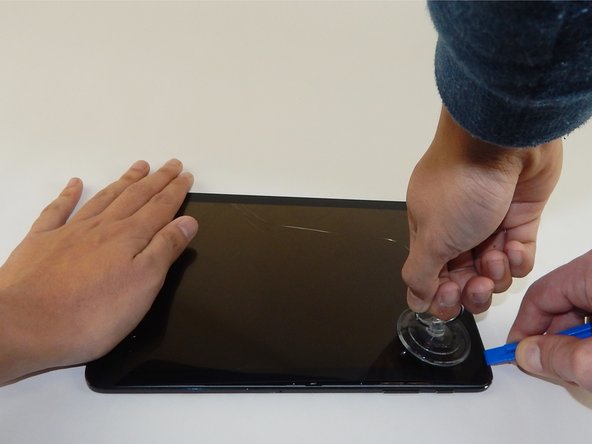
    • Insert the plastic opening tool into the gap on the side of the tablet, near a corner where you want to start removing the screen.

    • Place the small suction cup on the screen near the corner that the plastic opening tool is placed.

    • Lift the small suction cup up while pushing down with the plastic opening tool to remove screen (you may need to have someone else hold the device down for proper leverage).

    • A ribbon cable is attached to the back of the screen. Avoid lifting or moving the screen more than 3-4 inches before disconnecting the ribbon cable or you could damage the device.

  3. Этот шаг не переведен. Помогите перевести

    : шаг 3, изображение 1 из 1
    • A piece of silver tape is placed over the gold ribbon cable connecting the screen to the tablet.

    • Use the tweezers to carefully remove the silver tape.

  4. Этот шаг не переведен. Помогите перевести

    : шаг 4, изображение 1 из 2 : шаг 4, изображение 2 из 2
    • With the plastic opening tool gently lift to disconnect the gold ribbon cable that attaches the screen to the base tablet.

  5. Этот шаг не переведен. Помогите перевести

    : шаг 5, изображение 1 из 2 : шаг 5, изображение 2 из 2
    • Remove the nineteen 3mm Phillips #1 screws.

  6. Этот шаг не переведен. Помогите перевести

    : шаг 6, изображение 1 из 2 : шаг 6, изображение 2 из 2
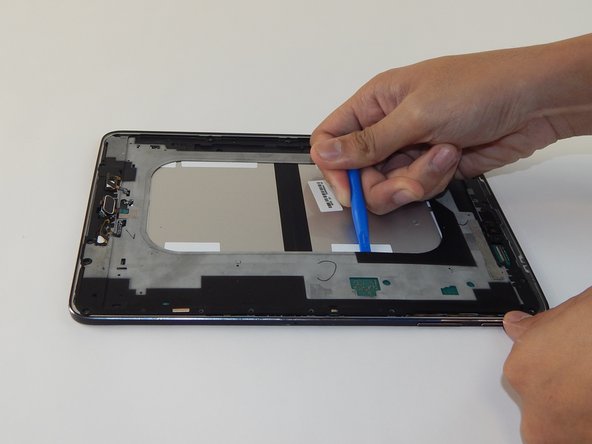
    • Pry open the next layer of the device using the plastic opening tool.

    • Even though the device separates along the outside edge, using the inside edge (as pictured) may help with leverage.

  7. Этот шаг не переведен. Помогите перевести

    : шаг 7, изображение 1 из 1
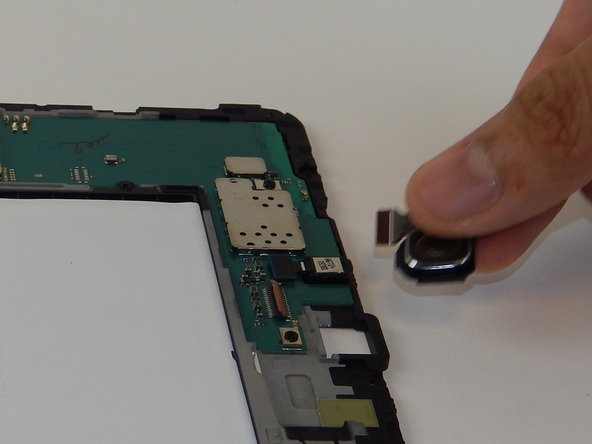
    • Remove strip of green tape covering the camera connector with the tweezers.

  8. Этот шаг не переведен. Помогите перевести

    : шаг 8, изображение 1 из 1
    • Use tweezers to lift the tab on the ZIF connector holding the ribbon cable in place.

    • Pull the ribbon cable straight out with tweezers.

  9. Этот шаг не переведен. Помогите перевести

    : шаг 9, изображение 1 из 2 : шаг 9, изображение 2 из 2
    • Remove rear camera.

Финишная черта

Jovina Martinez

Участник с: 01/20/16

2 084 Репутация

Автор 7 руководств

Команда

USF Tampa, Team 10-4, Remmell Spring 2016 Участник USF Tampa, Team 10-4, Remmell Spring 2016

USFT-REMMELL-S16S10G4

4 членов

Автор 18 руководств

0 Комментариев

Добавить комментарий

Просмотр статистики:

За последние 24часов: 0

За последние 7 дней: 8

За последние 30 дней: 11

За всё время: 2,378