Эта версия возможно содержит некорректные исправления. Переключить на последнюю проверенную версию.
Выберете то, что вам нужно
-
Этот шаг не переведен. Помогите перевести
-
To soften the adhesive holding the tablet together, heat up the edges of the glass panel using a heated iOpener on the edge of the device. Alternatively you can use a heat gun to loosen the adhesive.
-
Leave the iOpener on edge for two minutes.
-
-
Этот шаг не переведен. Помогите перевести
-
Place a suction cup near edge that you heated up with the iOpener.
-
Press down on the suction cup to create a seal, and pull up with force to create a separation between the display and the midframe.
-
Use an opening tool to split apart the glass panel from the midframe.
-
-
Этот шаг не переведен. Помогите перевести
-
As you continue along the edge using the opening tool, use a plastic card to keep the glass separate from the midframe.
-
-
Этот шаг не переведен. Помогите перевести
-
Pull off the glass panel using the suction cup.
-
Carefully disconnect the ribbon cable connecting the display assembly to the motherboard. You can disconnect this ribbon from either end.
-
-
Этот шаг не переведен. Помогите перевести
-
Repeat steps 3 through 7 to remove the rear glass panel on the opposite side of the device.
-
-
-
Этот шаг не переведен. Помогите перевести
-
Use a Phillips #000 screwdriver to unscrew the five screws securing the battery, and the twenty-two screws surrounding the midframe.
-
-
Этот шаг не переведен. Помогите перевести
-
The midframe should snap off from the device’s motherboard.
-
-
Этот шаг не переведен. Помогите перевести
-
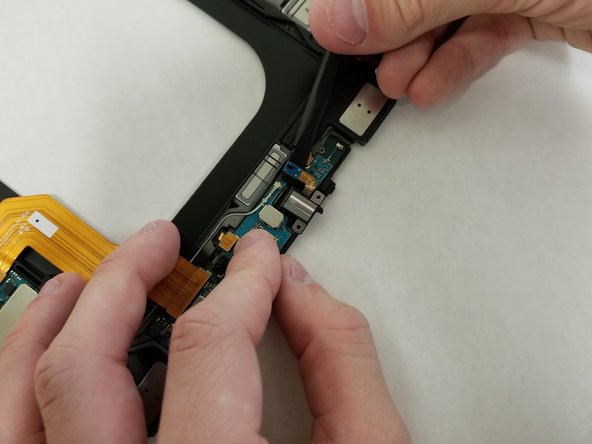
Locate the ribbon running from the midframe and disconnect it from the motherboard with the flat end of a spudger.
-
-
Этот шаг не переведен. Помогите перевести
-
Use the flat end of the spudger to pop off the connector between the battery and the motherboard.
-
-
Этот шаг не переведен. Помогите перевести
-
Flip the midframe over and pop the battery out, making sure to slide it out from underneath the ribbon cables.
-
-
Этот шаг не переведен. Помогите перевести
-
The battery should now be removed and detached from the device.
-
-
Этот шаг не переведен. Помогите перевести
-
Insert the pointy end of the spudger into the headphone jack.
-
Lift the spudger up to snap the headphone jack module off of the motherboard.
-
-
Этот шаг не переведен. Помогите перевести
-
Use the flat end of the spudger to snap the ribbon connector off of the motherboard.
-


Отменить: Я не выполнил это руководство.
Еще один человек закончил это руководство.
Команда

Cal Poly, Team S22-G4, Maness Spring 2018 Участник Cal Poly, Team S22-G4, Maness Spring 2018
CPSU-MANESS-S18S22G4
5 членов
Автор 15 руководств