Перейти к основному содержанию

Samsung Jack Keyboard Replacement

Выберете то, что вам нужно

  1. Samsung Jack Keyboard Replacement, Battery: шаг 1, изображение 1 из 1
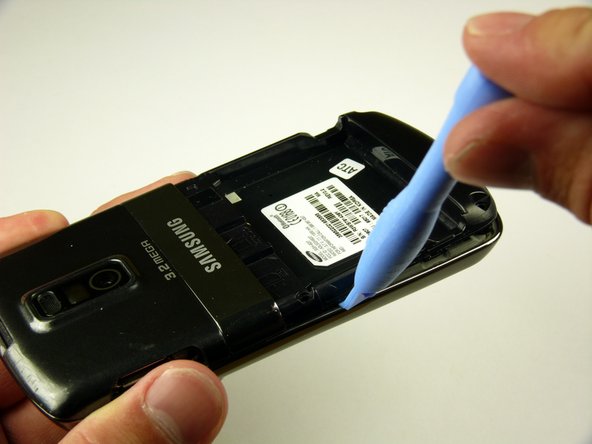
    • Slide the battery cover downwards with pressure focused on the center of the cover.

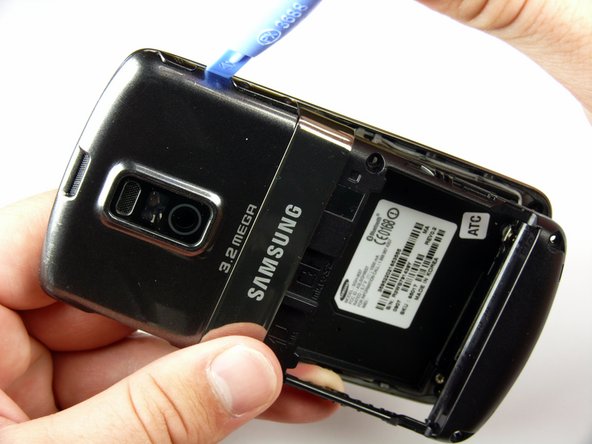
    • Lift the cover off of the phone.

  2. Samsung Jack Keyboard Replacement: шаг 2, изображение 1 из 1
    • Grasp the bottom left and right corners of the battery and lift it from its housing.

  3. Samsung Jack Keyboard Replacement, Rear Case: шаг 3, изображение 1 из 1
    • Remove the four black 7.30 mm screws surrounding the battery housing using a Phillips #00 Screwdriver.

  4. Samsung Jack Keyboard Replacement: шаг 4, изображение 1 из 3 Samsung Jack Keyboard Replacement: шаг 4, изображение 2 из 3 Samsung Jack Keyboard Replacement: шаг 4, изображение 3 из 3
    • The rear case is firmly attached to the phone with clips. Do not be afraid to use a little extra force.

    • Insert the Plastic Opening Tool in between the front and rear cases.

    • Pry with the Plastic Opening Tool around all edges of the phone until you free all the clips.

  5. Samsung Jack Keyboard Replacement: шаг 5, изображение 1 из 1
    • Lift the rear case off of the phone.

  6. Samsung Jack Keyboard Replacement, Antenna: шаг 6, изображение 1 из 1
    • Remove the two silver 4.30 mm screws on either side of the antenna using a Phillip's #00 Screwdriver.

  7. Samsung Jack Keyboard Replacement: шаг 7, изображение 1 из 3 Samsung Jack Keyboard Replacement: шаг 7, изображение 2 из 3 Samsung Jack Keyboard Replacement: шаг 7, изображение 3 из 3
    • There is a wire under the antenna connecting it to the Motherboard. Do not pull off the antenna just yet.

    • Use a spudger to remove the wire connector under the antenna.

  8. Samsung Jack Keyboard Replacement, Speaker: шаг 8, изображение 1 из 1
    • Remove the two black 7.30 mm screws on the top right and left corners of the Motherboard using a Phillips #00 Screwdriver.

    • Remove the silver 4.50 mm screw located below the speaker using a Phillips #00 Screwdriver.

  9. Samsung Jack Keyboard Replacement: шаг 9, изображение 1 из 2 Samsung Jack Keyboard Replacement: шаг 9, изображение 2 из 2
    • Use the spudger to detach the speaker ribbon cable.

  10. Samsung Jack Keyboard Replacement: шаг 10, изображение 1 из 1
    • Lift the speaker out of its compartment.

  11. Samsung Jack Keyboard Replacement, Motherboard: шаг 11, изображение 1 из 1
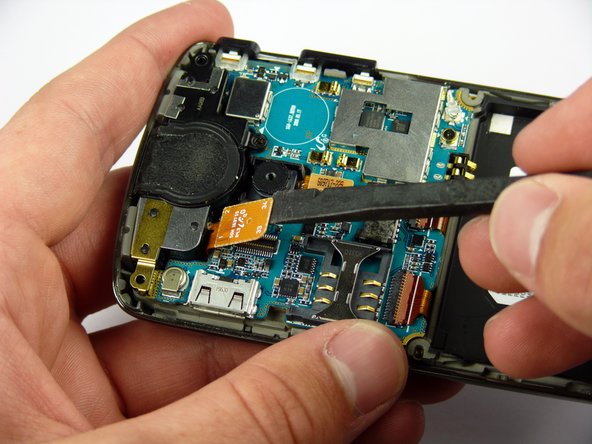
    • Remove the power and volume buttons on the right side of the Motherboard.

  12. Samsung Jack Keyboard Replacement: шаг 12, изображение 1 из 2 Samsung Jack Keyboard Replacement: шаг 12, изображение 2 из 2
    • Use a spudger to detach the camera ribbon cable.

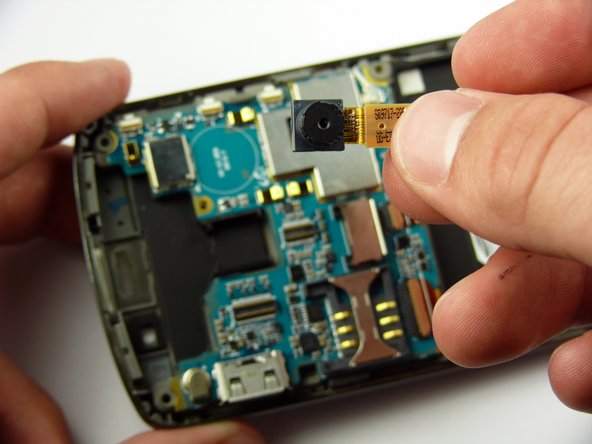
    • Lift the camera off of the Motherboard.

  13. Samsung Jack Keyboard Replacement: шаг 13, изображение 1 из 2 Samsung Jack Keyboard Replacement: шаг 13, изображение 2 из 2
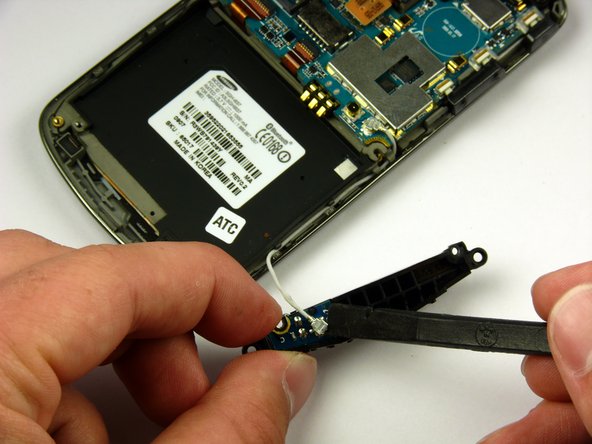
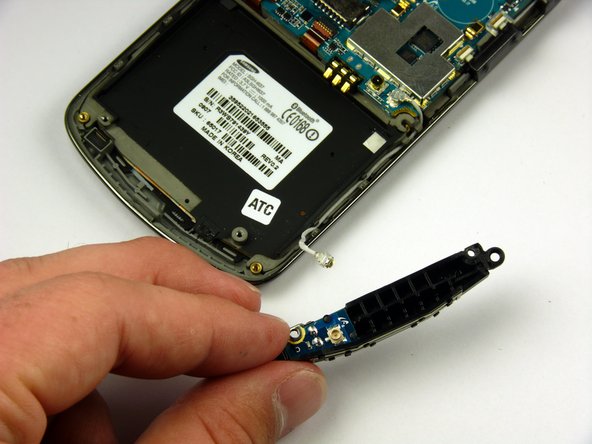
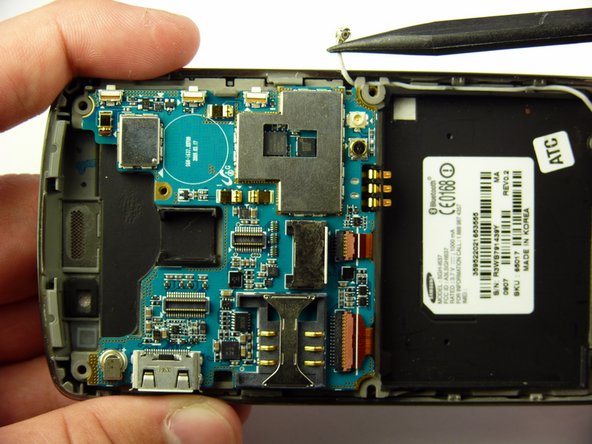
    • Use a spudger to disconnect the white antenna wire on the bottom right corner of the Motherboard.

  14. Samsung Jack Keyboard Replacement: шаг 14, изображение 1 из 3 Samsung Jack Keyboard Replacement: шаг 14, изображение 2 из 3 Samsung Jack Keyboard Replacement: шаг 14, изображение 3 из 3
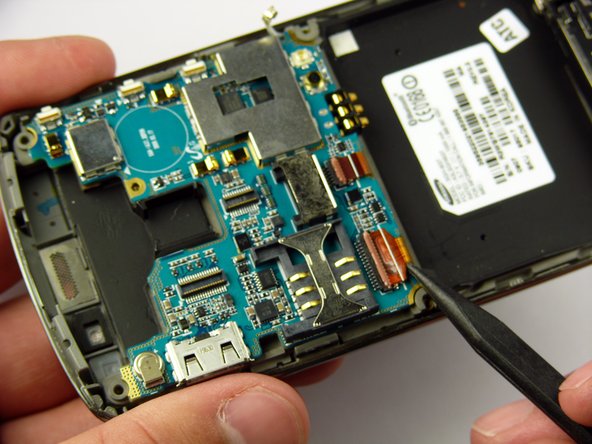
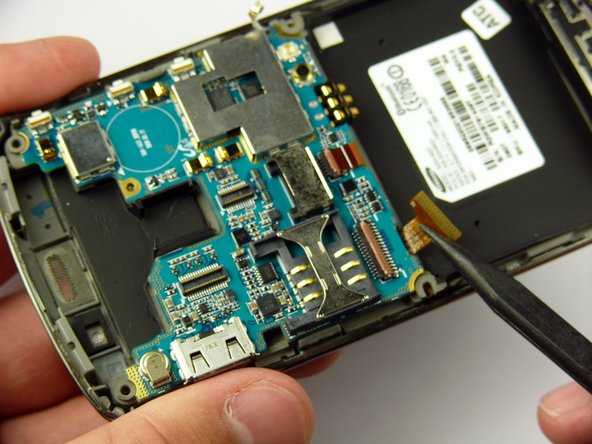
    • Use a Plastic Opening Tool to lift the flaps of the ZIF connectors to release the ribbon cables near the bottom of the Motherboard.

    • Use a spudger to carefully pull the ribbon cables away from the ZIF connectors.

  15. Samsung Jack Keyboard Replacement: шаг 15, изображение 1 из 2 Samsung Jack Keyboard Replacement: шаг 15, изображение 2 из 2
    • There is a ribbon cable under the Motherboard connecting it to the LCD. Do not pull off the Motherboard just yet.

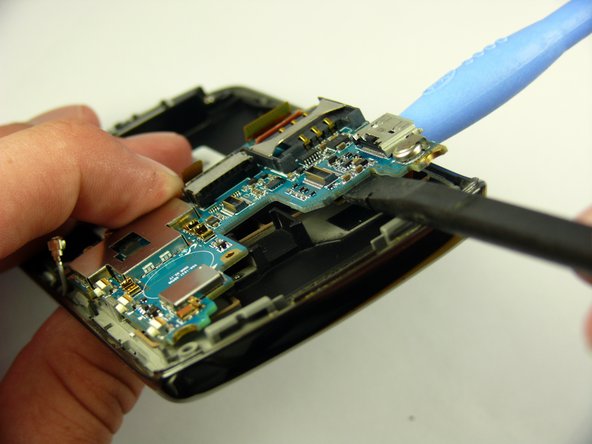
    • Insert the Plastic Opening Tool under the upper left corner of the Motherboard to help reveal the ribbon cable.

    • Use a spudger to disconnect the Motherboard ribbon cable.

  16. Samsung Jack Keyboard Replacement: шаг 16, изображение 1 из 1
    • Lift the Motherboard off of the phone.

  17. Samsung Jack Keyboard Replacement, Keyboard: шаг 17, изображение 1 из 3 Samsung Jack Keyboard Replacement, Keyboard: шаг 17, изображение 2 из 3 Samsung Jack Keyboard Replacement, Keyboard: шаг 17, изображение 3 из 3
    • The LCD frame is firmly attached to the phone with clips. Do not be afraid to use a little extra force.

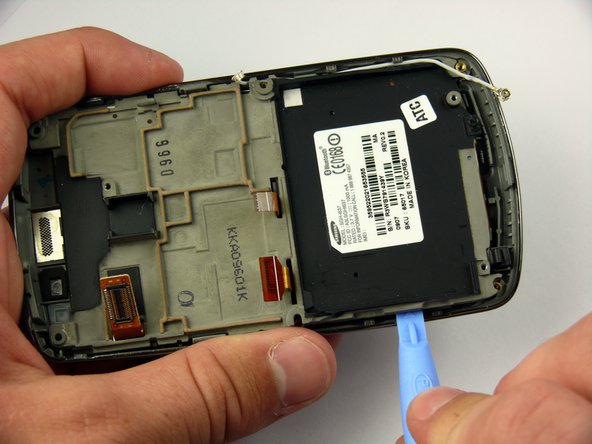
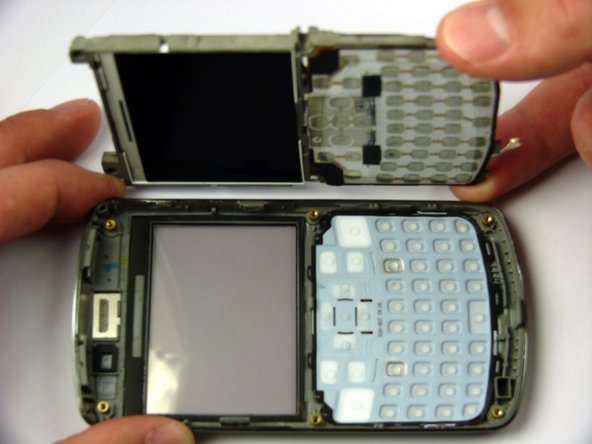
    • Insert the Plastic Opening Tool between the LCD frame and the front case of the phone.

    • Slide the Plastic Opening Tool around the LCD frame to detach all of the clips.

  18. Samsung Jack Keyboard Replacement: шаг 18, изображение 1 из 2 Samsung Jack Keyboard Replacement: шаг 18, изображение 2 из 2
    • Lift up the LCD frame.

  19. Samsung Jack Keyboard Replacement: шаг 19, изображение 1 из 3 Samsung Jack Keyboard Replacement: шаг 19, изображение 2 из 3 Samsung Jack Keyboard Replacement: шаг 19, изображение 3 из 3
    • The keyboard ribbon cable passes through the LCD frame. Be careful not to rip the ribbon cable when removing the keyboard.

    • The keyboard and directional keys are glued separately to the LCD frame.

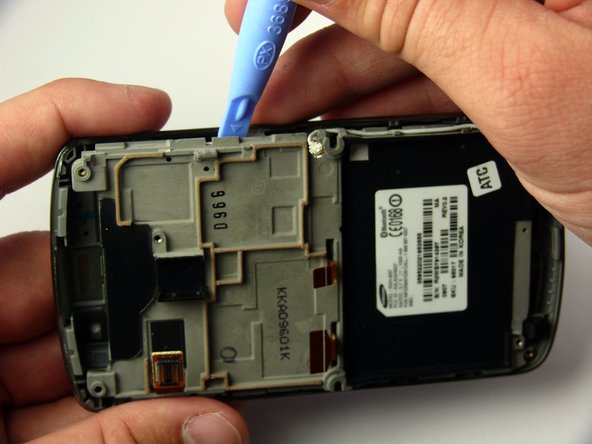
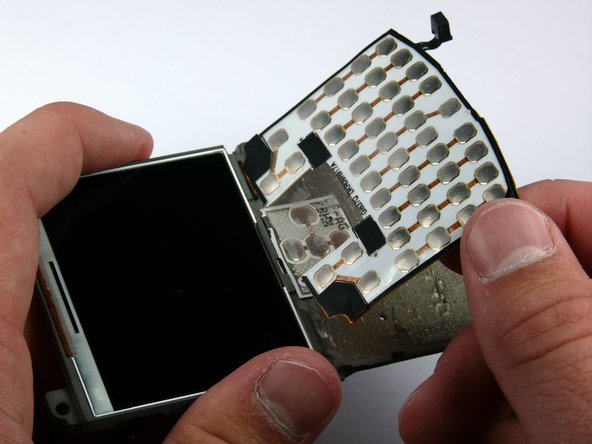
    • Insert the spudger between the keyboard and the frame.

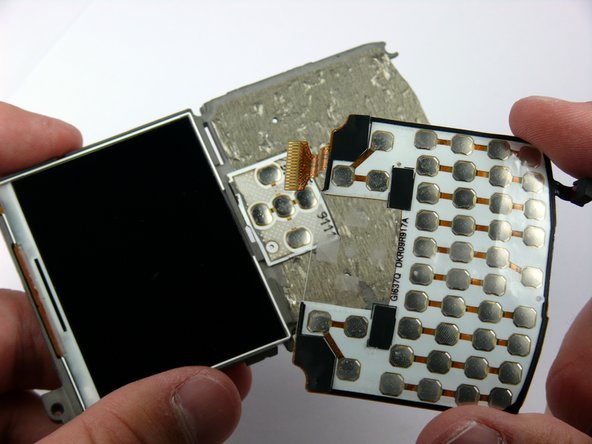
    • Peel the keyboard off by sliding the spudger back and forth across the LCD frame.

  20. Samsung Jack Keyboard Replacement: шаг 20, изображение 1 из 3 Samsung Jack Keyboard Replacement: шаг 20, изображение 2 из 3 Samsung Jack Keyboard Replacement: шаг 20, изображение 3 из 3
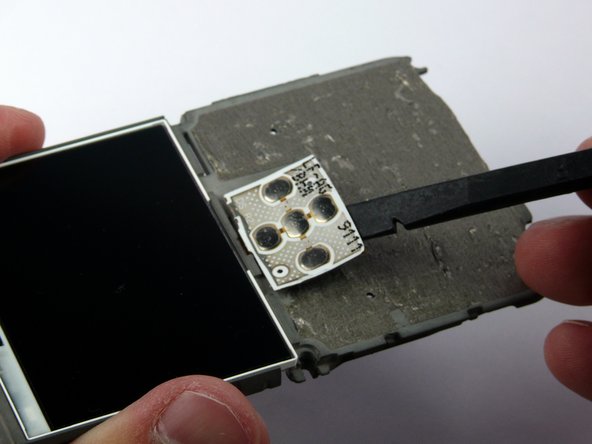
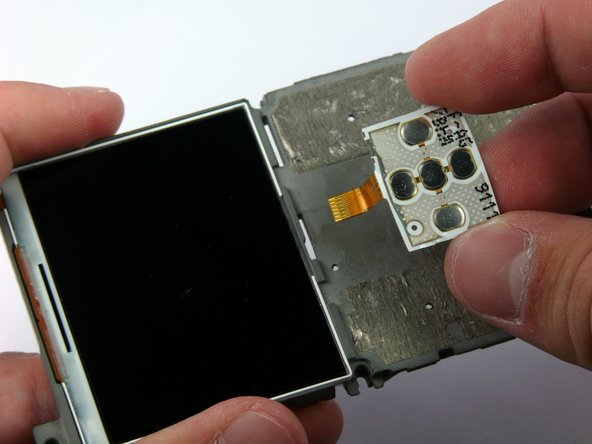
    • Insert the spudger between the directional keys and the frame.

    • Peel the directional keys off by sliding the spudger back and forth across the LCD frame.

Заключение

To reassemble your device, follow these instructions in reverse order.

Еще один человек закончил это руководство.

Jaime Serrano

Участник с: 04/11/11

59 Репутация

Автор 2 руководств

Команда

Cal Poly, Team 24-57, Amido Spring 2011 Участник Cal Poly, Team 24-57, Amido Spring 2011

CPSU-AMIDO-S11S24G57

4 членов

Автор 7 руководств

0 Комментариев

Добавить комментарий

Просмотр статистики:

За последние 24часов: 0

За последние 7 дней: 1

За последние 30 дней: 2

За всё время: 2,055