Перейти к основному содержанию

Samsung NP-QX411L Hinges Replacement

Выберете то, что вам нужно

  1. Samsung NP-QX411L Hinges Replacement, Optical Drive: шаг 1, изображение 1 из 2 Samsung NP-QX411L Hinges Replacement, Optical Drive: шаг 1, изображение 2 из 2
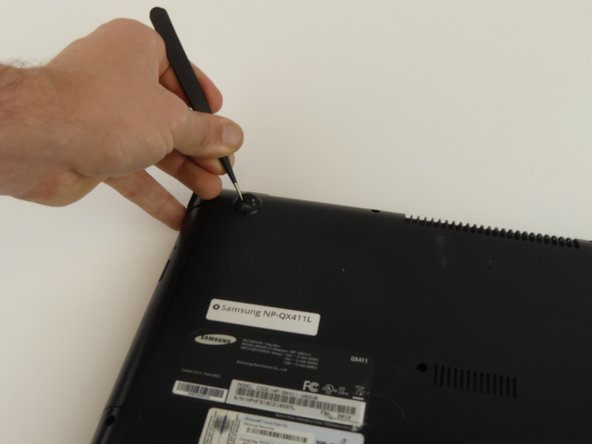
    • Flip the laptop over.

    • Remove the 6 mm screw with the Phillips #000 screwdriver.

  2. Samsung NP-QX411L Hinges Replacement: шаг 2, изображение 1 из 1
    • Slide out the optical drive to remove it.

  3. Samsung NP-QX411L Hinges Replacement, Hard Drive: шаг 3, изображение 1 из 2 Samsung NP-QX411L Hinges Replacement, Hard Drive: шаг 3, изображение 2 из 2
    • Put on the anti-static wristband and connect the attached alligator clip to a metal object. This will prevent you from shocking the motherboard.

    • Flip the laptop.

    • Use the Phillips #000 screwdriver to unscrew the 6 mm screw from the square panel.

  4. Samsung NP-QX411L Hinges Replacement: шаг 4, изображение 1 из 2 Samsung NP-QX411L Hinges Replacement: шаг 4, изображение 2 из 2
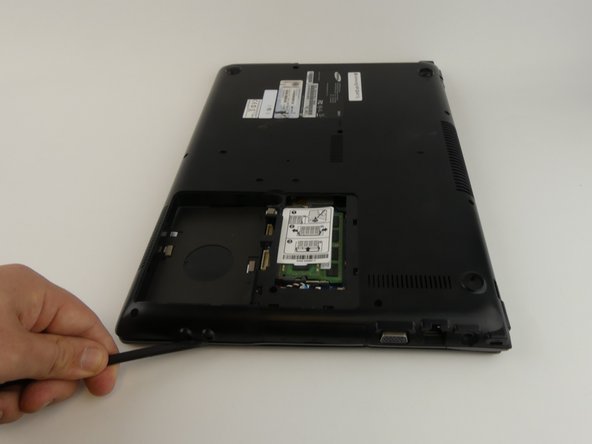
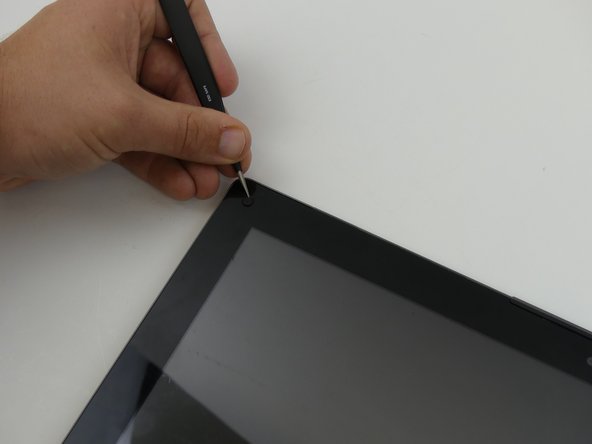
    • Gently wedge the spudger under the square panel.

    • Run the spudger under the edges of the square panel to loosen it.

    • Remove the panel.

  5. Samsung NP-QX411L Hinges Replacement: шаг 5, изображение 1 из 1
    • Remove the hard drive slowly because it is still connected to a wire.

    • Pull up on the rubber flap or use the spudger to lift the hard drive.

  6. Samsung NP-QX411L Hinges Replacement: шаг 6, изображение 1 из 1
    • Remove the hard drive by gently pulling the power connector at the base of the wire off. You can do this by pulling the connector away from the hard drive.

  7. Samsung NP-QX411L Hinges Replacement, Hinges: шаг 7, изображение 1 из 2 Samsung NP-QX411L Hinges Replacement, Hinges: шаг 7, изображение 2 из 2
    • Disconnect the wire from the motherboard by pulling up and away from the laptop.

    • Remove the 6 mm screw with the Phillips #000 screwdriver.

  8. Samsung NP-QX411L Hinges Replacement: шаг 8, изображение 1 из 2 Samsung NP-QX411L Hinges Replacement: шаг 8, изображение 2 из 2
    • Remove the top two rubber stoppers using precision tweezers.

  9. Samsung NP-QX411L Hinges Replacement: шаг 9, изображение 1 из 1
    • Unscrew nine 6 mm screws on the cover using a Phillips #000 screwdriver.

  10. Samsung NP-QX411L Hinges Replacement: шаг 10, изображение 1 из 3 Samsung NP-QX411L Hinges Replacement: шаг 10, изображение 2 из 3 Samsung NP-QX411L Hinges Replacement: шаг 10, изображение 3 из 3
    • Wedge the spudger under the cover to gently pry it up.

  11. Samsung NP-QX411L Hinges Replacement: шаг 11, изображение 1 из 3 Samsung NP-QX411L Hinges Replacement: шаг 11, изображение 2 из 3 Samsung NP-QX411L Hinges Replacement: шаг 11, изображение 3 из 3
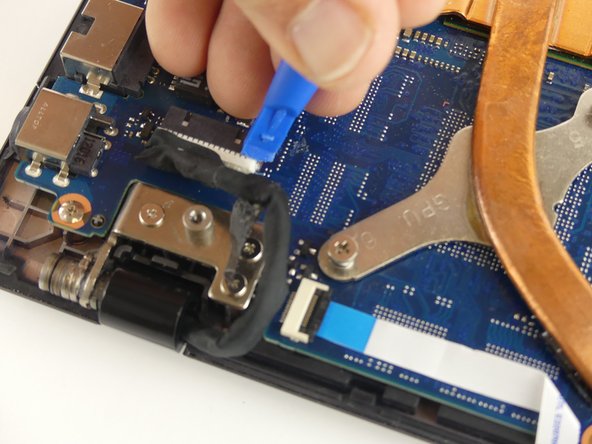
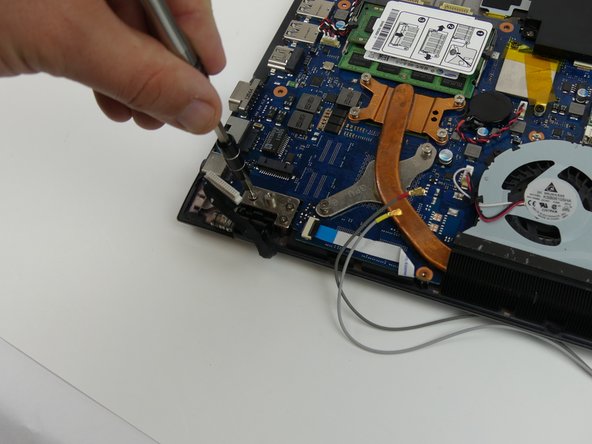
    • Disconnect the wire by carefully using the plastic opening tool to pry the connector away from the motherboard.

  12. Samsung NP-QX411L Hinges Replacement: шаг 12, изображение 1 из 3 Samsung NP-QX411L Hinges Replacement: шаг 12, изображение 2 из 3 Samsung NP-QX411L Hinges Replacement: шаг 12, изображение 3 из 3
    • Use precision tweezers to pop the antenna wires off of the WiFi card.

  13. Samsung NP-QX411L Hinges Replacement: шаг 13, изображение 1 из 3 Samsung NP-QX411L Hinges Replacement: шаг 13, изображение 2 из 3 Samsung NP-QX411L Hinges Replacement: шаг 13, изображение 3 из 3
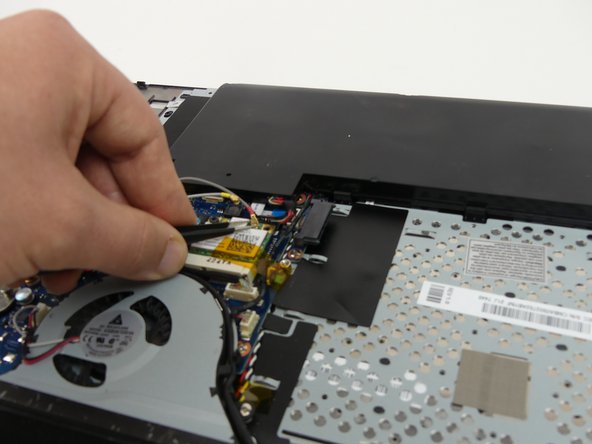
    • Open the laptop slightly.

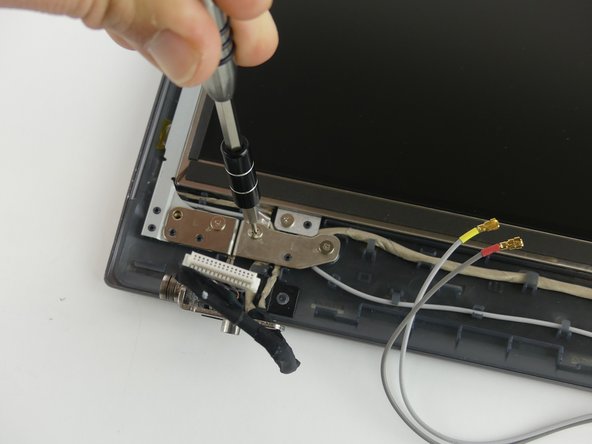
    • Holding the laptop open, remove three 4 mm screws from each hinge (6 total) using a Phillips #000 screwdriver.

  14. Samsung NP-QX411L Hinges Replacement: шаг 14, изображение 1 из 1
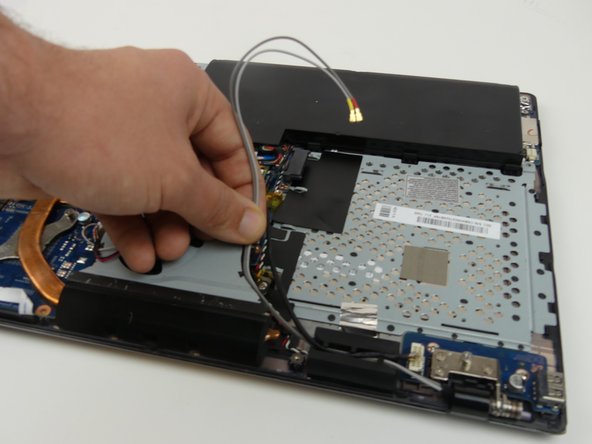
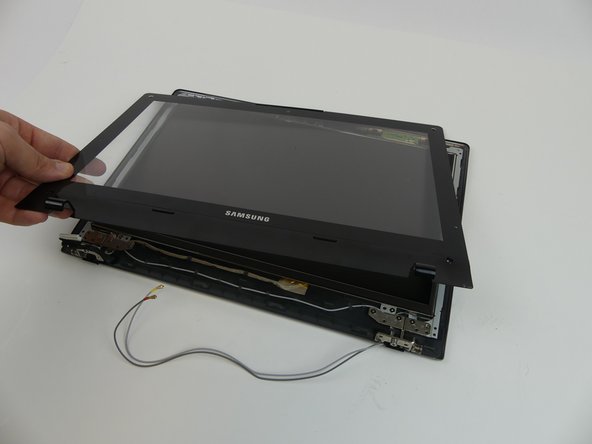
    • Hold hinges in place with your thumb and slide the laptop away from the screen.

  15. Samsung NP-QX411L Hinges Replacement: шаг 15, изображение 1 из 2 Samsung NP-QX411L Hinges Replacement: шаг 15, изображение 2 из 2
    • Remove the 4 rubber stoppers with the precision tweezers.

  16. Samsung NP-QX411L Hinges Replacement: шаг 16, изображение 1 из 2 Samsung NP-QX411L Hinges Replacement: шаг 16, изображение 2 из 2
    • Remove the four 4 mm screws with a Phillips #000 screwdriver.

  17. Samsung NP-QX411L Hinges Replacement: шаг 17, изображение 1 из 2 Samsung NP-QX411L Hinges Replacement: шаг 17, изображение 2 из 2
    • The metal spudger could scratch the screen.

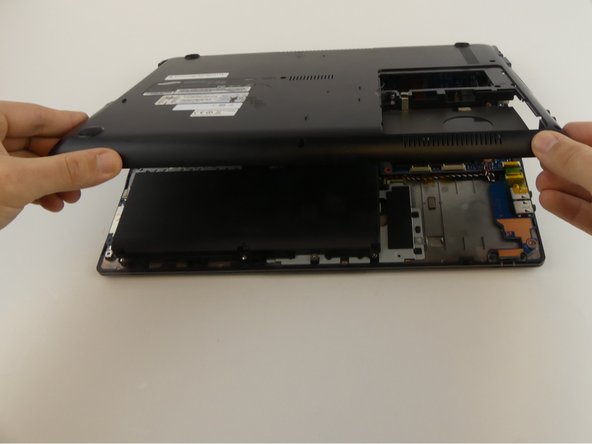
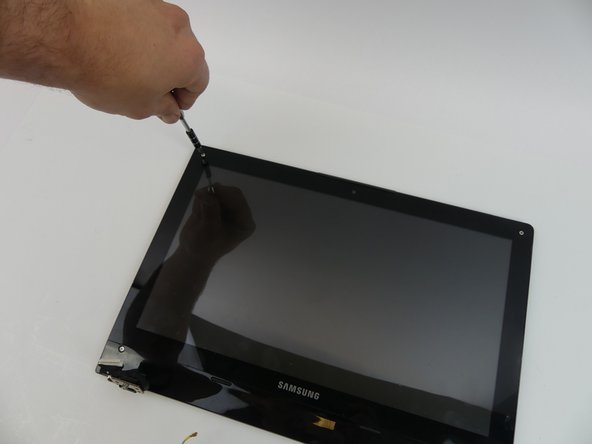
    • Wedge the metal spudger underneath the cover and run it along the edges. Gently pry the cover up.

  18. Samsung NP-QX411L Hinges Replacement: шаг 18, изображение 1 из 2 Samsung NP-QX411L Hinges Replacement: шаг 18, изображение 2 из 2
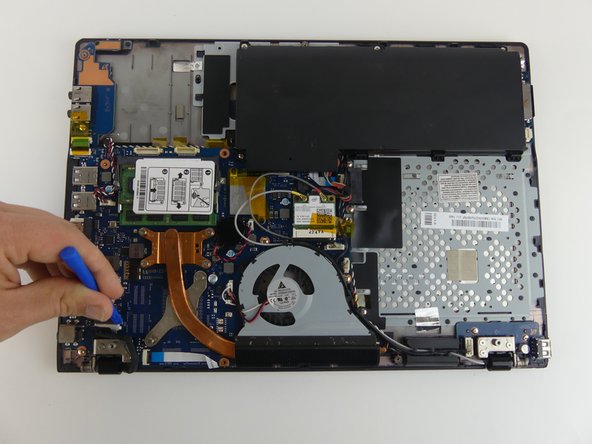
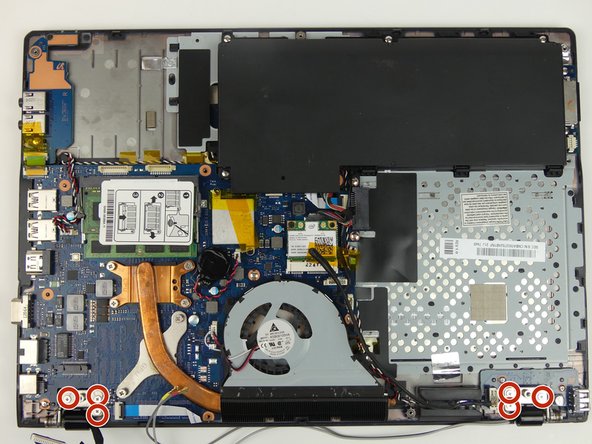
    • Remove the three 4 mm screws on each hinge with a Phillips #000 screwdriver. There should be a total of 6 screws to remove.

Заключение

To reassemble your device, follow these instructions in reverse order.

Rebecca Johnson

Участник с: 02/17/17

561 Репутация

Автор 5 руководств

Команда

USF Tampa, Team S19-G3, Hoffman Spring 2017 Участник USF Tampa, Team S19-G3, Hoffman Spring 2017

USFT-HOFFMAN-S17S19G3

4 членов

Автор 5 руководств

0 Комментариев

Добавить комментарий

Просмотр статистики:

За последние 24часов: 1

За последние 7 дней: 6

За последние 30 дней: 8

За всё время: 759