Перейти к основному содержанию

Samsung NP540U3C-A02UB Battery Replacement

Выберете то, что вам нужно

  1. Samsung NP540U3C-A02UB Battery Replacement, Hard Drive: шаг 1, изображение 1 из 1
    • Turn off the laptop before beginning disassembly and unplug it from the power cord.

    • Place the laptop flat with its bottom facing up.

  2. Samsung NP540U3C-A02UB Battery Replacement: шаг 2, изображение 1 из 2 Samsung NP540U3C-A02UB Battery Replacement: шаг 2, изображение 2 из 2
    • Remove one 4 mm Phillips #00 screw labeled "HDD Memory".

  3. Samsung NP540U3C-A02UB Battery Replacement: шаг 3, изображение 1 из 3 Samsung NP540U3C-A02UB Battery Replacement: шаг 3, изображение 2 из 3 Samsung NP540U3C-A02UB Battery Replacement: шаг 3, изображение 3 из 3
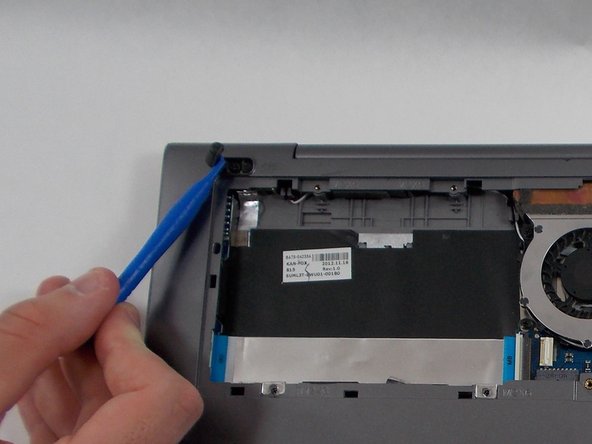
    • Gently release the 3 clips holding the HDD cover with the plastic opening tool.

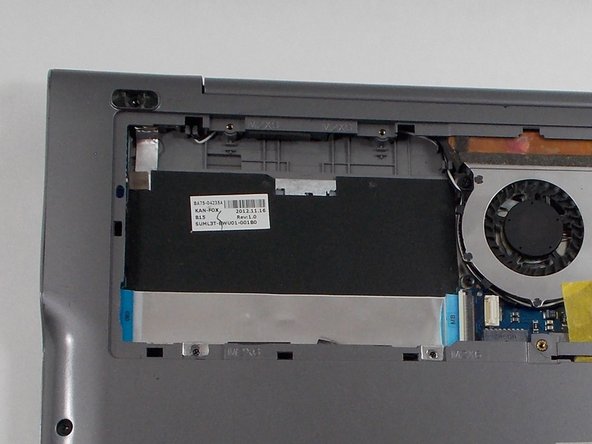
    • Remove the HDD cover from the device.

  4. Samsung NP540U3C-A02UB Battery Replacement: шаг 4, изображение 1 из 2 Samsung NP540U3C-A02UB Battery Replacement: шаг 4, изображение 2 из 2
    • Remove the four 6 mm Phillips #00 screws attaching the hard drive to the case.

  5. Samsung NP540U3C-A02UB Battery Replacement: шаг 5, изображение 1 из 2 Samsung NP540U3C-A02UB Battery Replacement: шаг 5, изображение 2 из 2
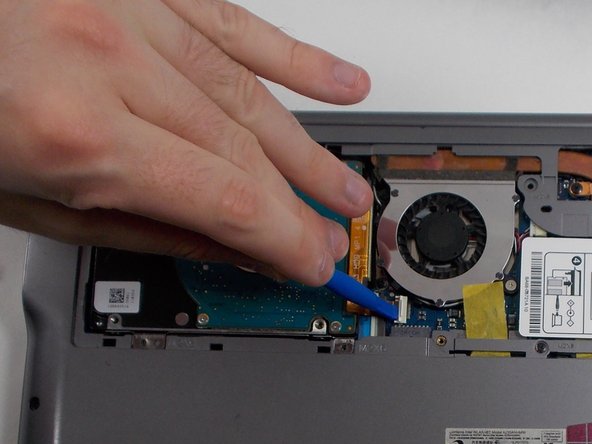
    • Using the plastic opening tool, push the hard drive connector clip upwards in order to release the cable.

  6. Samsung NP540U3C-A02UB Battery Replacement: шаг 6, изображение 1 из 2 Samsung NP540U3C-A02UB Battery Replacement: шаг 6, изображение 2 из 2
    • Remove the hard drive from the case.

  7. Samsung NP540U3C-A02UB Battery Replacement, Battery: шаг 7, изображение 1 из 2 Samsung NP540U3C-A02UB Battery Replacement, Battery: шаг 7, изображение 2 из 2
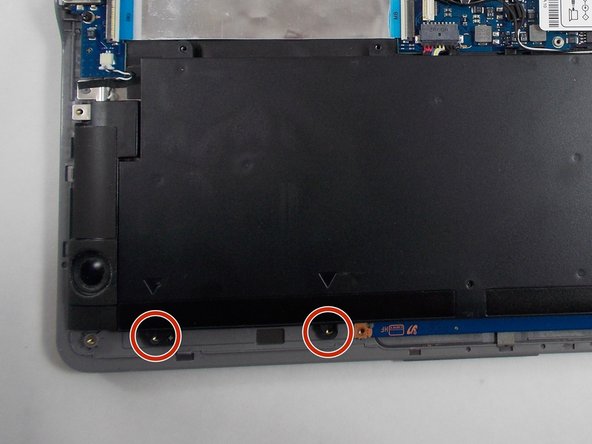
    • Remove the following screws holding the case together:

    • 6x 4mm Phillips #00 screws.

    • 3x 6mm Phillips #00 screws.

  8. Samsung NP540U3C-A02UB Battery Replacement: шаг 8, изображение 1 из 2 Samsung NP540U3C-A02UB Battery Replacement: шаг 8, изображение 2 из 2
    • Using the opening tool, remove the two rubber pads just above the hard drive cover.

  9. Samsung NP540U3C-A02UB Battery Replacement: шаг 9, изображение 1 из 2 Samsung NP540U3C-A02UB Battery Replacement: шаг 9, изображение 2 из 2
    • Remove the 2x 4mm Phillips #00 screws formerly concealed by the pads.

  10. Samsung NP540U3C-A02UB Battery Replacement: шаг 10, изображение 1 из 1
    • Using the plastic opening tool, gently lift and remove the back cover.

    • There are clips along the edges of the back cover that hold it in place. Be careful not to break these.

  11. Samsung NP540U3C-A02UB Battery Replacement: шаг 11, изображение 1 из 2 Samsung NP540U3C-A02UB Battery Replacement: шаг 11, изображение 2 из 2
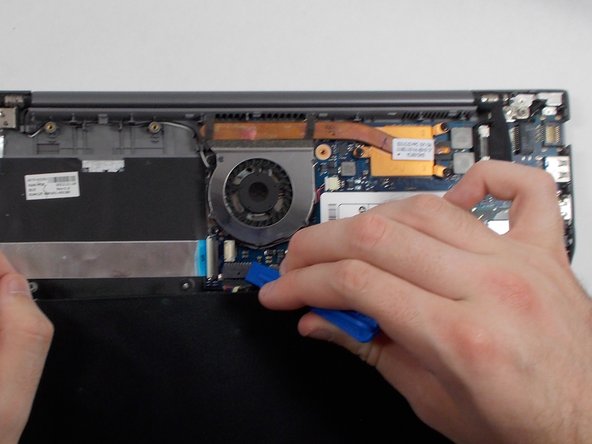
    • Using your hands or the plastic opening tool, gently remove the tape holding the wires in place.

  12. Samsung NP540U3C-A02UB Battery Replacement: шаг 12, изображение 1 из 3 Samsung NP540U3C-A02UB Battery Replacement: шаг 12, изображение 2 из 3 Samsung NP540U3C-A02UB Battery Replacement: шаг 12, изображение 3 из 3
    • Remove the 4x 4mm Phillips #00 screws securing the battery to the chassis.

  13. Samsung NP540U3C-A02UB Battery Replacement: шаг 13, изображение 1 из 2 Samsung NP540U3C-A02UB Battery Replacement: шаг 13, изображение 2 из 2
    • Using the plastic opening tool, gently pull the battery connector towards the battery to disconnect it.

  14. Samsung NP540U3C-A02UB Battery Replacement: шаг 14, изображение 1 из 1
    • Remove the battery from the laptop.

Заключение

To reassemble your device, follow these instructions in reverse order.

Еще один человек закончил это руководство.

Alejandro

Участник с: 03/28/22

253 Репутация

Автор 2 руководств

Команда

UMass Dartmouth, Team C-1, Gurgel Spring 2022 Участник UMass Dartmouth, Team C-1, Gurgel Spring 2022

UMASSD-GURGEL-S22SCG1

4 членов

Автор 6 руководств

0 Комментариев

Добавить комментарий

Просмотр статистики:

За последние 24часов: 1

За последние 7 дней: 13

За последние 30 дней: 34

За всё время: 892