Перейти к основному содержанию

Samsung Notebook 5 NP530E5M Fan Assembly Replacement

Выберете то, что вам нужно

  1. Samsung Notebook 5 NP530E5M Fan Assembly Replacement, Bottom Case: шаг 1, изображение 1 из 1
    • Flip the laptop over to access the bottom case.

    • Using a Phillips #000 screwdriver, remove the ten 6mm screws that secure the bottom case.

  2. Samsung Notebook 5 NP530E5M Fan Assembly Replacement: шаг 2, изображение 1 из 2 Samsung Notebook 5 NP530E5M Fan Assembly Replacement: шаг 2, изображение 2 из 2
    • Pry along the seam using an iFixit opening tool.

    • Lift off the bottom case.

  3. Samsung Notebook 5 NP530E5M Fan Assembly Replacement, Battery: шаг 3, изображение 1 из 1
    • Locate the battery towards the bottom left corner of the laptop.

  4. Samsung Notebook 5 NP530E5M Fan Assembly Replacement: шаг 4, изображение 1 из 3 Samsung Notebook 5 NP530E5M Fan Assembly Replacement: шаг 4, изображение 2 из 3 Samsung Notebook 5 NP530E5M Fan Assembly Replacement: шаг 4, изображение 3 из 3
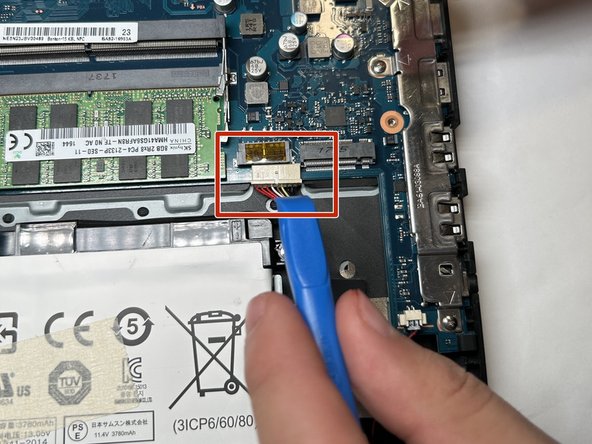
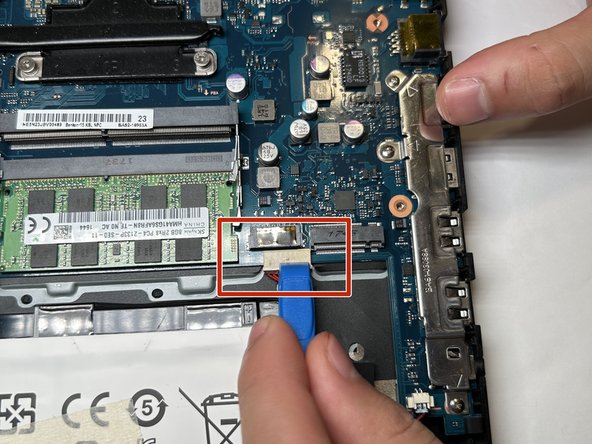
    • Using a spudger or iFixit opening tool, loosen the bundled power cable from its connector on the motherboard.

    • Disconnect the bundled cable connector.

  5. Samsung Notebook 5 NP530E5M Fan Assembly Replacement: шаг 5, изображение 1 из 3 Samsung Notebook 5 NP530E5M Fan Assembly Replacement: шаг 5, изображение 2 из 3 Samsung Notebook 5 NP530E5M Fan Assembly Replacement: шаг 5, изображение 3 из 3
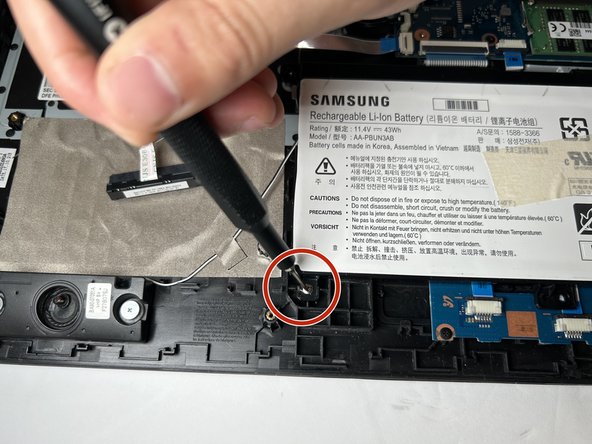
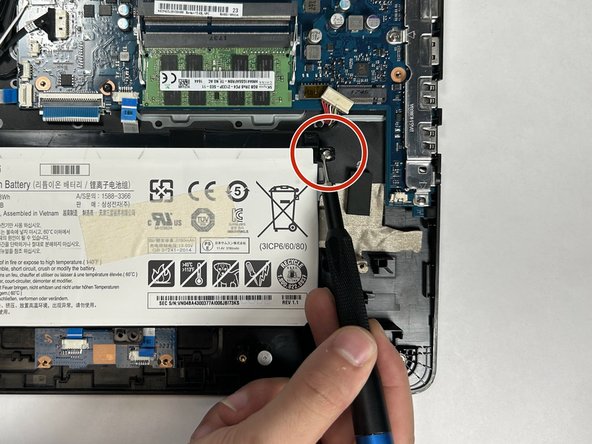
    • Using the Phillips #000 screwdriver, remove the three 5 mm screws holding the battery in place.

    • The screws are towards three corners of the battery, although there is an extra screw mount on the battery that is not used in this model of laptop.

  6. Samsung Notebook 5 NP530E5M Fan Assembly Replacement: шаг 6, изображение 1 из 2 Samsung Notebook 5 NP530E5M Fan Assembly Replacement: шаг 6, изображение 2 из 2
    • There is a "lip" in the bottom right corner of the battery mount.

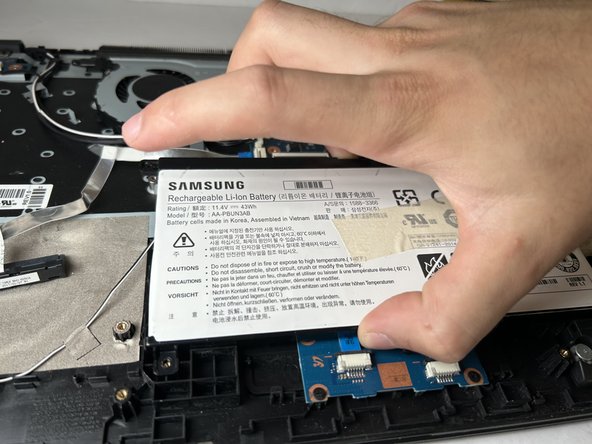
    • Gently grip the battery from the sides, lift up and and to the left to remove the battery from its place.

  7. Samsung Notebook 5 NP530E5M Fan Assembly Replacement, Fan Assembly: шаг 7, изображение 1 из 1
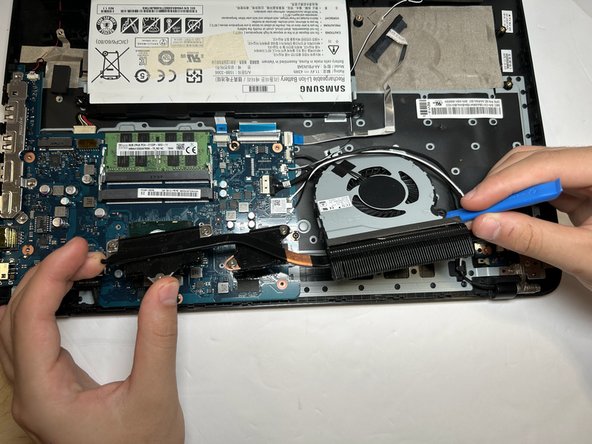
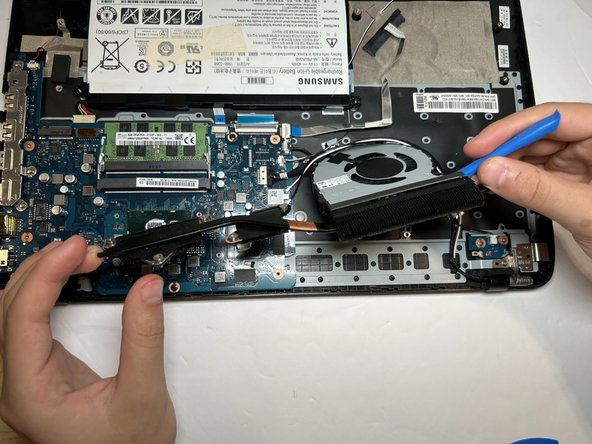
    • Locate the fan assembly towards the top of the laptop.

    • The assembly includes the fan and the heat sink that is attached to the motherboard.

    • Using a spudger or iFixit opening tool, gently remove the cable from the motherboard.

  8. Samsung Notebook 5 NP530E5M Fan Assembly Replacement: шаг 8, изображение 1 из 3 Samsung Notebook 5 NP530E5M Fan Assembly Replacement: шаг 8, изображение 2 из 3 Samsung Notebook 5 NP530E5M Fan Assembly Replacement: шаг 8, изображение 3 из 3
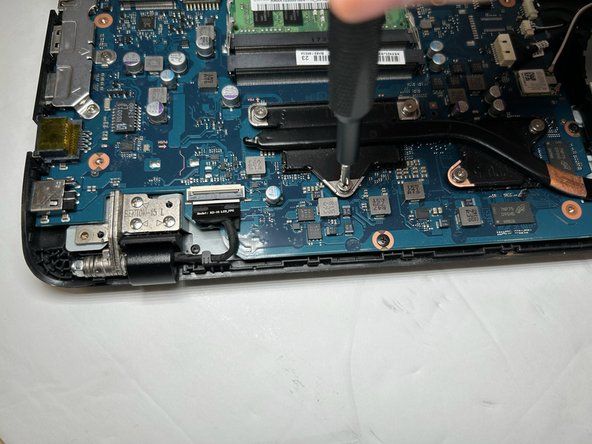
    • Using your Phillips #000 screwdriver, unscrew the five screws mounting the heat sink to the motherboard.

    • These captive screws are attached to the heat sink itself, so they will not come out completely.

  9. Samsung Notebook 5 NP530E5M Fan Assembly Replacement: шаг 9, изображение 1 из 2 Samsung Notebook 5 NP530E5M Fan Assembly Replacement: шаг 9, изображение 2 из 2
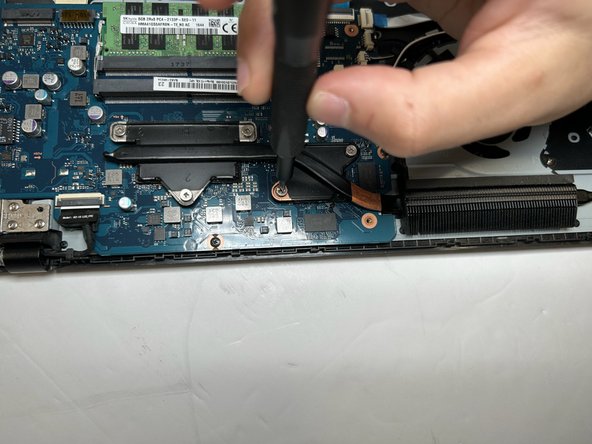
    • Using the Phillips #000 screwdriver, remove the two 4.5 mm screws holding the fan housing to the laptop case.

  10. Samsung Notebook 5 NP530E5M Fan Assembly Replacement: шаг 10, изображение 1 из 3 Samsung Notebook 5 NP530E5M Fan Assembly Replacement: шаг 10, изображение 2 из 3 Samsung Notebook 5 NP530E5M Fan Assembly Replacement: шаг 10, изображение 3 из 3
    • Carefully unseat the fan assembly from the case, using the pry tool.

    • The heat sink portion should detach easily from the board.

  11. Samsung Notebook 5 NP530E5M Fan Assembly Replacement: шаг 11, изображение 1 из 1
    • The CPU and GPU are now exposed on the motherboard. Avoid unnecessary contact to prevent potential static.

    • Using alcohol or thermal paste cleaner and a clean microfiber cloth, carefully remove the thermal paste left behind.

    • Re-apply a small dab of thermal paste to the now clean CPU and GPU before replacing the fan assembly.

    • Be careful applying thermal paste. You only want just enough to cover the contacts between the processors and heat sink.

Заключение

To reassemble your device, follow these instructions in reverse order.

Lucas Gil

Участник с: 09/07/23

690 Репутация

Автор 5 руководств

Команда

Gateway, Team 1-1, Gonzalez Fall 2023 Участник Gateway, Team 1-1, Gonzalez Fall 2023

GCC-GONZALEZ-F23S1G1

4 членов

Автор 6 руководств

0 Комментариев

Добавить комментарий

Просмотр статистики:

За последние 24часов: 0

За последние 7 дней: 1

За последние 30 дней: 7

За всё время: 120