Введение
The hard drive and SSD of your computer is the main data storage unit of your device. Overtime the storage unit is susceptible to stop working as originally intended. In many cases, the data in the hard drive/SSD may become corrupted. If you’re experiencing any problems with loading files in your computer, consider replacing the hard drive/SSD.
This is the Hard Drive and SSD replacement guide for Samsung Notebook 7 Spin NP740U3MK01US. If you suspect that your hard drive is failing or want faster processing speed and capacity upgrades, please follow this guide.
Выберете то, что вам нужно
-
-
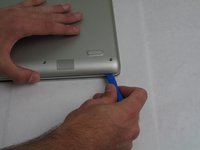
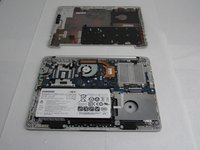
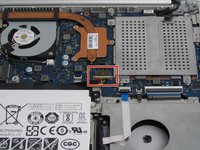
Use a Phillips #00 screwdriver to remove the four 6.5mm screws and the six 4.5mm screws that secure the back plate.
-
-
-
-
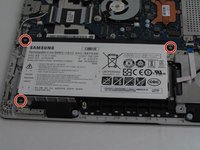
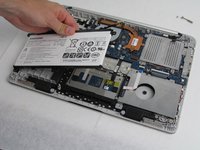
Use a Phillips #00 screwdriver to remove the three 4.5 mm screws holding the battery in place.
-
-
-
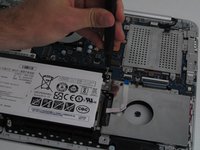
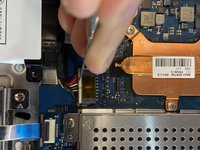
Use a spudger to pry the battery connecting cable from the laptop and remove the battery.
-


To reassemble your device, follow these instructions in reverse order.
To reassemble your device, follow these instructions in reverse order.
Команду

Embry-Riddle Aeronautical University, Team S23-G3, McClure Fall 2019 Участник Embry-Riddle Aeronautical University, Team S23-G3, McClure Fall 2019
ERAU-MCCLURE-F19S23G3
4 членов
Автор 5 руководств
2Комментарии к руководству
Would you point out where the SSD slot would be?
this was very helpfull!, im not sure where i could find the SSD though