Перейти к основному содержанию

Выберете то, что вам нужно

Это демонтаж а неруководство по ремонту. Чтобы отремонтировать Samsung SGH-A117, воспользуйтесь нашим сервисным руководством.

  1. Samsung SGH-A117: Breakdown and Reassembly, Samsumg SGH-A117: шаг 1, изображение 1 из 1
    • This is the Samsung SGH-A117.

  2. Samsung SGH-A117: Breakdown and Reassembly, Backside of the cellphone: шаг 2, изображение 1 из 1
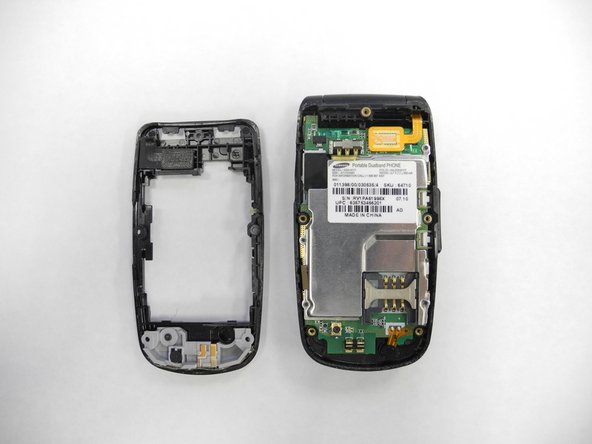
    • This is the back view following the removal of the back cover and battery.

  3. Samsung SGH-A117: Breakdown and Reassembly, Removing Screws: шаг 3, изображение 1 из 1
    • Use a screwdriver to remove screws around the frame.

    • Use a PH00 size screw to operate this step.

    • The screws are extremely small. It is recommended to have a small container to keep track of the screws.

  4. Samsung SGH-A117: Breakdown and Reassembly, Removing the Back Cover: шаг 4, изображение 1 из 2 Samsung SGH-A117: Breakdown and Reassembly, Removing the Back Cover: шаг 4, изображение 2 из 2
    • Insert the spudger under the back cover at the marked locations and gently lift to remove the back cover.

    • The end of the phone closest to the hinge will require additional force to lift.

    • Be careful not to bend the cover during the removal process.

  5. Samsung SGH-A117: Breakdown and Reassembly, Separate Circuit Connector from Logic Board: шаг 5, изображение 1 из 1
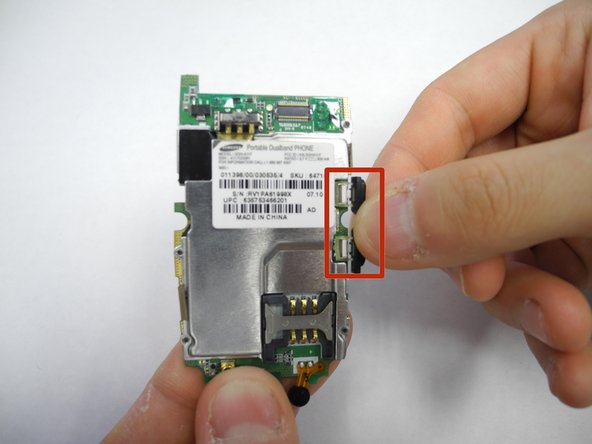
    • Use a spudger to gently lift the circuit connector from the logic board.

    • Be careful not to remove the circuit connector from the phone.

  6. Samsung SGH-A117: Breakdown and Reassembly, Lift Logic Board: шаг 6, изображение 1 из 2 Samsung SGH-A117: Breakdown and Reassembly, Lift Logic Board: шаг 6, изображение 2 из 2
    • Use a spudger to lift the logic board and separate it from the main body of the phone.

    • It is recommended to lift from the bottom part of the logic board as shown in the picture.

    • Be careful not to lose the volume button, which is loosely attached to the logic board.

  7. Samsung SGH-A117: Breakdown and Reassembly, Remove Keypad: шаг 7, изображение 1 из 2 Samsung SGH-A117: Breakdown and Reassembly, Remove Keypad: шаг 7, изображение 2 из 2
    • Gently push the keyboard from the case as shown in the picture.

  8. Samsung SGH-A117: Breakdown and Reassembly, Layout of Disassembled Device: шаг 8, изображение 1 из 1
    • 1 Case

    • 1 Keyboard

    • 1 Logic Board

    • 1 Volume Control

    • 1 Back Cover

    • 5 Screws

Justin

Участник с: 10/06/14

150 Репутация

Автор 2 руководств

Команда

Aristotle Участник Aristotle

Community

5 членов

Автор 3 руководств

0 Комментариев

Добавить комментарий

Просмотр статистики:

За последние 24часов: 2

За последние 7 дней: 3

За последние 30 дней: 6

За всё время: 782