Перейти к основному содержанию

Sceptre X9 Komodo VII Liquid Crystal Display Replacement

Выберете то, что вам нужно

  1. Sceptre X9 Komodo VII Liquid Crystal Display Replacement, Stand: шаг 1, изображение 1 из 1
    • Place the monitor face down.

    • Remove the four 11.5mm screws with a #2 Phillips screwdriver.

    • Remove the stand by pulling it out.

  2. Sceptre X9 Komodo VII Liquid Crystal Display Replacement: шаг 2, изображение 1 из 1
    • Remove two 11.5mm screws with a #2 Phillips screwdriver.

    • Remove the plastic bar.

  3. Sceptre X9 Komodo VII Liquid Crystal Display Replacement, Board Cover: шаг 3, изображение 1 из 1
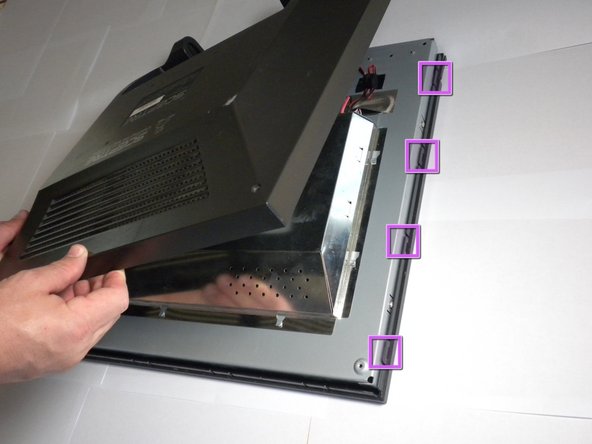
    • Using a #2 Phillips screwdriver, remove the six 7mm screws at the circled locations.

  4. Sceptre X9 Komodo VII Liquid Crystal Display Replacement: шаг 4, изображение 1 из 3 Sceptre X9 Komodo VII Liquid Crystal Display Replacement: шаг 4, изображение 2 из 3 Sceptre X9 Komodo VII Liquid Crystal Display Replacement: шаг 4, изображение 3 из 3
    • Pry the monitor using the plastic opening tool to release the clips holding the cover on.

    • There are four clips on each side, four on the top, and one on the bottom.

    • You may hear a loud snapping noise when releasing the clips. Do not be alarmed, it is natural.

    • Once all the clips have been released, remove the cover by pulling it up.

  5. Sceptre X9 Komodo VII Liquid Crystal Display Replacement: шаг 5, изображение 1 из 2 Sceptre X9 Komodo VII Liquid Crystal Display Replacement: шаг 5, изображение 2 из 2
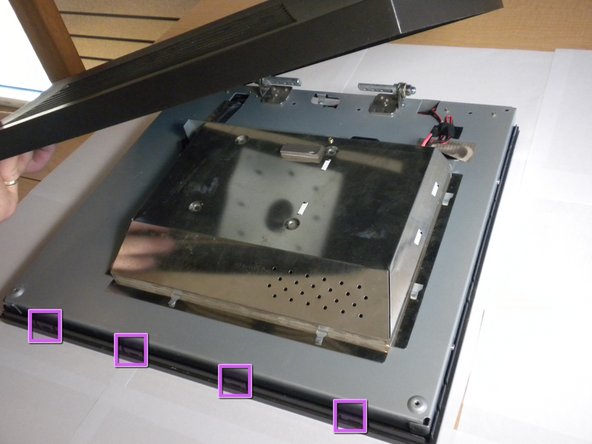
    • Using the #2 Phillips screwdriver, remove the one 6mm screw.

    • Unplug the indicated cable by pulling on the base.

    • Slide the cover toward the top of the monitor.

    • Remove the cover.

  6. Sceptre X9 Komodo VII Liquid Crystal Display Replacement, Liquid Crystal Display: шаг 6, изображение 1 из 3 Sceptre X9 Komodo VII Liquid Crystal Display Replacement, Liquid Crystal Display: шаг 6, изображение 2 из 3 Sceptre X9 Komodo VII Liquid Crystal Display Replacement, Liquid Crystal Display: шаг 6, изображение 3 из 3
    • Use caution when removing the connectors as they can easily break when removing.

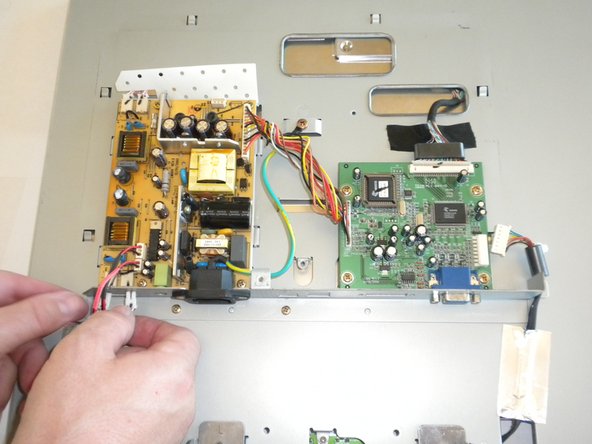
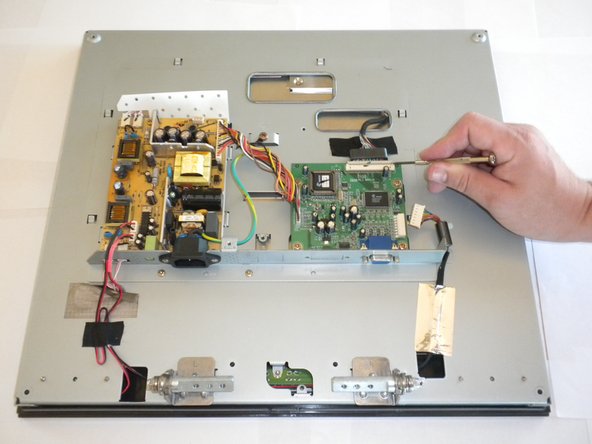
    • Disconnect the two connectors at the top-left of the power board.

    • Disconnect the two connectors at the very bottom of the power board (pink wire).

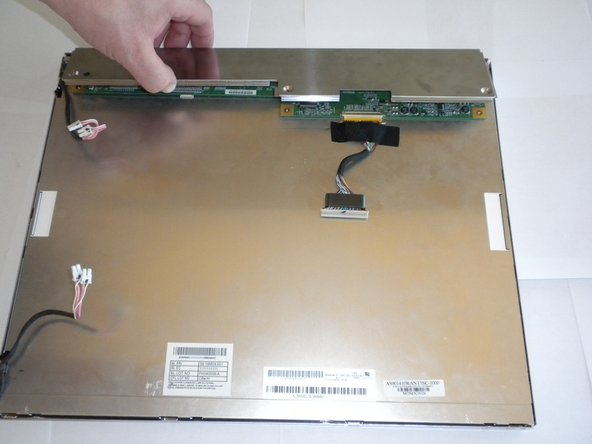
    • Disconnect the multi-pin connector at the top of the motherboard.

    • A small flat-blade screwdriver or tweezers can be used to assist in removal of connectors.

  7. Sceptre X9 Komodo VII Liquid Crystal Display Replacement: шаг 7, изображение 1 из 3 Sceptre X9 Komodo VII Liquid Crystal Display Replacement: шаг 7, изображение 2 из 3 Sceptre X9 Komodo VII Liquid Crystal Display Replacement: шаг 7, изображение 3 из 3
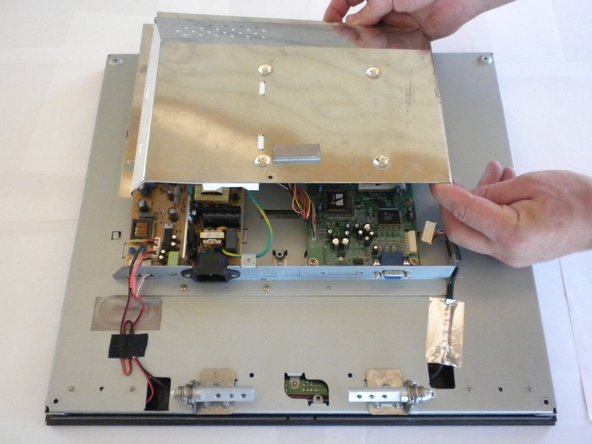
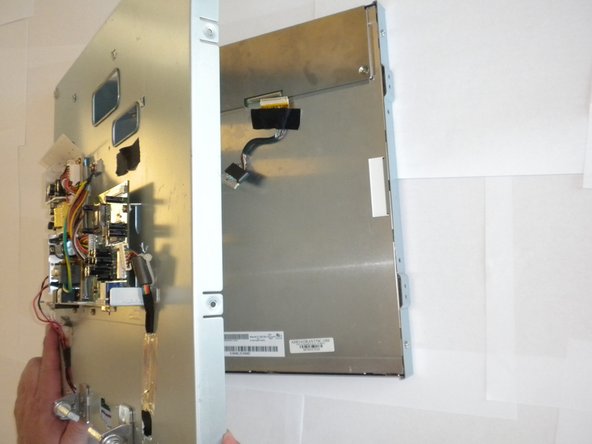
    • Use a #2 Phillips to unscrew the two 4.5mm screws on each side of the back panel.

    • Carefully side the connectors through their respective openings.

    • Lif the back panel to reveal the LCD back cover.

  8. Sceptre X9 Komodo VII Liquid Crystal Display Replacement, LCD Back Cover: шаг 8, изображение 1 из 3 Sceptre X9 Komodo VII Liquid Crystal Display Replacement, LCD Back Cover: шаг 8, изображение 2 из 3 Sceptre X9 Komodo VII Liquid Crystal Display Replacement, LCD Back Cover: шаг 8, изображение 3 из 3
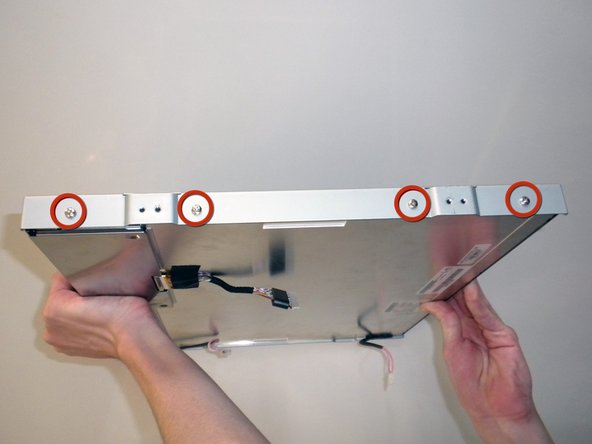
    • Use a #2 Phillips to remove the four 6mm screws on the bezel for each side of the back cover.

    • Remove the bezels from the LCD back cover (the bezels should simply fall off once the screws are removed).

  9. Sceptre X9 Komodo VII Liquid Crystal Display Replacement: шаг 9, изображение 1 из 3 Sceptre X9 Komodo VII Liquid Crystal Display Replacement: шаг 9, изображение 2 из 3 Sceptre X9 Komodo VII Liquid Crystal Display Replacement: шаг 9, изображение 3 из 3
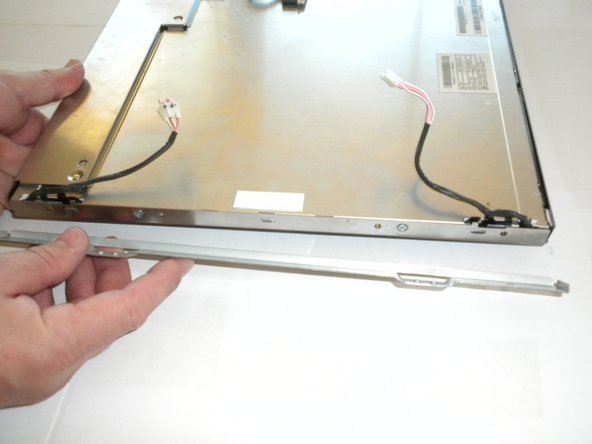
    • Use a #0 Phillips to remove the three 4.5mm screws located on the LCD back cover.

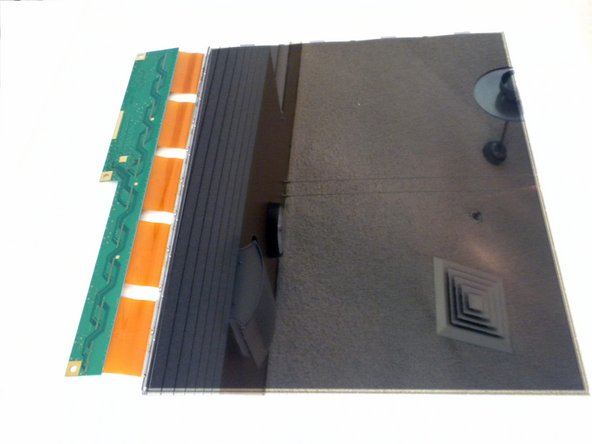
    • Lift the inner panel to remove it.

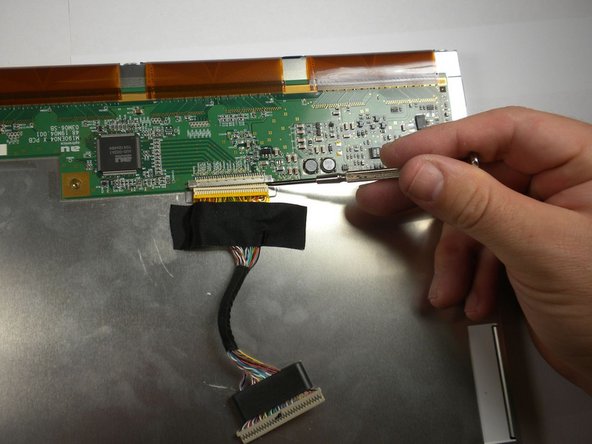
    • Disconnect the muti-pin connector on the LCD back cover by firmly pulling down on it.

  10. Sceptre X9 Komodo VII Liquid Crystal Display Replacement: шаг 10, изображение 1 из 2 Sceptre X9 Komodo VII Liquid Crystal Display Replacement: шаг 10, изображение 2 из 2
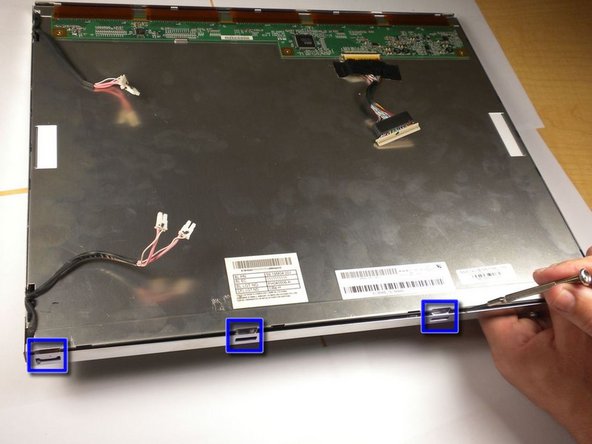
    • Use a #0 Phillips to remove the two 6mm screws on each side of the LCD cover.

    • There are tabs holding down the cover. You may have to use a bit of force to pry them open.

    • A small flat-blade screwdriver can be used to pry off LCD cover.

  11. Sceptre X9 Komodo VII Liquid Crystal Display Replacement: шаг 11, изображение 1 из 3 Sceptre X9 Komodo VII Liquid Crystal Display Replacement: шаг 11, изображение 2 из 3 Sceptre X9 Komodo VII Liquid Crystal Display Replacement: шаг 11, изображение 3 из 3
    • Lift the LCD back cover to reveal the LCD screen below.

Заключение

To reassemble your device, follow these instructions in reverse order.

Еще один человек закончил это руководство.

Alvin Lam

Участник с: 09/26/12

40 Репутация

1 руководство автора

Команда

Cal Poly, Team 16-56, Forte Fall 2012 Участник Cal Poly, Team 16-56, Forte Fall 2012

CPSU-FORTE-F12S16G56

5 членов

Автор 13 руководств

0 Комментариев

Добавить комментарий

Просмотр статистики:

За последние 24часов: 0

За последние 7 дней: 1

За последние 30 дней: 4

За всё время: 606