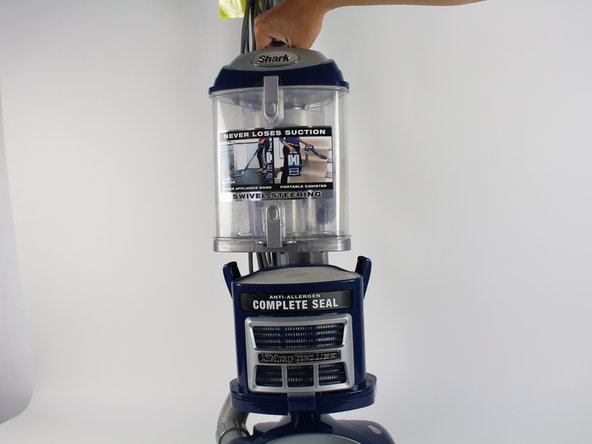
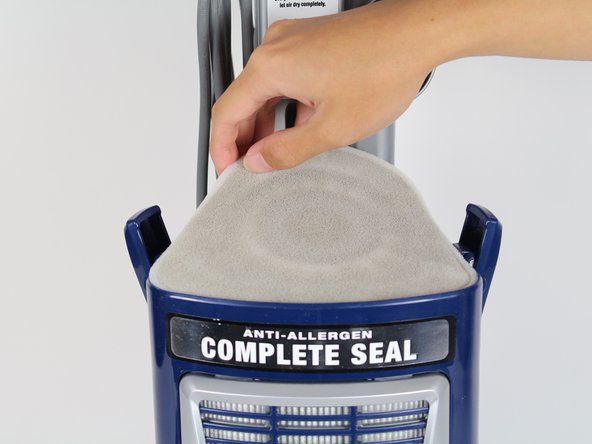
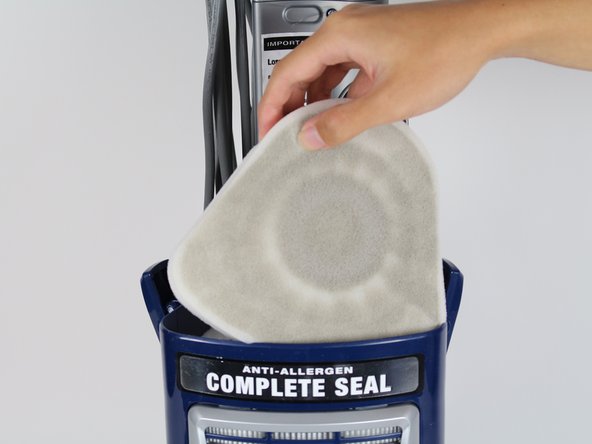
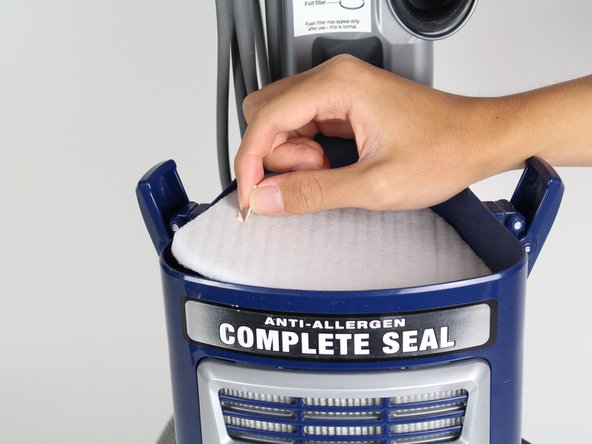
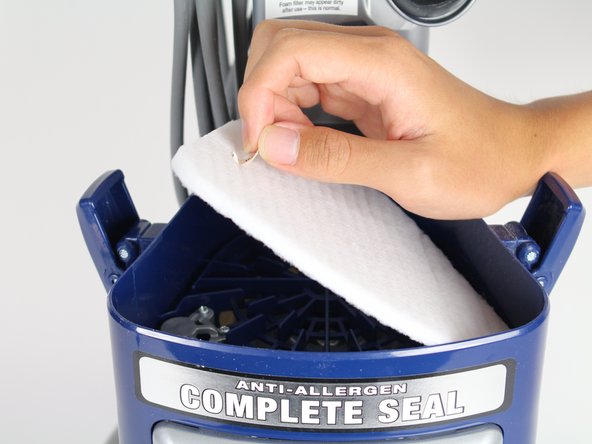
Перейти к основному содержанию

Shark Navigator Lift-Away Deluxe NV360 Power Button Replacement

Выберете то, что вам нужно

  1. Shark Navigator Lift-Away Deluxe NV360 Power Button Replacement, Foam and Felt Filters: шаг 1, изображение 1 из 1
    • Locate the latches on the side of the dust cup, the clear plastic chamber in the center of the vacuum.

  2. Shark Navigator Lift-Away Deluxe NV360 Power Button Replacement: шаг 2, изображение 1 из 3 Shark Navigator Lift-Away Deluxe NV360 Power Button Replacement: шаг 2, изображение 2 из 3 Shark Navigator Lift-Away Deluxe NV360 Power Button Replacement: шаг 2, изображение 3 из 3
    • Pull the bottom of the latch with your hand in an upward direction.

    • Lift the top of the latch up and away from the dust cup using your hand.

    • Repeat the above steps with the latch on the other side of the dust cup.

  3. Shark Navigator Lift-Away Deluxe NV360 Power Button Replacement: шаг 3, изображение 1 из 2 Shark Navigator Lift-Away Deluxe NV360 Power Button Replacement: шаг 3, изображение 2 из 2
    • Lift the dust cup up and away by its handle on the top with your hands.

  4. Shark Navigator Lift-Away Deluxe NV360 Power Button Replacement: шаг 4, изображение 1 из 3 Shark Navigator Lift-Away Deluxe NV360 Power Button Replacement: шаг 4, изображение 2 из 3 Shark Navigator Lift-Away Deluxe NV360 Power Button Replacement: шаг 4, изображение 3 из 3
    • Lift the foam filter up, out, and away with your hands.

  5. Shark Navigator Lift-Away Deluxe NV360 Power Button Replacement: шаг 5, изображение 1 из 3 Shark Navigator Lift-Away Deluxe NV360 Power Button Replacement: шаг 5, изображение 2 из 3 Shark Navigator Lift-Away Deluxe NV360 Power Button Replacement: шаг 5, изображение 3 из 3
    • Lift the felt filter up, out, and away with your hands by the tab on the top.

  6. Shark Navigator Lift-Away Deluxe NV360 Power Button Replacement, Power Button: шаг 6, изображение 1 из 2 Shark Navigator Lift-Away Deluxe NV360 Power Button Replacement, Power Button: шаг 6, изображение 2 из 2
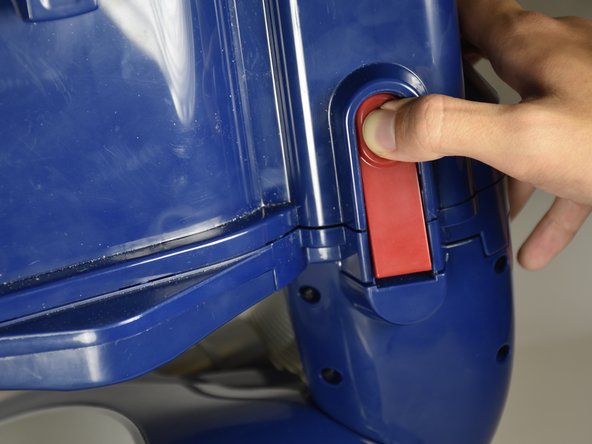
    • Locate the red latch on the side of the vacuum cleaner.

    • Push the circular region of the latch with your finger.

  7. Shark Navigator Lift-Away Deluxe NV360 Power Button Replacement: шаг 7, изображение 1 из 2 Shark Navigator Lift-Away Deluxe NV360 Power Button Replacement: шаг 7, изображение 2 из 2
    • Lift this upper plastic body of the vacuum cleaner up with your hands while continuing to press on the circular region of the latch.

  8. Shark Navigator Lift-Away Deluxe NV360 Power Button Replacement: шаг 8, изображение 1 из 3 Shark Navigator Lift-Away Deluxe NV360 Power Button Replacement: шаг 8, изображение 2 из 3 Shark Navigator Lift-Away Deluxe NV360 Power Button Replacement: шаг 8, изображение 3 из 3
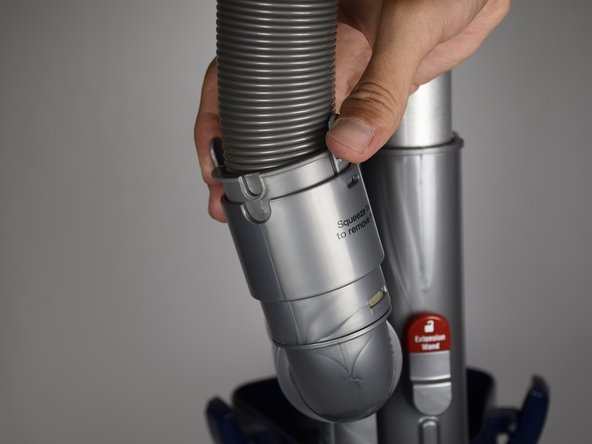
    • Locate the lower junction that connects the curved grey plastic tube and the hose coming from the vacuum cleaner's handle.

    • Press on the two grey flaps on either side of the hose simultaneously with your fingers and lift the hose out of the plastic cup with your hand.

  9. Shark Navigator Lift-Away Deluxe NV360 Power Button Replacement: шаг 9, изображение 1 из 3 Shark Navigator Lift-Away Deluxe NV360 Power Button Replacement: шаг 9, изображение 2 из 3 Shark Navigator Lift-Away Deluxe NV360 Power Button Replacement: шаг 9, изображение 3 из 3
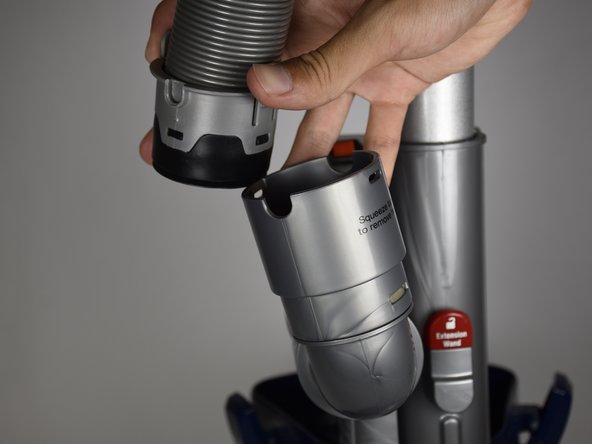
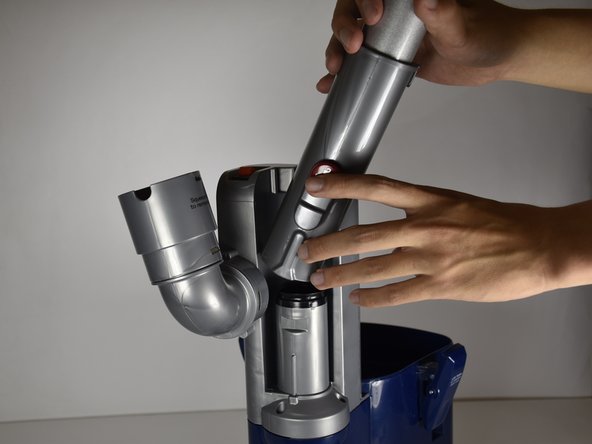
    • Locate the red latch that was next to the hose from the previous step.

    • Hold the bottom of vacuum cleaner's handle and its extension.

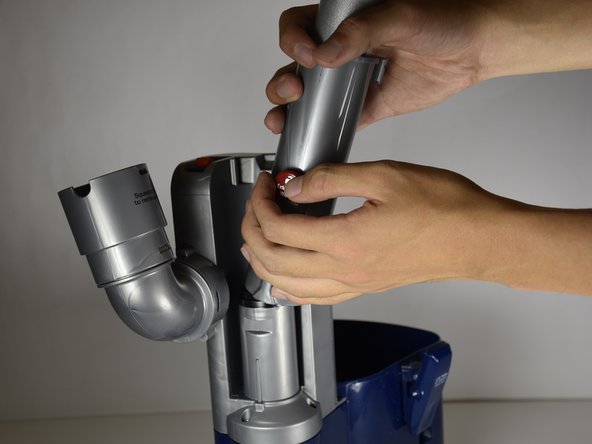
    • Use your other hand to press on the latch.

    • Lift the handle off the vacuum cleaner.

  10. Shark Navigator Lift-Away Deluxe NV360 Power Button Replacement: шаг 10, изображение 1 из 1
    • Remove the two 15mm screws with the PH1 screwdriver located on the bottom side of grey plastic body from which the handle was removed.

  11. Shark Navigator Lift-Away Deluxe NV360 Power Button Replacement: шаг 11, изображение 1 из 2 Shark Navigator Lift-Away Deluxe NV360 Power Button Replacement: шаг 11, изображение 2 из 2
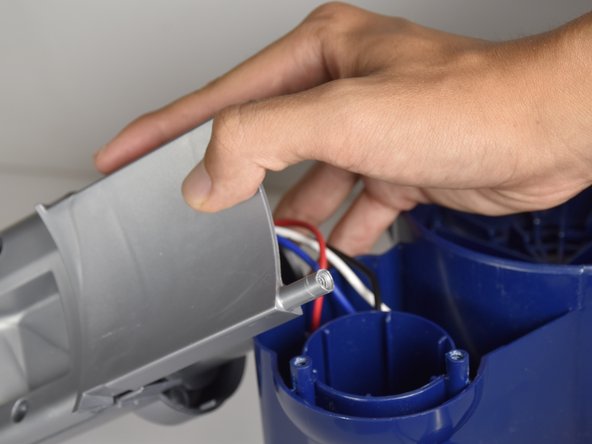
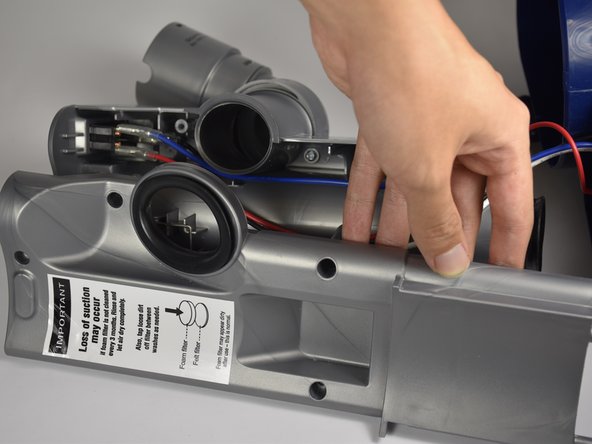
    • Lift the grey compartment out of the main body of the vacuum cleaner by pulling upwards with your hands.

  12. Shark Navigator Lift-Away Deluxe NV360 Power Button Replacement: шаг 12, изображение 1 из 3 Shark Navigator Lift-Away Deluxe NV360 Power Button Replacement: шаг 12, изображение 2 из 3 Shark Navigator Lift-Away Deluxe NV360 Power Button Replacement: шаг 12, изображение 3 из 3
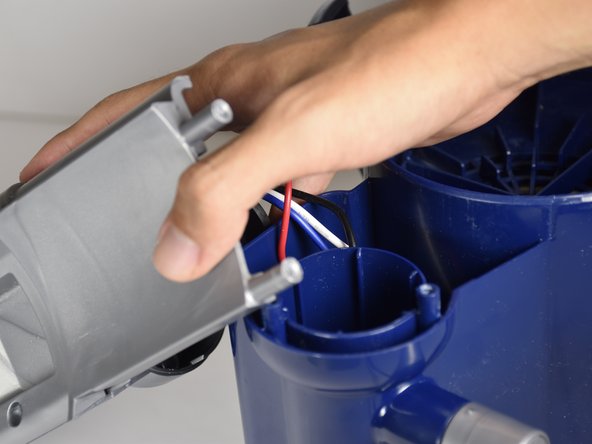
    • Continue to pull on the grey compartment until it is fully out of the main body of the vacuum.

    • Place the grey compartment on a surface for the next step.

  13. Shark Navigator Lift-Away Deluxe NV360 Power Button Replacement: шаг 13, изображение 1 из 3 Shark Navigator Lift-Away Deluxe NV360 Power Button Replacement: шаг 13, изображение 2 из 3 Shark Navigator Lift-Away Deluxe NV360 Power Button Replacement: шаг 13, изображение 3 из 3
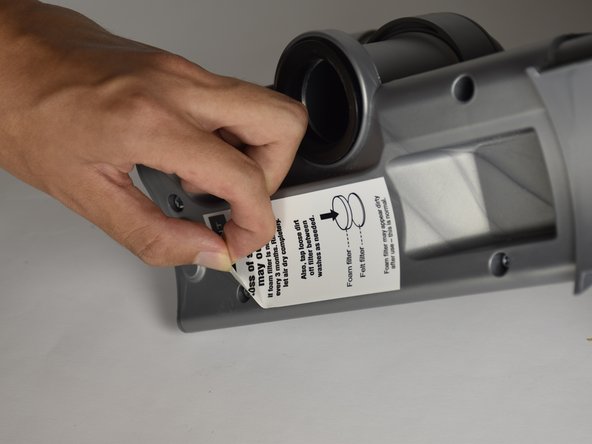
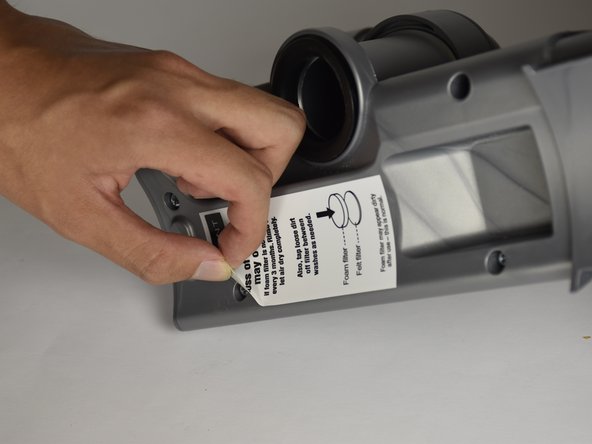
    • Peel the sticker away with your hands until the hidden screw hole is fully exposed.

  14. Shark Navigator Lift-Away Deluxe NV360 Power Button Replacement: шаг 14, изображение 1 из 1
    • Locate and remove the five 15mm screws with a PH1 screwdriver.

  15. Shark Navigator Lift-Away Deluxe NV360 Power Button Replacement: шаг 15, изображение 1 из 2 Shark Navigator Lift-Away Deluxe NV360 Power Button Replacement: шаг 15, изображение 2 из 2
    • Insert plastic opening tool into the crevice in the middle between the two halves of the grey compartment.

    • Apply an outward force throughout and all around the gap in order to separate the two plastic halves.

  16. Shark Navigator Lift-Away Deluxe NV360 Power Button Replacement: шаг 16, изображение 1 из 2 Shark Navigator Lift-Away Deluxe NV360 Power Button Replacement: шаг 16, изображение 2 из 2
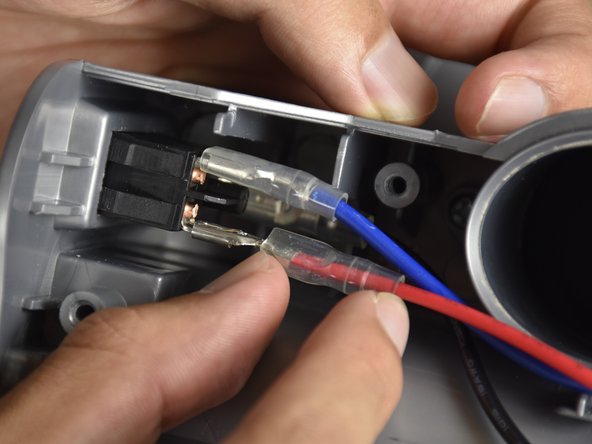
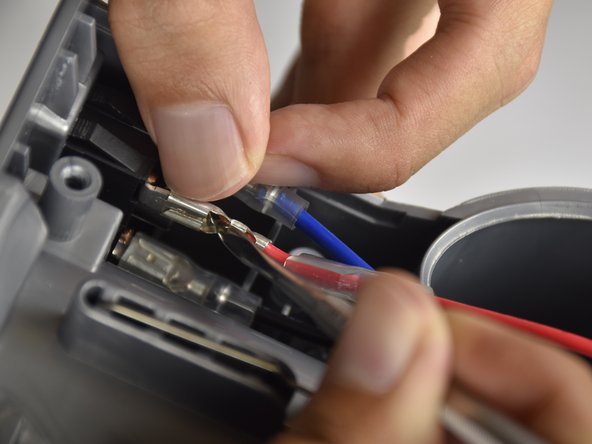
    • Locate the red power button and its red, blue, and black connected wires.

    • Pinch and pull the red wire's clear plastic insulator away from the power button with your hands until the metal connector is fully exposed.

    • Repeat this step for the blue wire.

  17. Shark Navigator Lift-Away Deluxe NV360 Power Button Replacement: шаг 17, изображение 1 из 3 Shark Navigator Lift-Away Deluxe NV360 Power Button Replacement: шаг 17, изображение 2 из 3 Shark Navigator Lift-Away Deluxe NV360 Power Button Replacement: шаг 17, изображение 3 из 3
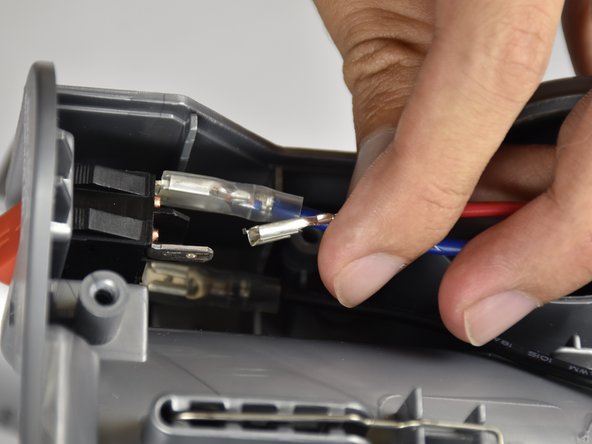
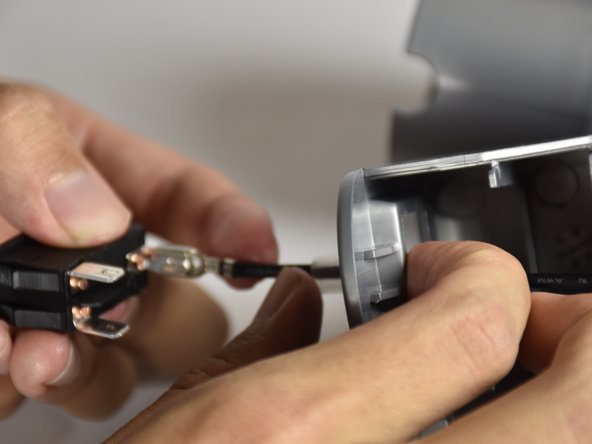
    • Locate the protrusion on the metal connector of the red wire.

    • Push down on the protrusion with the metal spudger while pushing the connector on the red wire away from the power button with your fingers.

    • Pull and wiggle the wire away by its connector with your fingers until it is completely detached from the connector on the power button.

    • Repeat this step for the blue wire

  18. Shark Navigator Lift-Away Deluxe NV360 Power Button Replacement: шаг 18, изображение 1 из 3 Shark Navigator Lift-Away Deluxe NV360 Power Button Replacement: шаг 18, изображение 2 из 3 Shark Navigator Lift-Away Deluxe NV360 Power Button Replacement: шаг 18, изображение 3 из 3
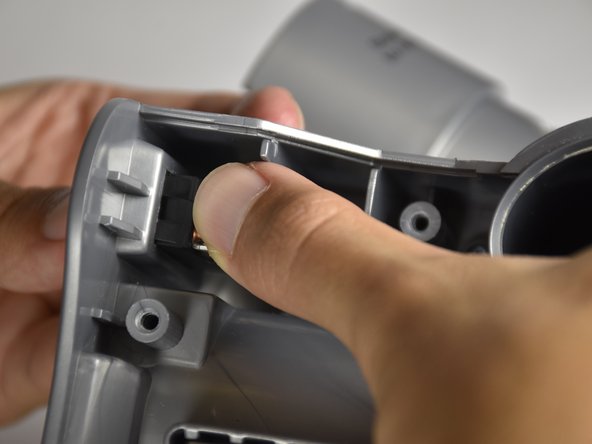
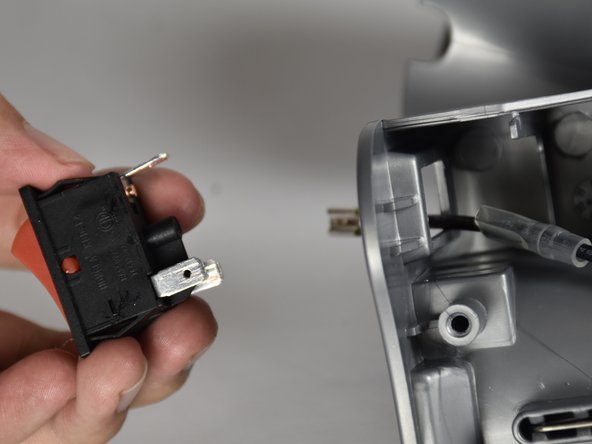
    • Push down towards the outside on the ledges that are holding the power button inside the grey frame.

    • Pull on the power button from the outside of the grey compartment with your hands, once the ledges are past the edge of grey frame.

  19. Shark Navigator Lift-Away Deluxe NV360 Power Button Replacement: шаг 19, изображение 1 из 3 Shark Navigator Lift-Away Deluxe NV360 Power Button Replacement: шаг 19, изображение 2 из 3 Shark Navigator Lift-Away Deluxe NV360 Power Button Replacement: шаг 19, изображение 3 из 3
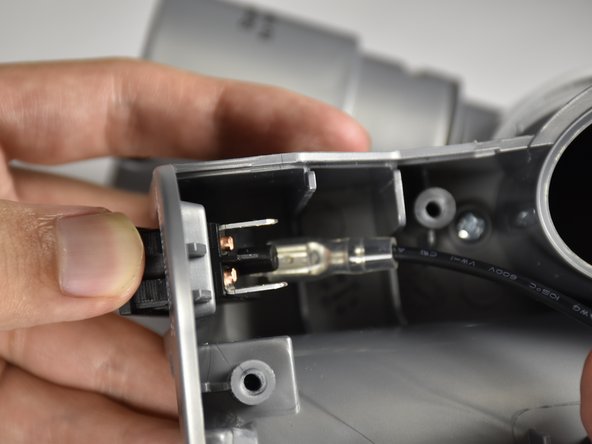
    • Pull the power button a couple inches away from the grey frame with your hands so that you have easy access to the black wire's connection.

    • Repeat steps 16 and 17 on the black wire and its connector.

    • Remove the disconnected power button away from the frame with your hands.

Заключение

To reassemble your device, follow these instructions in reverse order.

2 участников успешно повторили данное руководство.

Elena Postupalskaya

Участник с: 10/02/17

1 159 Репутация

Автор 6 руководств

Команда

Cal Poly, Team S15-G2, Livingston Fall 2017 Участник Cal Poly, Team S15-G2, Livingston Fall 2017

CPSU-LIVINGSTON-F17S15G2

3 членов

Автор 14 руководств

6 Комментариев

These instructions are for changing the switch and are great. My question is the switch isn’t listed as a needed part. How can I buy a replacement switch?

Mark Snowden - Ответить

search for shark (your model number here) power switch. I found it on amazon and several other places. That’s also how I found these instructions.

James Avey - Ответить

Great Instructions, except see notes on step 11 - there seems to be another step required to disconnect grey switch compartment.

Jonathan Steinberg - Ответить

Agree with previous question on Step 11 - half of the compartment will not come out. I thought a wire was jammed somehow. My roller will not work. I took apart the vacuum from the bottom up and it works with direct power to it (with a testing circuit) but as i moved up the electrical system, it seems to be at the switch compartment somewhere. Switch itself seems fine for the main motor, but will not activate the roller. Any ideas?

Scott Billingsley - Ответить

I want to return it, it didn’t work right out of the box!!

Kimberlee Smith - Ответить

Добавить комментарий

Просмотр статистики:

За последние 24часов: 15

За последние 7 дней: 54

За последние 30 дней: 254

За всё время: 29,331