Перейти к основному содержанию

Shark Ultimate Professional Mode Display Replacement

Выберете то, что вам нужно

  1. Shark Ultimate Professional Mode Display Replacement, Mode Display: шаг 1, изображение 1 из 3 Shark Ultimate Professional Mode Display Replacement, Mode Display: шаг 1, изображение 2 из 3 Shark Ultimate Professional Mode Display Replacement, Mode Display: шаг 1, изображение 3 из 3
    • Use the Philips head #0 screwdriver to remove the two 11.49mm screws at the back of the iron.

    • Remove the back cover piece.

    • Make sure the iron is unplugged and cooled off.

  2. Shark Ultimate Professional Mode Display Replacement: шаг 2, изображение 1 из 2 Shark Ultimate Professional Mode Display Replacement: шаг 2, изображение 2 из 2
    • Use the Philips head #0 screwdriver to remove the two 11.77mm screws holding the white clamp to the iron.

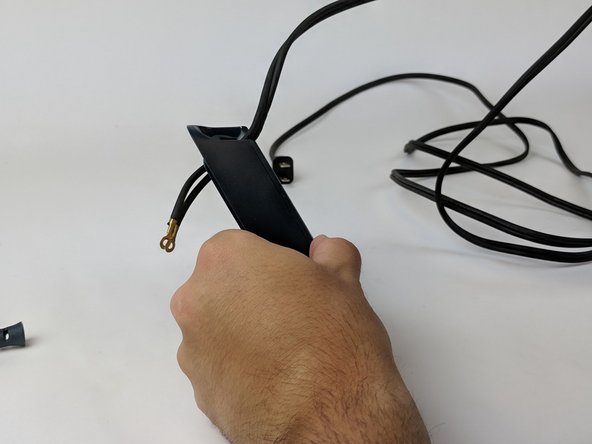
    • Use the Philips head #0 screwdriver to remove the two 6.58mm screws holding the black wires to the body of the iron.

    • Removing the left black wire will also free the red wire, attached by the same screw.

  3. Shark Ultimate Professional Mode Display Replacement: шаг 3, изображение 1 из 3 Shark Ultimate Professional Mode Display Replacement: шаг 3, изображение 2 из 3 Shark Ultimate Professional Mode Display Replacement: шаг 3, изображение 3 из 3
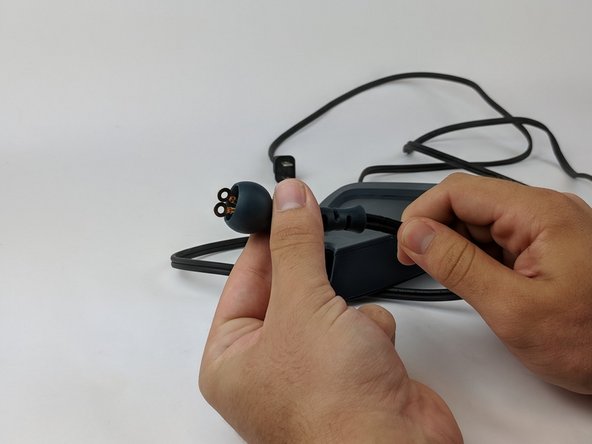
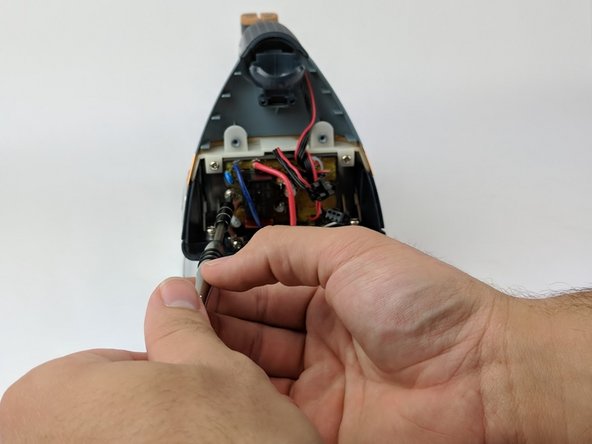
    • Pull the split end of the power cord upward through the ball joint of the iron.

    • Set aside the power cord.

  4. Shark Ultimate Professional Mode Display Replacement: шаг 4, изображение 1 из 3 Shark Ultimate Professional Mode Display Replacement: шаг 4, изображение 2 из 3 Shark Ultimate Professional Mode Display Replacement: шаг 4, изображение 3 из 3
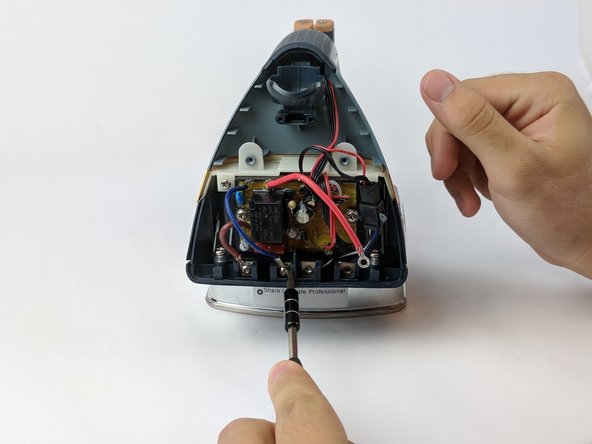
    • Use the Philips head #0 screwdriver to remove remaining 6.58mm screws that hold a wire on the bottom (brown and blue).

    • Unscrew from left to right.

    • Wires order (from left to right): Brown, Blue, Black, Red

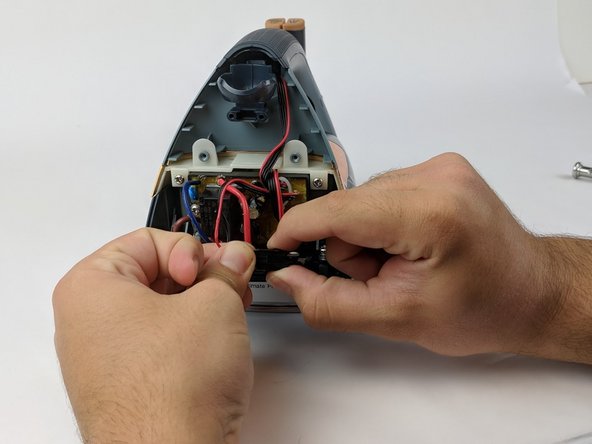
    • Unclip the black adapter piece on the bottom right.

  5. Shark Ultimate Professional Mode Display Replacement: шаг 5, изображение 1 из 2 Shark Ultimate Professional Mode Display Replacement: шаг 5, изображение 2 из 2
    • Use the Philips head #0 screwdriver to remove two 9.75mm screws (left and right) affixed to circuit board.

  6. Shark Ultimate Professional Mode Display Replacement: шаг 6, изображение 1 из 2 Shark Ultimate Professional Mode Display Replacement: шаг 6, изображение 2 из 2
    • Use the Philips head #0 screwdriver to remove the two 9.82mm screws (left and right) from the white border on top of the circuit board.

    • Pull the circuit board out from its affixed position.

  7. Shark Ultimate Professional Mode Display Replacement: шаг 7, изображение 1 из 3 Shark Ultimate Professional Mode Display Replacement: шаг 7, изображение 2 из 3 Shark Ultimate Professional Mode Display Replacement: шаг 7, изображение 3 из 3
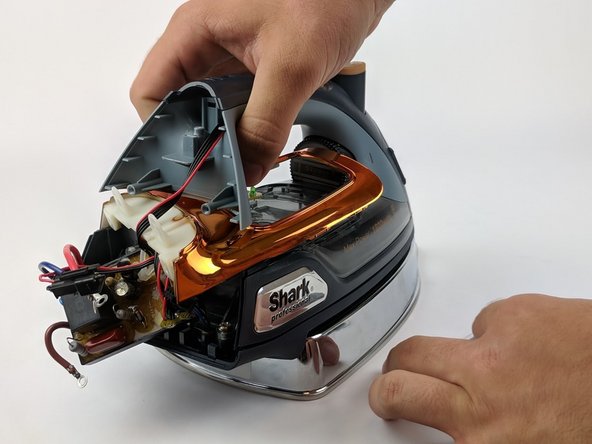
    • Lift the handle and wiggle the plastic trim and the orange-chrome bezel out from under the handle.

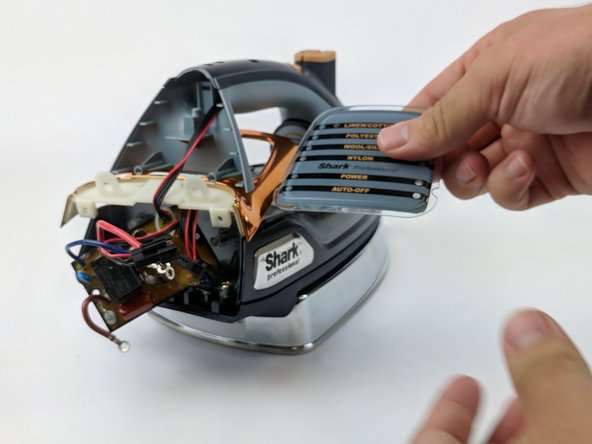
    • Remove and set aside the mode display.

Заключение

To reassemble your device, follow these instructions in reverse order.

Еще один человек закончил это руководство.

Drew Carff

Участник с: 10/23/17

868 Репутация

Автор 5 руководств

Команда

USF Tampa, Team S1-G4, Leahy Fall 2017 Участник USF Tampa, Team S1-G4, Leahy Fall 2017

USFT-LEAHY-F17S1G4

3 членов

Автор 10 руководств

0 Комментариев

Добавить комментарий

Просмотр статистики:

За последние 24часов: 1

За последние 7 дней: 1

За последние 30 дней: 4

За всё время: 643