Перейти к основному содержанию

Sharper Image SVC430 Disassembly

Абсолютно необходимое руководство
Это руководство предназначено только для использования в качестве обязательного условия для других руководств. Оно не полностью само по себе.

Выберете то, что вам нужно

  1. Sharper Image SVC430 Disassembly, Sharper Image SVC430 Disassembly: шаг 1, изображение 1 из 2 Sharper Image SVC430 Disassembly, Sharper Image SVC430 Disassembly: шаг 1, изображение 2 из 2
    • Power off your device before you begin.

    • Use your thumb to push down on the lever that says "open" while simultaneously pushing up the latch with your other thumb.

  2. Sharper Image SVC430 Disassembly: шаг 2, изображение 1 из 2 Sharper Image SVC430 Disassembly: шаг 2, изображение 2 из 2
    • Once the latch is free, simply pull the front of the waterproof case off and slide the camera out.

  3. Sharper Image SVC430 Disassembly: шаг 3, изображение 1 из 3 Sharper Image SVC430 Disassembly: шаг 3, изображение 2 из 3 Sharper Image SVC430 Disassembly: шаг 3, изображение 3 из 3
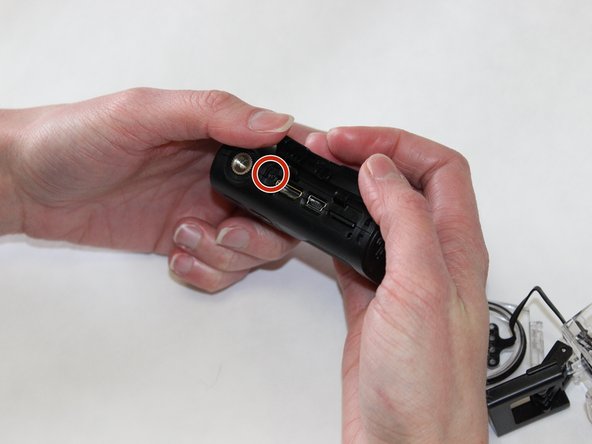
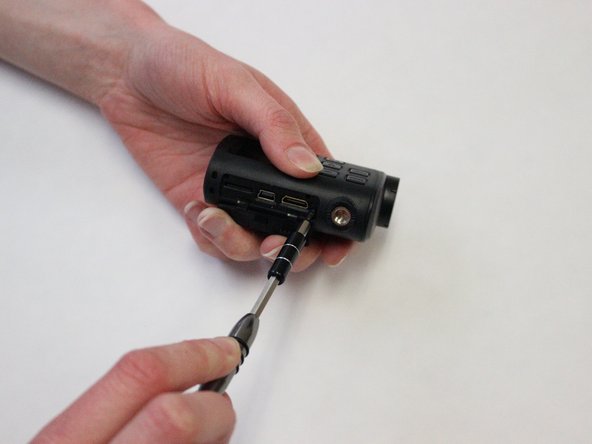
    • Locate the bottom of the device.

    • Now, using the metal screwdriver, unscrew the screw on the bottom of the device.

  4. Sharper Image SVC430 Disassembly: шаг 4, изображение 1 из 2 Sharper Image SVC430 Disassembly: шаг 4, изображение 2 из 2
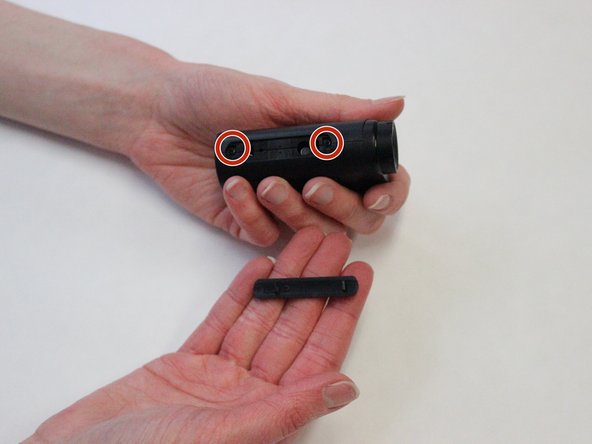
    • This panel should come off easily, do not apply too much pressure.

    • Use the plastic opening tool to pry open the plastic panel from the top of the camera.

    • Locate the two screws on the top of the device.

  5. Sharper Image SVC430 Disassembly: шаг 5, изображение 1 из 1
    • Use the JIS J0 screwdriver to unscrew the two screws on the top of the device.

  6. Sharper Image SVC430 Disassembly: шаг 6, изображение 1 из 3 Sharper Image SVC430 Disassembly: шаг 6, изображение 2 из 3 Sharper Image SVC430 Disassembly: шаг 6, изображение 3 из 3
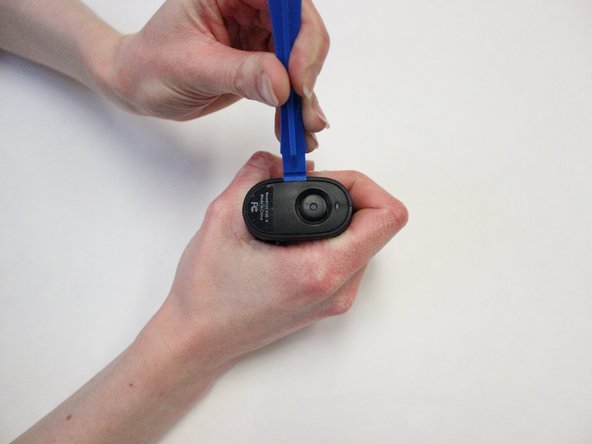
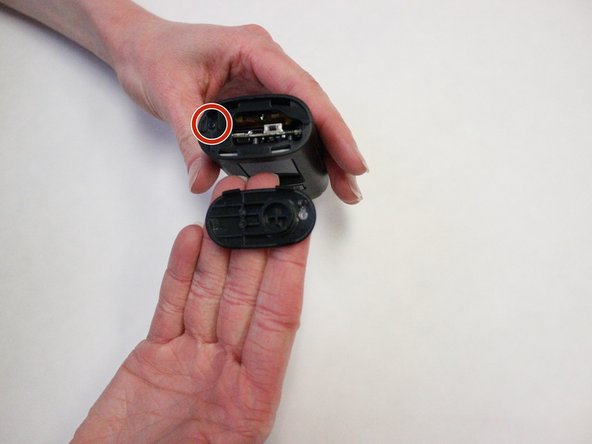
    • Use the plastic opening tool to pry off the back panel.

    • The back panel will come off easily.

  7. Sharper Image SVC430 Disassembly: шаг 7, изображение 1 из 1
    • Use the metal screwdriver to unscrew the screw from the back of the device.

  8. Sharper Image SVC430 Disassembly: шаг 8, изображение 1 из 1
    • Use the plastic opening tool to pry off the front panel of the device.

  9. Sharper Image SVC430 Disassembly: шаг 9, изображение 1 из 1
    • Using the screwdriver, unscrew the screw located underneath the front panel.

  10. Sharper Image SVC430 Disassembly: шаг 10, изображение 1 из 1
    • Be gentle with the device since there are wires attached to the front plate and two halves.

    • Gently pull both sides of the device to expose the interior of the device.

Заключение

To reassemble your device, follow these instructions in reverse order.

Еще один человек закончил это руководство.

Kathryn Mattingly

Участник с: 01/29/16

698 Репутация

Автор 6 руководств

Команда

University of Kentucky Louisville, Team 1-6, Matravers Spring 2016 Участник University of Kentucky Louisville, Team 1-6, Matravers Spring 2016

LOUISVILLE-MATRAVERS-S16S1G6

4 членов

Автор 6 руководств

0 Комментариев

Добавить комментарий

Просмотр статистики:

За последние 24часов: 0

За последние 7 дней: 0

За последние 30 дней: 0

За всё время: 48