Введение
This is a simple guide to setting up Smart Tweezers to measure Small Capacitance and Resistance.
If measuring for Resistance, select Resitance mode from the menu instead of Capacitance.
Выберете то, что вам нужно
-
-
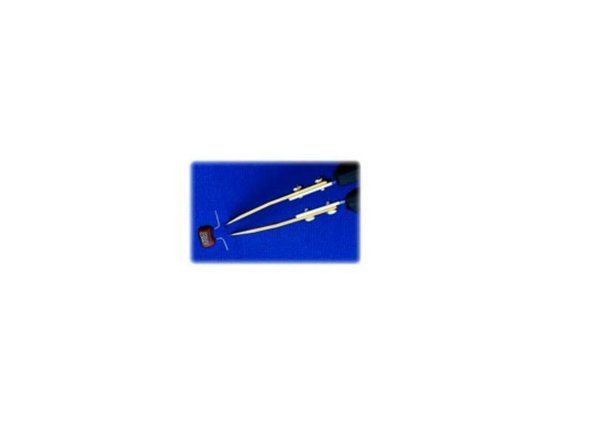
First, turn on the Smart Tweezers device by pressing the navigation button
-
-
-
Small capacitance is best measured in 'Manual Mode' with 10 KHz testing frequency.
-
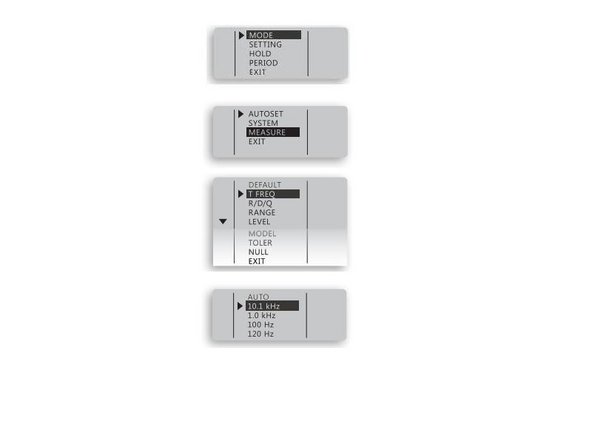
To Switch to 'Manual Mode', hold the navigation button down until the menu appears. Select and press MODE. Then MEASURE. Then select CAP.
-
The device is now in Capacitance Mode.
-
-
-
-
Now the Test Frequency needs to be changed to 10KHz.
-
Press the Navigation button again, and select MEASURE. Then SETTING, then T.FREQ. Select 10KHz.
-
The number on the screen that appears is the capacitance between the two tweezer tips at their default distance. This is the Capacitance Offset.
-
The offset is varied by the distance between the tips. The smaller the component, the closer the tips are together, thus a higher offset evaluation.
-
-
-
To store the offset so Smart Tweezers can automatically deduce it from measurements, first, enter the menu, select MODE, and set the device to manual CAP measurement.
-
Then select HOLD
-
Set the tweezer tips apart to a distance equal to the component to be measured. This is the offset.
-
Enter the NULL menu, and select SET.
-
An asterisk will appear beside the test mode indicator while measuring to indicate an offset has been stored.
-
-
-
Now that an offset has been stored, Capacitance can be measured more accurately.
-
-
-
When you are finished measuring, make sure to reset the offset and custom settings by selecting the menu, then pressing AUTOSET.
-


To turn off custom settings, frequencies, and erase the offset, hold the navigation button, and press AUTOSET.
To turn off custom settings, frequencies, and erase the offset, hold the navigation button, and press AUTOSET.
Отменить: Я не выполнил это руководство.
Еще один человек закончил это руководство.