Введение
If the main camera glass of your Smartab STJR700 camera is broken, you can either remove and replace the glass on the lens, or replace the whole camera lens.
Removing the glass on the lens while the Smartab STJR700 is still assembled may cause small pieces of glass to fall into the camera, but it is a faster method that requires less disassembly of the device.
Replacing the whole camera lens is a longer process, and requires removing the back panel, but it is less likely to damage the camera itself. This procedure includes replacing the glass lens and the camera bezel, and will require replacement rear glass adhesive.
Выберете то, что вам нужно
-
-
First, use a screwdriver to remove the screws on the back cover of the Smartab.
-
Next, carefully remove the cover to reveal the inside of the tablet.
-
-
-
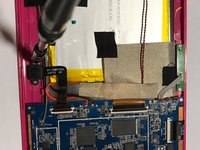
When you open the tablet, you will see several components.
-
You will see that the camera is stabilized by screws. The digitizer is held in place using black tape.
-
When the black tape is peeled back, you will see that the digitizer is also connected to the motherboard.
-
-
Инструмент, используемый на этом этапе:Tweezers$4.99
-
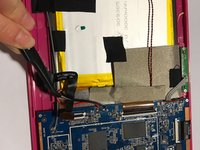
Use a screwdriver to unscrew the camera from the tablet.
-
Use tweezers to remove the digitizer from the hard drive.
-
After the digitizer is removed and the camera is unscrewed, remove them from the tablet.
-
Replace the old camera with a replacement camera by using a screwdriver. Replace the old digitizer with a replacement digitizer by using a soldering tool.
-
-
-
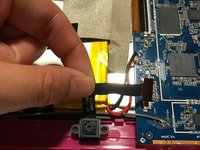
To replace the camera lens, start by removing the broken glass by using tweezers.
-
If the new lens has adhesive, make sure that all the old adhesive is removed from the frame so that the lens does not stick out, and so a tighter seal is formed.
-
Once the glass is removed, place the new camera lense by peeling off the upper film and align the glass with the ring.
-


To reassemble your device, follow these instructions in reverse order.
Команда

UMass Dartmouth, Team S3-G4, Botvin Spring 2017 Участник UMass Dartmouth, Team S3-G4, Botvin Spring 2017
UMASSD-BOTVIN-S17S3G4
4 членов
Автор 5 руководств