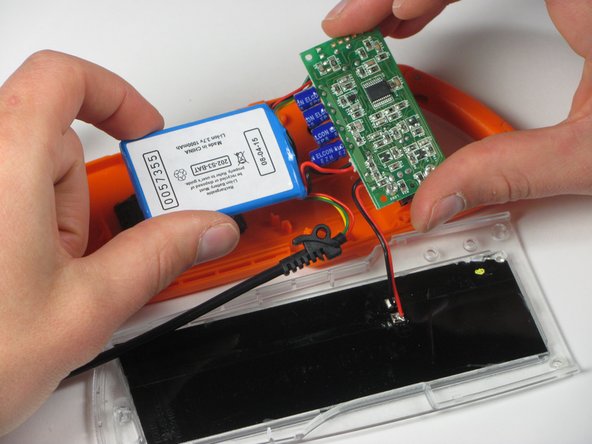
Перейти к основному содержанию

Solio Rocsta Internal Components Replacement

Архивированное руководство
Это руководство сохранено для исторических целей. Используйте его обновлённую версию, чтобы выполнить ремонт.

Выберете то, что вам нужно

  1. Solio Rocsta Internal Components Replacement, Internal Components: шаг 1, изображение 1 из 1
    • Remove the three 7mm Torx T7 screws.

  2. Solio Rocsta Internal Components Replacement: шаг 2, изображение 1 из 3 Solio Rocsta Internal Components Replacement: шаг 2, изображение 2 из 3 Solio Rocsta Internal Components Replacement: шаг 2, изображение 3 из 3
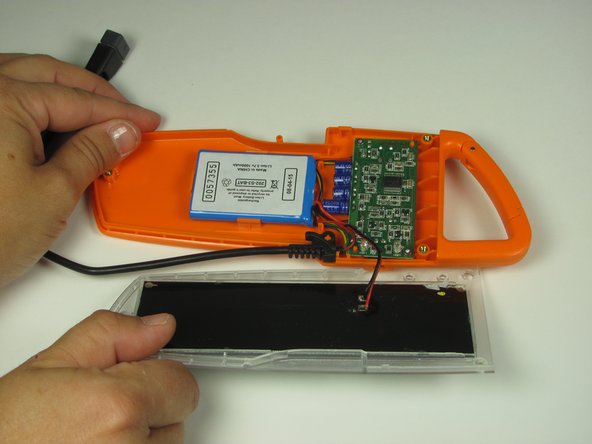
    • Insert the flat end of the spudger between the top panel and the body.

    • Use the spudger as a lever to carefully pry apart the two panels.

    • As you pry, take care not to break the small orange clip holding the top to the body.

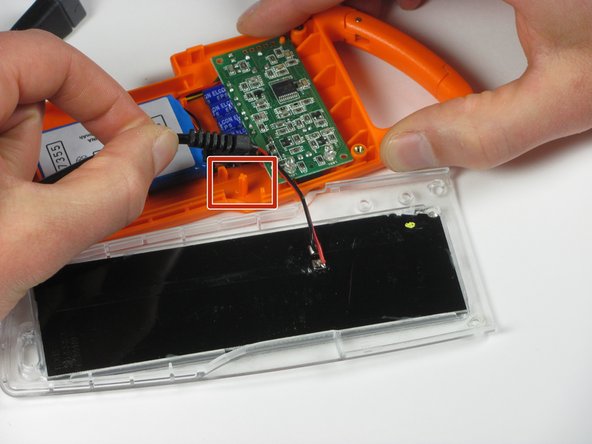
    • Lift the panel above and away to disconnect the panel from the body.

    • Be careful when lifting because you could break the wiring connecting the motherboard to the panel.

  3. Solio Rocsta Internal Components Replacement: шаг 3, изображение 1 из 2 Solio Rocsta Internal Components Replacement: шаг 3, изображение 2 из 2
    • Lift the panel off the body and set it next to the device.

    • Remember to use caution when lifting because you could break the wiring connecting the motherboard to the panel.

  4. Solio Rocsta Internal Components Replacement: шаг 4, изображение 1 из 1
    • Remove the two 6mm Torx T6 screws from the motherboard.

  5. Solio Rocsta Internal Components Replacement: шаг 5, изображение 1 из 2 Solio Rocsta Internal Components Replacement: шаг 5, изображение 2 из 2
    • Lift the end of the USB cord out of the body.

    • The cord fits over an orange peg.

  6. Solio Rocsta Internal Components Replacement: шаг 6, изображение 1 из 3 Solio Rocsta Internal Components Replacement: шаг 6, изображение 2 из 3 Solio Rocsta Internal Components Replacement: шаг 6, изображение 3 из 3
    • Lift up the battery with your fingers or with the flat end of the spudger.

    • Be prepared to use force because the battery is adhered to the body.

    • Do not try to remove the battery completely because the wiring connects to the motherboard.

  7. Solio Rocsta Internal Components Replacement: шаг 7, изображение 1 из 2 Solio Rocsta Internal Components Replacement: шаг 7, изображение 2 из 2
    • Remove the battery and the motherboard from the body.

Заключение

To reassemble your device, follow these instructions in reverse order.

Еще один человек закончил это руководство.

Aimee Whiteside

Участник с: 05/21/15

1 Репутация

1 руководство автора

Команда

iFixit, Team 1-1, Goldberg SU 2015 Участник iFixit, Team 1-1, Goldberg SU 2015

FIX-GOLDBERG-SU15S1G1

3 членов

Автор 1 руководств

0 Комментариев

Добавить комментарий

Просмотр статистики:

За последние 24часов: 1

За последние 7 дней: 1

За последние 30 дней: 1

За всё время: 59