Эта версия возможно содержит некорректные исправления. Переключить на последнюю проверенную версию.
Выберете то, что вам нужно
-
Этот шаг не переведен. Помогите перевести
-
With all other devices unplugged, flip the Charger Hub over so that the grey side with the screw is face up.
-
Take out the PH000 bit from your 26 Bit Driver Kit and attach it to the screw driver.
-
-
Этот шаг не переведен. Помогите перевести
-
Once the screw has been fully loosened, pull it out and place it to the side. Be careful not to lose it!
-
-
Этот шаг не переведен. Помогите перевести
-
Without pushing too hard, slightly lift the side of the gray bottom panel that was screwed down (the far side in this picture).
-
Do not force the whole gray bottom panel off, as it is not ready to come off yet!
-
-
Этот шаг не переведен. Помогите перевести
-
If you are having difficulty pushing the gray bottom panel up, use the Plastic Opening Tools for assistance.
-
Do not bend the gray bottom panel completely up, as a clip is still holding it in place on the other side of the Charger Hub! Excessive bending may damage the device.
-
-
-
Этот шаг не переведен. Помогите перевести
-
To fully remove the gray bottom panel, it must be slid out of place to release it from the internal sealing methods. Push/slide the grey bottom panel to the left given the orientation presented in the picture.
-
-
Этот шаг не переведен. Помогите перевести
-
Fully remove the gray bottom panel. The insides of the Charger Hub should now be fully exposed as shown.
-
-
Этот шаг не переведен. Помогите перевести
-
Using the Phillips bit PH1 from the 26 Bit Driver Kit, remove the three screws keeping the orange battery cover held in place. Keep track of these screws as well; they are not the same type of screw used to secure the bottom gray panel.
-
This part will take patience, as the PH1 bit may not fit perfectly within the threads of the screws. Applying a firm amount of pressure while unscrewing makes this process easier.
-
-
Этот шаг не переведен. Помогите перевести
-
Simply lift up the orange battery cover and place it to the side.
-
-
Этот шаг не переведен. Помогите перевести
-
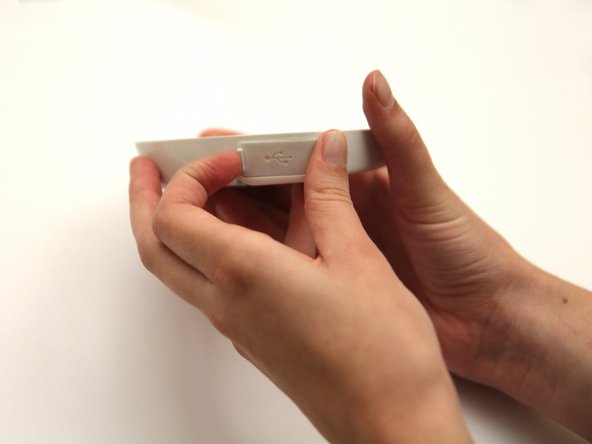
Before moving to remove the circuit board, pull out the USB port protector. This will allow the circuit board to be removed without conflict.
-
-
Этот шаг не переведен. Помогите перевести
-
Be careful! You are working with a delicate circuit board, so you want to make sure you do not force any movements.
-
The battery is attached to the circuit board via wires, so you must remove both at once.
-
Place the Plastic Opening Tool underneath the circuit board and lift the circuit board up so that it becomes loosened.
-
-
Этот шаг не переведен. Помогите перевести
-
Remove the circuit board and the battery from the plastic casing.
-
-
Этот шаг не переведен. Помогите перевести
-
This step will require some force, but be careful not to over stress the circuit board, as you do not want to break it!
-
Pull the white base of the wires out of the white port on the circuit board.
-
-
Этот шаг не переведен. Помогите перевести
-
Now that the battery is removed, you can plug in your new Lithium Polymer Battery - 3.7V 2000mAh into the circuit board.
-
Follow the steps in reverse order using your new battery to put the device back together.
-


Отменить: Я не выполнил это руководство.
17 участников успешно повторили данное руководство.
Команда

Cal Poly, Team 8-21, Regan Fall 2012 Участник Cal Poly, Team 8-21, Regan Fall 2012
CPSU-REGAN-F12S8G21
1 член
Автор 1 руководств
Один комментарий
Please note that the replacement battery is available from Solio here:
http://store.solio.com/Solio-Bolt-Hub-Re...
The battery listed in the direction above does not fit the space, has the wrong connector, and is not the high-temp rated battery required for the extreme conditions of solar charging.