Введение
This guide will help you replace the optical drive in your Sony BDP-BX320 Blu-ray player. The optical drive is responsible for reading Blu-ray and DVD discs. This guide specifically addresses replacing the optical drive due to errors during playback, audio issues, or distortion.
Unplug the device before starting the repair to avoid electrical hazards. Check the disc tray for dust( you may use as ESD-safe brush or small dust blower). If the player was exposed to liquid or physical damage, inspect for potential issues with other components. Use an anti-static wrist strap to protect internal components from electrostatic discharge (ESD).
Step 7 involves detaching the old optical drive. Have a new optical drive ready for installation, and properly dispose of the old optical drive by following local e-waste disposal guidelines.
Restore the functionality of your Sony BDP-BX320 Blu-ray player with the steps in this guide.
Выберете то, что вам нужно
-
-
Power off and unplug the device from any power source.
-
Place the Blue-ray player on a clean, stable surface.
-
-
Инструмент, используемый на этом этапе:Magnetic Project Mat$19.95
-
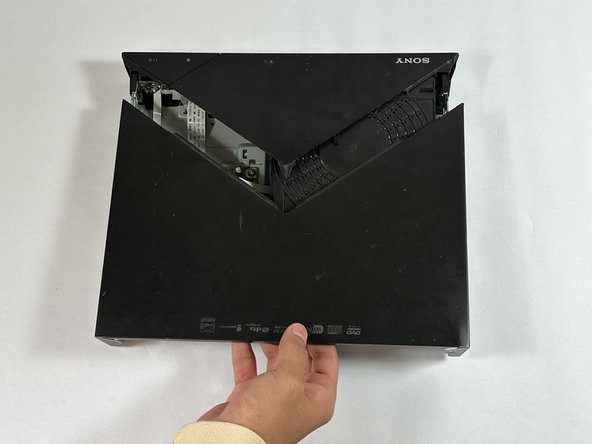
Use a Phillips #1 screwdriver to remove the three 8.3 mm screws on the back of the device.
-
Slide the back section of the top case off the device.
-
-
-
Use your hands or a metal spudger to gently disconnect the case from the small tabs on the bottom and sides of the device.
-
-
-
-
Locate the optical drive, which is positioned next to the main board and connected by a wide ZIF connector ribbon cable.
-
-
Инструмент, используемый на этом этапе:Phillips #1 Screwdriver$5.49
-
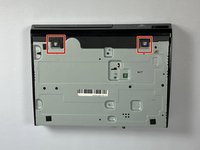
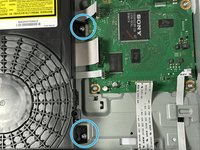
Use a Phillips #1 Screwdriver to remove the two 7 mm screws that secure the optical drive to the frame of the device.
-
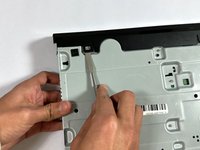
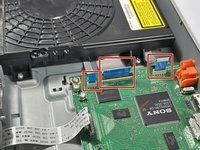
Use a spudger or a clean fingernail to flip up the locking flap of the ZIF connector located between the two "no fuss" ribbon cables that are attached to the board. This action puts the connector in the unlocked position.
-
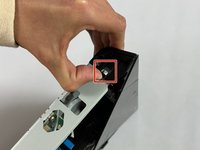
Use tweezers or your fingers to gently pull the cable out of its socket by the blue tab.
-
Pull the other two "no-fuss" ribbon cables straight out of their socket to disconnect them.
-


By following these steps, you should have successfully replaced the optical drive in your Sony BDP-BX320, and resolved playback issues due to a faulty drive. To reassemble, follow these steps in reverse order. Carefully replace the outer casing if needed and screw it back into place. Ensure all screws are tightened, but avoid overtightening.
By following these steps, you should have successfully replaced the optical drive in your Sony BDP-BX320, and resolved playback issues due to a faulty drive. To reassemble, follow these steps in reverse order. Carefully replace the outer casing if needed and screw it back into place. Ensure all screws are tightened, but avoid overtightening.
Отменить: Я не выполнил это руководство.
Еще один человек закончил это руководство.

Команду

CSU Los Angeles, Team 5-2, Kershman Fall 2024 Участник CSU Los Angeles, Team 5-2, Kershman Fall 2024
CSULA-KERSHMAN-F24S5G2
6 членов
Автор 3 руководств