Перейти к основному содержанию

Sony CPF-IP001 Power Plug Replacement

Выберете то, что вам нужно

  1. Sony CPF-IP001 Power Plug Replacement, Power Plug: шаг 1, изображение 1 из 3 Sony CPF-IP001 Power Plug Replacement, Power Plug: шаг 1, изображение 2 из 3 Sony CPF-IP001 Power Plug Replacement, Power Plug: шаг 1, изображение 3 из 3
    • The Sony Cradle Audio System will have 14 XXXX type of screws located on the bottom of the device.

    • Using a Phillips #2 screwdriver, remove all 14 screws.

  2. Sony CPF-IP001 Power Plug Replacement: шаг 2, изображение 1 из 3 Sony CPF-IP001 Power Plug Replacement: шаг 2, изображение 2 из 3 Sony CPF-IP001 Power Plug Replacement: шаг 2, изображение 3 из 3
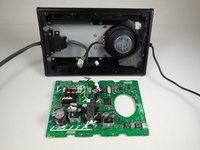
    • Once all of the screws are removed, the cover can be taken off using a metal spudger.

    • There are 8 more XXXX screws holding the circuit board in place that will need to be removed.

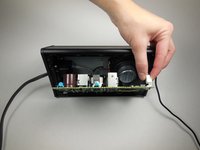
    • Once the screws are removed, a plastic spudger can be used to carefully move the circuit board away from the device.

    • There will be 3 wires connected to the opposite side of the circuit board. Be careful not to pull the board out of the device too far and damage these wires.

  3. Sony CPF-IP001 Power Plug Replacement: шаг 3, изображение 1 из 2 Sony CPF-IP001 Power Plug Replacement: шаг 3, изображение 2 из 2
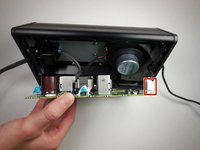
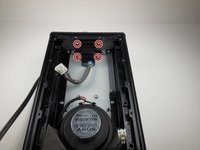
    • The first of the 3 wires can easily be found and is connected to the board via a clip.

    • To remove the clip squeeze the tap and pull it out.
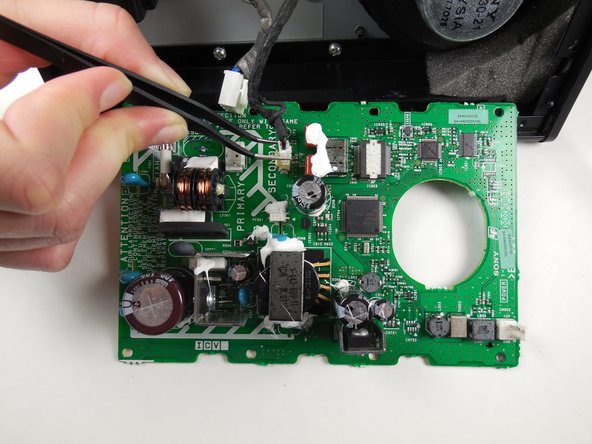
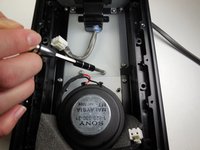
    • There are still 2 more wires connected to the board. Now that the first has been removed the other two can be more easily reached.

  4. Sony CPF-IP001 Power Plug Replacement: шаг 4, изображение 1 из 3 Sony CPF-IP001 Power Plug Replacement: шаг 4, изображение 2 из 3 Sony CPF-IP001 Power Plug Replacement: шаг 4, изображение 3 из 3
    Инструмент, используемый на этом этапе:
    Tweezers
    $4.99
    Купить
    • The wire furthest to the left of the device can be removed in the same way that he first was removed. Simply squeeze the clip and pull out.

    • The final wire (furthest to the right) can be carefully removed using a pair of tweezers.

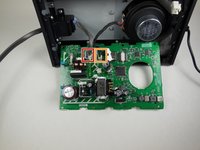
    • Now the circuit board has been completely removed from the device and can be set aside.

  5. Sony CPF-IP001 Power Plug Replacement: шаг 5, изображение 1 из 2 Sony CPF-IP001 Power Plug Replacement: шаг 5, изображение 2 из 2
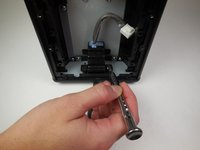
    • Next the housing for the power switch and power cord must be removed.

    • Remove the 4 XXXX screws using a Phillips #2 screwdriver.

  6. Sony CPF-IP001 Power Plug Replacement: шаг 6, изображение 1 из 3 Sony CPF-IP001 Power Plug Replacement: шаг 6, изображение 2 из 3 Sony CPF-IP001 Power Plug Replacement: шаг 6, изображение 3 из 3
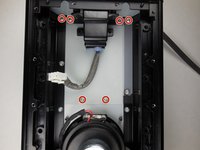
    • Remove these next 6 XXXX screws using a Phillips #2 screwdriver.

    • The housing is now disconnected from the device and can be pulled out from the side.

    • The power housing will come out as a whole unit with the subwoofer air tunnel.

  7. Sony CPF-IP001 Power Plug Replacement: шаг 7, изображение 1 из 1
    • The subwoofer air tunnel can be removed by unscrewing the 2 XXXX screws with a Phillips #2 screwdriver.

Заключение

To reassemble your device, follow these instructions in reverse order.

Mike Bolton

Участник с: 04/14/15

473 Репутация

Автор 4 руководств

Команда

Cal Poly, Team 6-14, Maness Spring 2015 Участник Cal Poly, Team 6-14, Maness Spring 2015

CPSU-MANESS-S15S6G14

4 членов

Автор 8 руководств

0 Комментариев

Добавить комментарий

Просмотр статистики:

За последние 24часов: 0

За последние 7 дней: 1

За последние 30 дней: 8

За всё время: 152