Перейти к основному содержанию

Sony Cyber-Shot DSC-H1 Lens Replacement

Выберете то, что вам нужно

  1. Sony Cyber-Shot DSC-H1 Lens Replacement, Back Panel: шаг 1, изображение 1 из 1
    • Power down the camera and remove the batteries.

  2. Sony Cyber-Shot DSC-H1 Lens Replacement: шаг 2, изображение 1 из 3 Sony Cyber-Shot DSC-H1 Lens Replacement: шаг 2, изображение 2 из 3 Sony Cyber-Shot DSC-H1 Lens Replacement: шаг 2, изображение 3 из 3
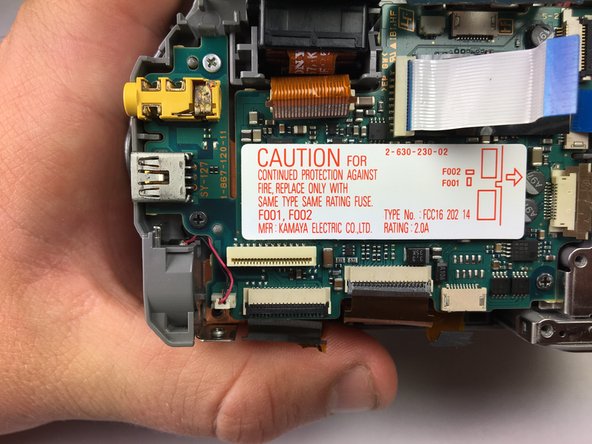
    • Using a Phillips #0 screwdriver, remove all of the screws from the back panel casing.

    • There are six 5.22mm long, 3.00mm head diameter screws total.

    • The left side is not shown but there should be 1 screw on that side.

  3. Sony Cyber-Shot DSC-H1 Lens Replacement: шаг 3, изображение 1 из 2 Sony Cyber-Shot DSC-H1 Lens Replacement: шаг 3, изображение 2 из 2
    • Remove the back casing.

    • The casing itself is sturdy so don't be afraid to remove it forcefully.

  4. Sony Cyber-Shot DSC-H1 Lens Replacement, LCD Screen: шаг 4, изображение 1 из 1
    • Take a hold of the right side of the LCD screen and lift it towards the left.

    • The screen is held firm and will require a bit of force to ease it from its housing.

  5. Sony Cyber-Shot DSC-H1 Lens Replacement: шаг 5, изображение 1 из 1
    • Unplug the large conductive tape attached to the screen.

    • Remove the LCD from the device.

  6. Sony Cyber-Shot DSC-H1 Lens Replacement, Lens: шаг 6, изображение 1 из 2 Sony Cyber-Shot DSC-H1 Lens Replacement, Lens: шаг 6, изображение 2 из 2
    • Unscrew and remove the gray backing behind the LCD screen.

  7. Sony Cyber-Shot DSC-H1 Lens Replacement: шаг 7, изображение 1 из 3 Sony Cyber-Shot DSC-H1 Lens Replacement: шаг 7, изображение 2 из 3 Sony Cyber-Shot DSC-H1 Lens Replacement: шаг 7, изображение 3 из 3
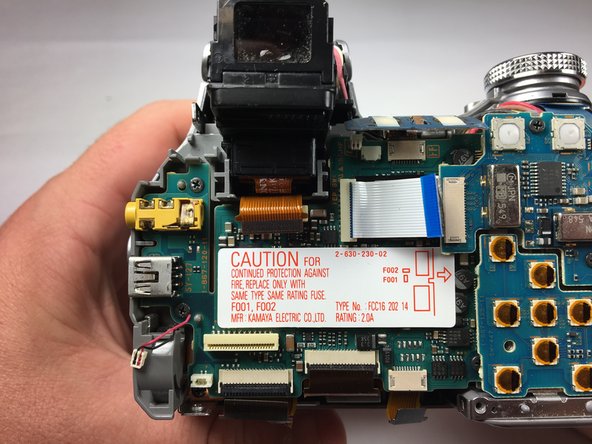
    • Using a Phillips #0 screwdriver, unscrew the four 4.24 mm black screws off the blue panel on the right side.

    • Disconnect the white conductive tape.

    • Remove the blue panel.

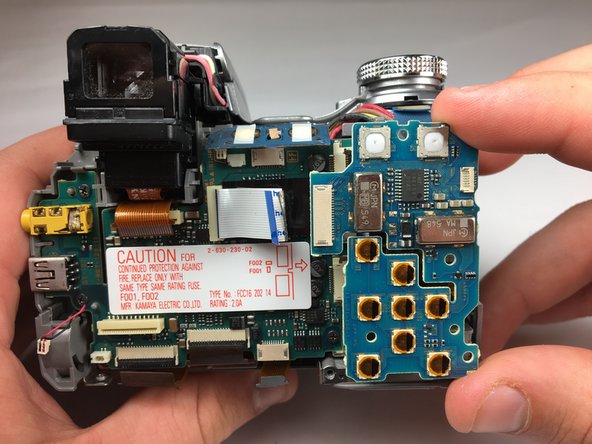
    • Use tweezers to remove the three conductive tape strips on the right side.

  8. Sony Cyber-Shot DSC-H1 Lens Replacement: шаг 8, изображение 1 из 2 Sony Cyber-Shot DSC-H1 Lens Replacement: шаг 8, изображение 2 из 2
    • Use tweezers to remove the orange conductive tape located below the shutter.

    • Unplug the three ZIF connectors from the motherboard.

  9. Sony Cyber-Shot DSC-H1 Lens Replacement: шаг 9, изображение 1 из 1
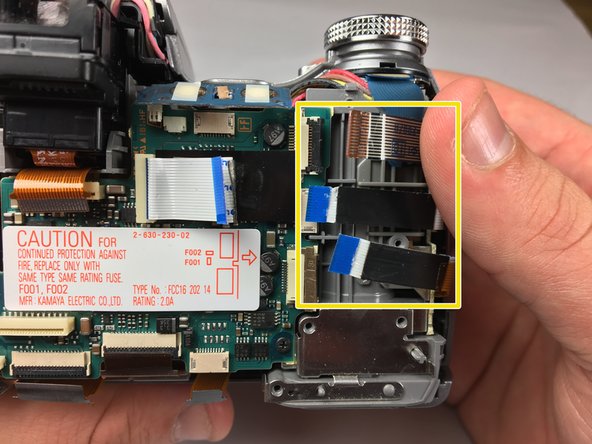
    • Flip up the blue overlapping board at the top.

    • Use tweezers to disconnect the remaining connectors.

  10. Sony Cyber-Shot DSC-H1 Lens Replacement: шаг 10, изображение 1 из 1
    • Remove the motherboard and battery pack unit.

  11. Sony Cyber-Shot DSC-H1 Lens Replacement: шаг 11, изображение 1 из 3 Sony Cyber-Shot DSC-H1 Lens Replacement: шаг 11, изображение 2 из 3 Sony Cyber-Shot DSC-H1 Lens Replacement: шаг 11, изображение 3 из 3
    • Use a screwdriver to remove 5 screws on plastic panel.

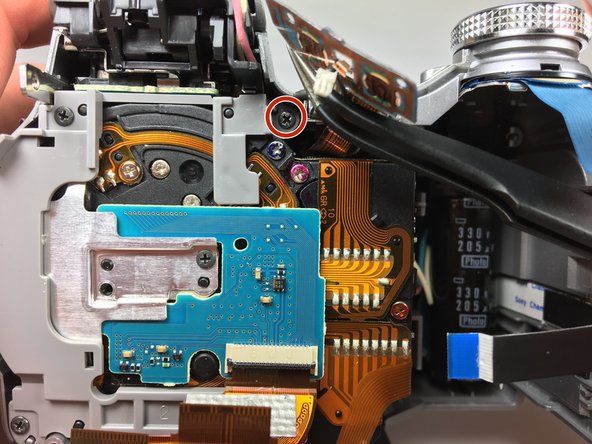
    • Remove the single screw on the silver panel in the center.

  12. Sony Cyber-Shot DSC-H1 Lens Replacement: шаг 12, изображение 1 из 3 Sony Cyber-Shot DSC-H1 Lens Replacement: шаг 12, изображение 2 из 3 Sony Cyber-Shot DSC-H1 Lens Replacement: шаг 12, изображение 3 из 3
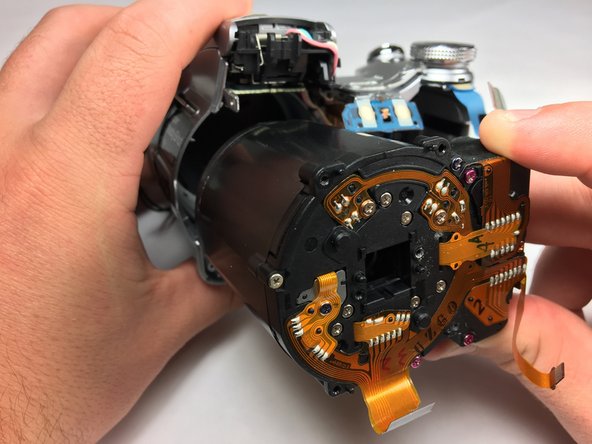
    • Use tweezers to remove the blue control panel.

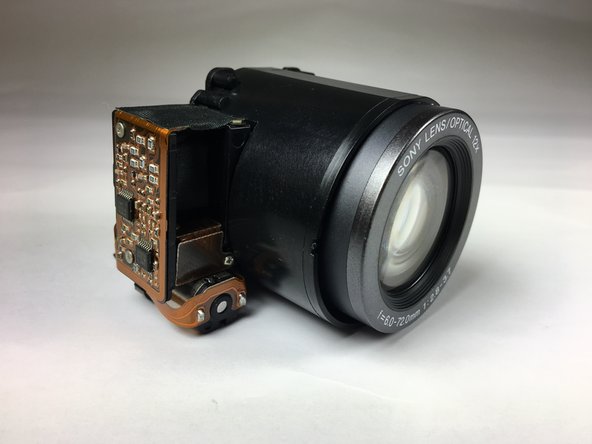
    • Remove the lens from the camera.

Заключение

To reassemble your device, follow these instructions in reverse order.

3 участников успешно повторили данное руководство.

Charlie Pugeda

Участник с: 03/19/18

505 Репутация

Автор 3 руководств

Команда

Baylor, Team S5-G4, Williams Spring 2018 Участник Baylor, Team S5-G4, Williams Spring 2018

BU-WILLIAMS-S18S5G4

3 членов

Автор 10 руководств

0 Комментариев

Добавить комментарий

Просмотр статистики:

За последние 24часов: 2

За последние 7 дней: 10

За последние 30 дней: 36

За всё время: 1,598